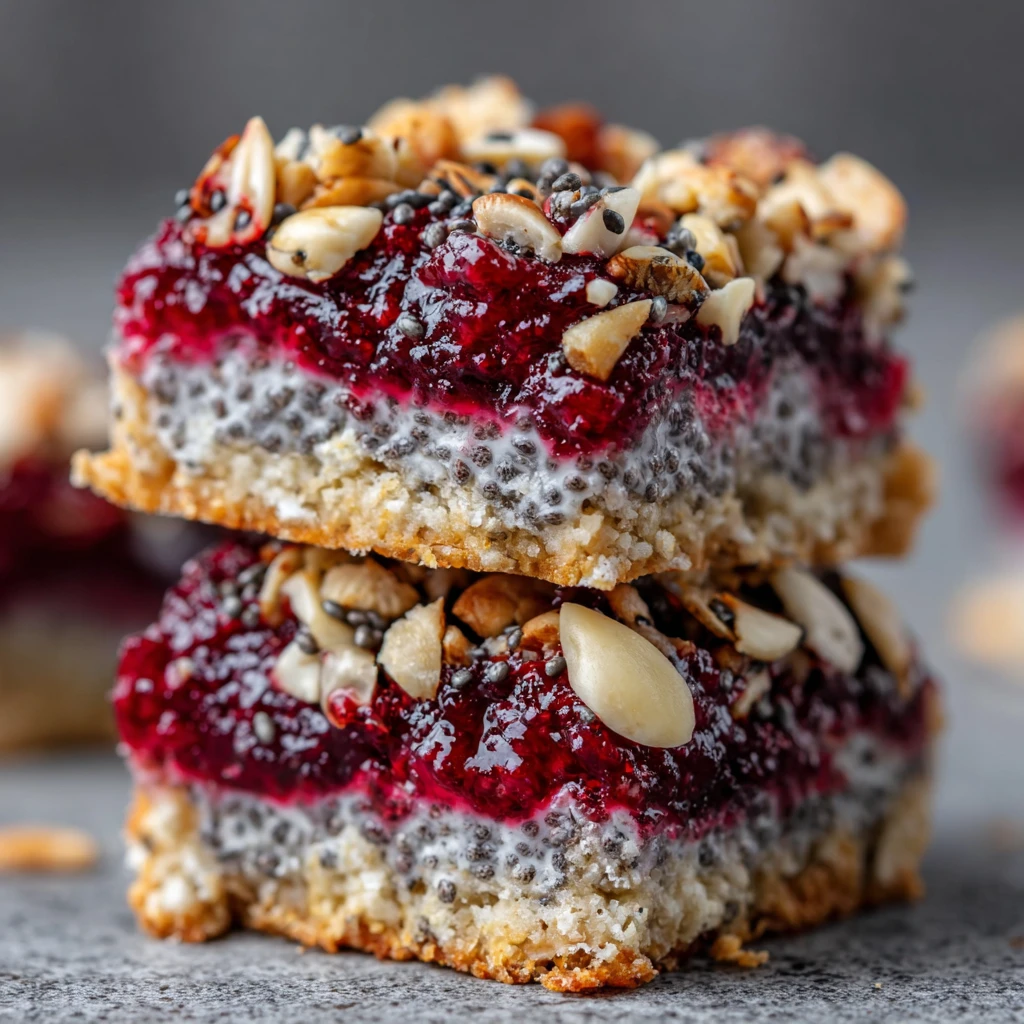
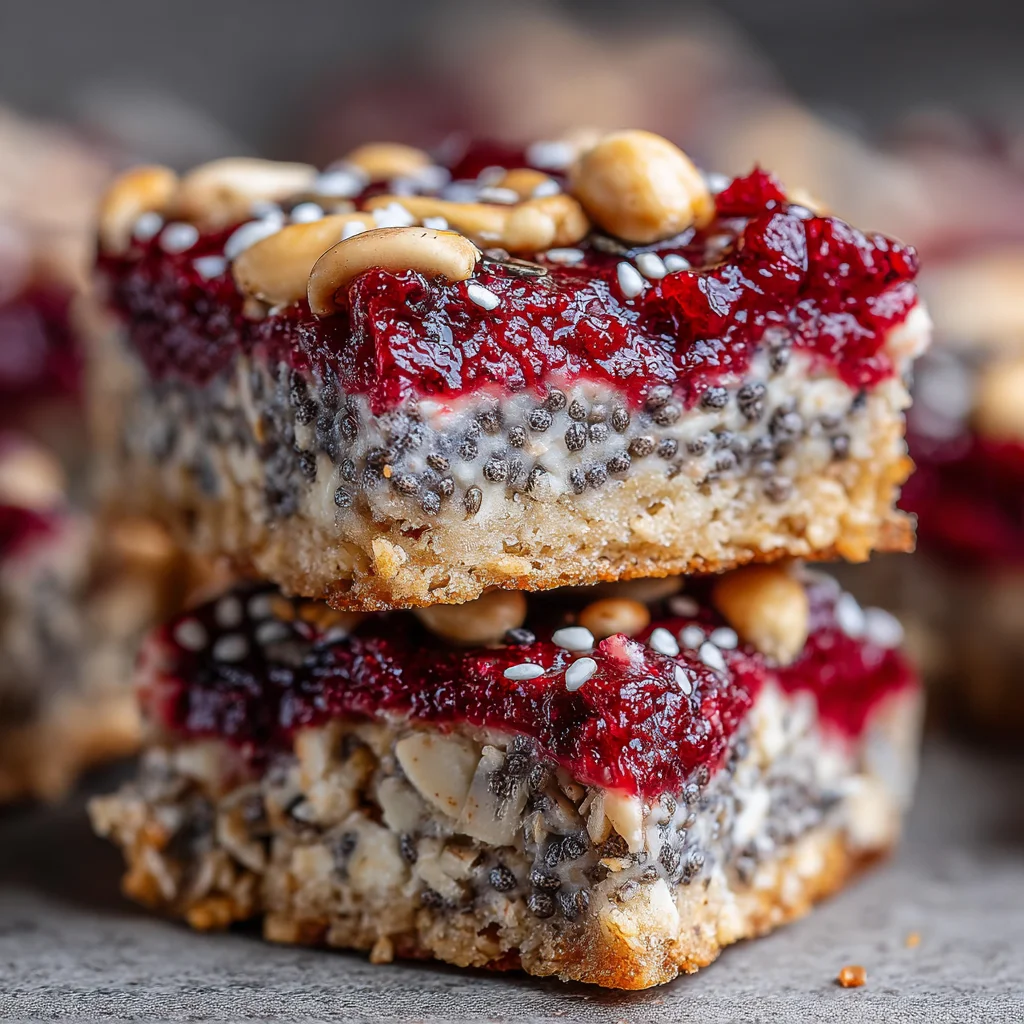
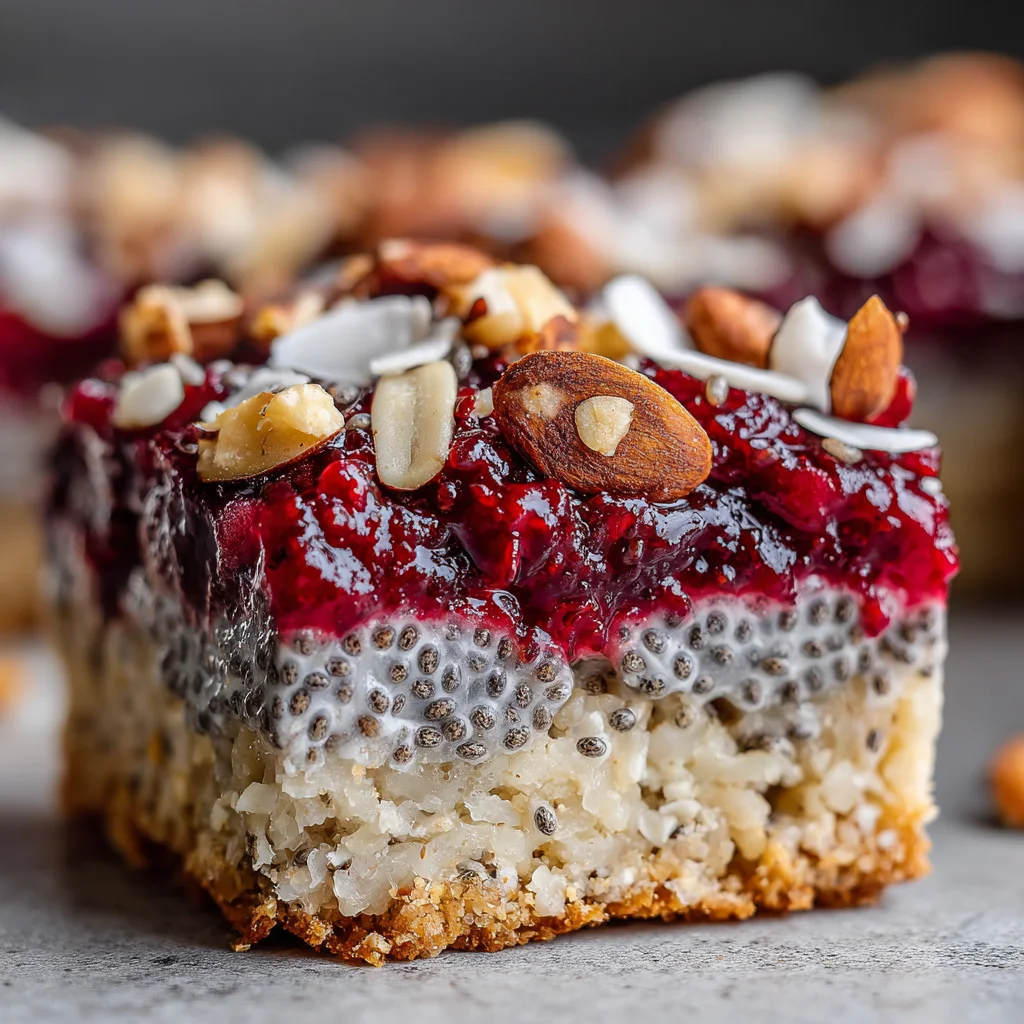
Healthy Breakfast Bars
These wholesome Healthy Breakfast Bars are the perfect way to start your day with a burst of energy and flavor. Packed with nutritious oats, crunchy nuts, and a vibrant berry topping, they offer a delightful balance of textures and natural sweetness. Ideal for busy mornings or as a nourishing snack, these bars are incredibly satisfying and easy to prepare, bringing a homemade touch to your daily routine.
Prep Time
20 minutes
Cook Time
25-30 minutes
Total Time
1 hour 30 minutes (including cooling time)
Servings
Makes 9-12 bars
Keywords

Why This Recipe Delivers
- A wholesome, satisfying start to your day, packed with fiber, healthy fats, and natural energy.
- Customizable with your favorite nuts, seeds, and seasonal berries for endless variations.
- Perfect for meal prep, providing convenient grab-and-go breakfasts or snacks throughout the week.
- Naturally sweetened with honey and maple syrup, avoiding refined sugars while delivering delicious flavor.
- Simple to make with minimal baking, ideal for all skill levels and busy schedules.
Ingredients
- 360 mL (1 1/2 cups) rolled oats
- 60 g (1/2 cup) chopped almonds
- 35 g (1/4 cup) sunflower seeds
- 60 mL (1/4 cup) honey
- 60 mL (1/4 cup) coconut oil, melted
- 5 mL (1 teaspoon) vanilla extract
- 1.25 mL (1/4 teaspoon) salt
- 150 g (1 cup) mixed berries (fresh or frozen)
- 30 mL (2 tablespoons) chia seeds
- 15 mL (1 tablespoon) maple syrup
Instructions
- Preheat your oven to 175°C (350°F). Prepare a 20×20 cm (8×8 inch) baking pan by lining it completely with parchment paper, ensuring an overhang on the sides to easily lift the bars later. This prevents sticking and makes removal simple.
- In a large mixing bowl, combine the rolled oats, chopped almonds, sunflower seeds, honey, melted coconut oil, vanilla extract, and salt. Use a spatula or your hands to mix thoroughly until all the dry ingredients are evenly coated and moistened. This ensures a cohesive base that holds together.
- Transfer the oat mixture into the prepared baking pan. Press it down very firmly and evenly across the bottom of the pan to create a compact base. The tighter you pack it, the less likely the bars are to crumble after baking, ensuring a sturdy foundation for your breakfast bars.
- Bake the base in the preheated oven for 15-20 minutes, or until the edges are lightly golden brown and the center is set. Baking stabilizes the base and gives it a slight crispness. Once done, remove it from the oven and allow it to cool slightly in the pan while you prepare the topping.
- While the base is baking and cooling, prepare the vibrant berry topping. In a small saucepan, combine the mixed berries (no need to thaw if frozen), chia seeds, and maple syrup. The chia seeds will begin to absorb moisture as they cook.
- Cook the berry mixture over medium heat, stirring occasionally to prevent burning. Continue to cook for approximately 5-7 minutes, or until the berries have softened considerably, burst, and the mixture has thickened into a glossy, jam-like consistency. The chia seeds will help create that ideal texture and bind the fruit.
- Once the baked base has cooled for about 10-15 minutes, spread the warm, thickened berry topping evenly over the entire surface of the base using the back of a spoon or an offset spatula. Ensure it reaches all the edges for full coverage.
- Allow the bars to cool completely in the pan at room temperature. This is a crucial step for clean cuts; rushing it will result in messy, crumbly bars. For faster cooling and a firmer set, you can place the pan in the refrigerator for about 30-60 minutes once it's no longer hot.
- Once thoroughly cooled and firm, use the parchment paper overhangs to carefully lift the entire slab of bars out of the pan. Place it on a cutting board and use a sharp knife to cut into your desired number of squares or rectangles, typically 9 to 12 bars.
- Store the finished breakfast bars in an airtight container. They will remain fresh at room temperature for up to 3 days, or you can refrigerate them for up to a week for extended freshness. Enjoy them as a quick breakfast or a wholesome snack.
Tools You’ll Need
- 20×20 cm (8×8 inch) baking pan
- Parchment paper
- Large mixing bowl
- Spatula or sturdy spoon
- Small saucepan
- Sharp knife
- Cutting board
- Airtight container for storage
Essential Success Tips
- Press the base mixture down very firmly into the pan. This is absolutely critical to preventing crumbly bars. Use the bottom of a glass or a flat measuring cup to really compact it.
- Do not rush the cooling process. Letting the bars cool completely and set, especially with the berry topping, ensures clean, stable cuts. Refrigeration can significantly speed this up.
- Adjust sweetness to your preference. If your mixed berries are particularly tart, you might add a touch more maple syrup to the topping or honey to the base.
- For extra flavor and binding, lightly toast the rolled oats and nuts in a dry pan for a few minutes before mixing them into the base. This brings out their nutty aroma and deepens their flavor.
- If using frozen berries, there's no need to thaw them before cooking for the topping; they will release their juices naturally during the cooking process and create a wonderful jam-like consistency.
Professional Cooking Secrets
- To achieve a truly professional, perfectly smooth top on your bars, gently press a second sheet of parchment paper over the berry topping immediately after spreading it, then remove it. This helps to level it out and create an even finish.
- For an enhanced textural contrast and flavor complexity, consider sprinkling a pinch of flaky sea salt over the berry topping just after spreading it. The subtle saltiness beautifully complements the sweet and tart berries, elevating the overall taste.
- Experiment with adding a tablespoon of your favorite nut butter, such as almond or cashew butter, to the base mixture. This can provide an extra layer of richness, contribute to the binding, and add another dimension of flavor to the bars.
Notes
- Storage: These bars keep well in an airtight container at room temperature for up to 3 days. For longer storage, refrigerate for up to a week. They can also be frozen individually wrapped for up to 1 month; thaw at room temperature or in the refrigerator before enjoying.
- Variations: Feel free to swap out almonds and sunflower seeds for other nuts like walnuts, pecans, or other seeds like pumpkin seeds. Dried fruits such as chopped apricots, cranberries, or raisins can be mixed into the base for added chewiness. For the topping, experiment with other fruit purees or homemade fruit jams.
- Gluten-Free Option: To ensure these bars are truly gluten-free, make sure to use certified gluten-free rolled oats, as regular oats can sometimes be cross-contaminated with wheat during processing.
Frequently Asked Questions
Can I substitute the honey and maple syrup?
Yes, you can use other liquid sweeteners like agave nectar or brown rice syrup as alternatives to honey and maple syrup. The consistency might vary slightly, but the bars should still hold together effectively.
How do I prevent the bars from crumbling after cutting?
The most critical steps to prevent crumbling are pressing the base mixture very firmly into the pan before baking and allowing the bars to cool completely and set before cutting. Refrigerating them until thoroughly firm can also significantly help achieve cleaner, less crumbly cuts.
Can I add protein powder to these breakfast bars?
While you could, adding protein powder to the base might alter the texture, potentially making the bars drier or more crumbly. If you wish to incorporate it, start with a small amount (1-2 tablespoons) and be prepared to adjust the liquid ingredients (honey or coconut oil) slightly to maintain the desired consistency.
Nutrition Facts (Per Serving)
Approximately 220 Calories, 6g Protein, 12g Fat, 25g Carbohydrates, 4g Fiber per bar (assuming 9 bars per pan). These values are estimates and can vary based on specific ingredients and portion sizes.
Allergy Information
Contains tree nuts (almonds) and may contain other allergens depending on the specific nuts and seeds chosen. These bars are naturally dairy-free. They can be made gluten-free by ensuring the use of certified gluten-free rolled oats. Always check ingredient labels for potential cross-contamination if managing severe allergies.


No comment