
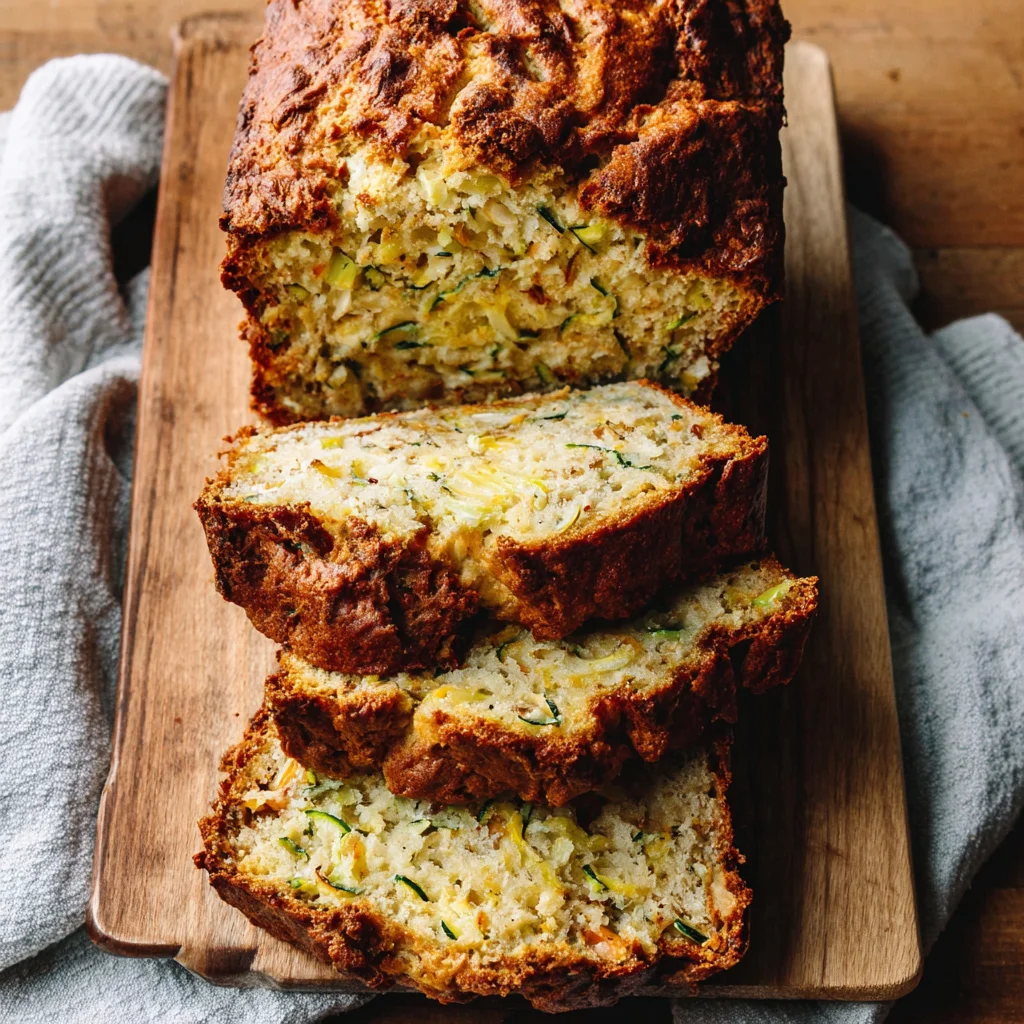
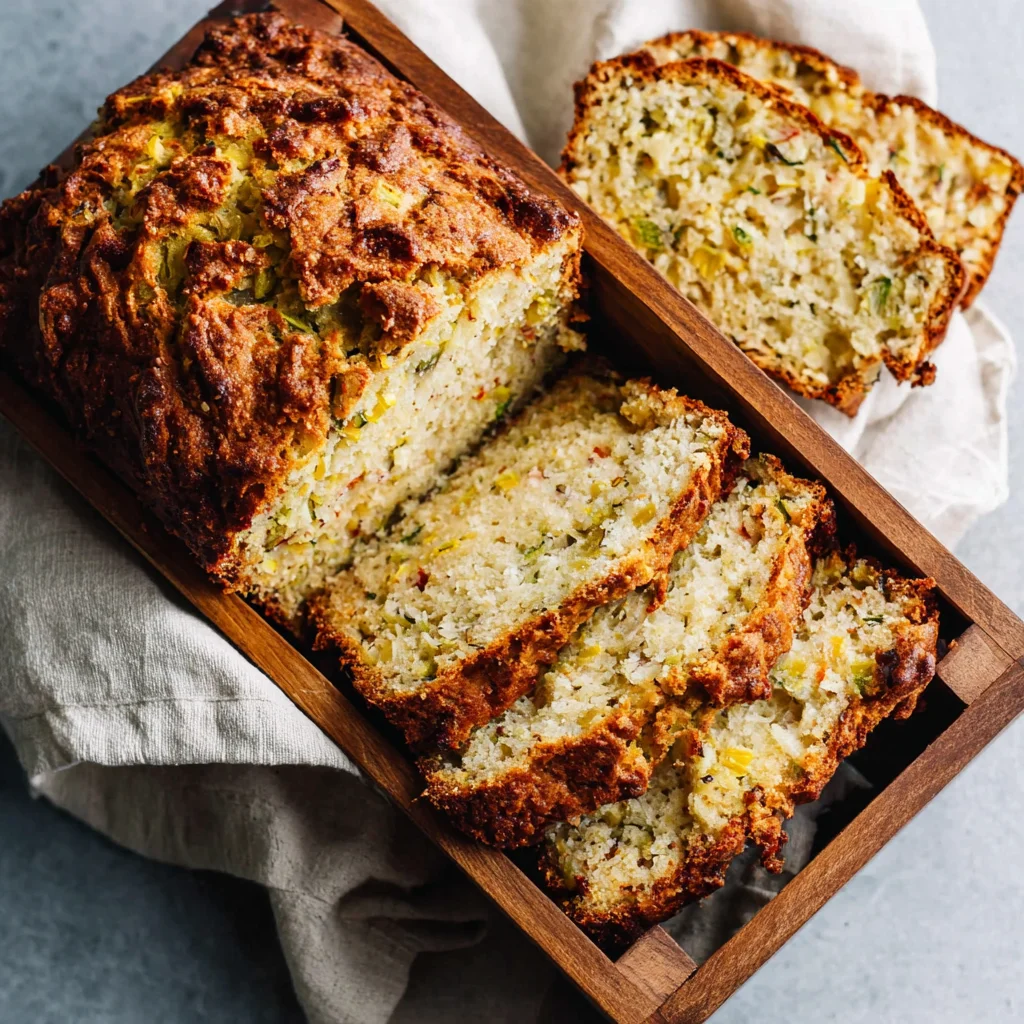
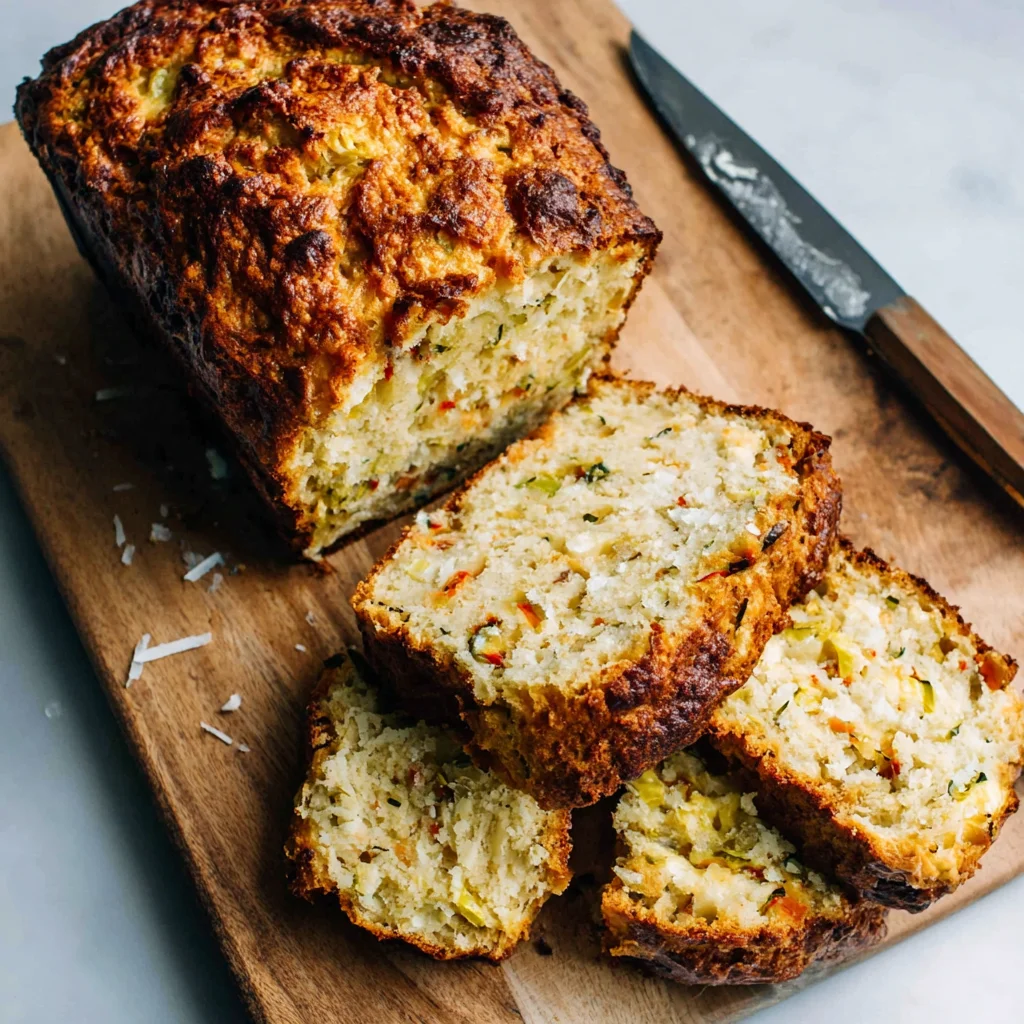
Farmers Market Breakfast Bread
This Farmers Market Breakfast Bread is a delightful ode to seasonal produce, transforming fresh, vibrant vegetables into a surprisingly tender and subtly sweet loaf. It's an inviting way to enjoy the bounty of the garden, perfect for a leisurely breakfast, a satisfying snack, or a wholesome dessert any time of day. Each slice promises a moist crumb and a gentle hint of your favorite seasonal flavors.
Prep Time
25 minutes
Cook Time
60 to 70 minutes
Total Time
Approximately 2 hours 30 minutes (including cooling time)
Servings
One 9×5-inch (23×13 cm) loaf, yielding 10-12 slices
Keywords
Why This Recipe Delivers
- A fantastic way to subtly incorporate more vegetables into your family's diet, even at breakfast.
- Offers a wonderfully moist and flavorful crumb, with a balanced sweetness that's not overwhelming.
- Highly versatile, allowing you to use whatever seasonal vegetables you have on hand from your local market or garden.
- Fills your home with an incredibly inviting aroma while baking, promising a comforting treat.
- Perfect for meal prep, as it stays delightfully fresh for several days and freezes exceptionally well.
Ingredients
- 180 grams (1 1/2 cups) all-purpose flour
- 60 grams (1/2 cup) whole-wheat or whole-wheat pastry flour (or additional all-purpose flour)
- 5 grams (1 teaspoon) baking powder
- 2.5 grams (1/2 teaspoon) baking soda
- 2.5 grams (1/2 teaspoon) sea salt
- 100 grams (1/2 cup) granulated sugar
- 2 large eggs, at room temperature
- 90 milliliters (1/4 cup plus 2 tablespoons) neutral vegetable oil, such as canola, sunflower, or grapeseed, plus extra for the pan
- 120 milliliters (1/2 cup) whole-milk plain yogurt, at room temperature
- Approximately 250-300 grams (2 cups) shredded vegetables (choose one or a combination of finely shredded beets, carrots, summer squash, or zucchini)
Instructions
- Prepare your oven and loaf pan by arranging a rack in the middle of the oven and preheating it to 175°C (350°F). Generously coat a 9×5-inch (23×13 cm) loaf pan with vegetable oil, ensuring all interior surfaces are well-greased to prevent sticking; set the prepared pan aside.
- In a medium-sized bowl, whisk together the dry ingredients: the all-purpose flour, whole-wheat flour, baking powder, baking soda, and sea salt. Whisking thoroughly ensures these leavening agents and seasoning are evenly distributed throughout the dry mixture, which is crucial for uniform rise and flavor.
- In a large mixing bowl, combine the wet ingredients. Whisk the granulated sugar and eggs together vigorously for about 2 minutes, until the mixture becomes pale in color and appears thick and shiny. This aeration step adds lightness to the bread. Then, whisk in the neutral vegetable oil and whole-milk plain yogurt until well combined, creating a smooth, emulsified base.
- Gently incorporate the dry ingredients into the wet mixture. Pour the whisked flour mixture into the large bowl with the wet ingredients. Using a rubber spatula, fold the ingredients together until they are just combined. It is vital not to overmix, as this can develop the gluten too much, resulting in a tough bread. A few streaks of flour are acceptable.
- Fold in the shredded vegetables. Add the shredded beets, carrots, summer squash, or zucchini to the batter. Continue to fold with the rubber spatula just enough to evenly distribute the vegetables throughout the mixture. Avoid excessive stirring to maintain the tender texture of the batter.
- Transfer the batter to the prepared loaf pan. Scrape all the batter into the generously oiled loaf pan. To eliminate any large air bubbles that could create cavities in the finished bread, pick up the pan and gently tap it on your counter three times.
- Bake the bread. Place the loaf pan in the preheated oven and bake for 60 to 70 minutes. The bread is fully baked when the top is beautifully golden-brown, the edges have pulled slightly away from the sides of the pan, and a wooden skewer or cake tester inserted into the center of the loaf comes out with only a few moist crumbs attached, not wet batter.
- Cool the bread. Once baked, remove the loaf pan from the oven and let the bread cool in the pan on a wire rack for 20 minutes. This crucial resting period allows the bread to set and firm up, making it easier to remove without breaking. After 20 minutes, carefully flip the bread out onto the wire rack to cool completely before attempting to slice. Slicing warm quick bread can lead to a gummy texture.
Tools You’ll Need
- 9×5-inch (23×13 cm) loaf pan
- Large mixing bowl
- Medium mixing bowl
- Whisk
- Rubber spatula
- Box grater or food processor with shredding disc
- Wire cooling rack
- Measuring cups and spoons (or a kitchen scale for precision)
Essential Success Tips
- Avoid overmixing the batter: Stir just until the ingredients are combined. Overmixing develops gluten, which can lead to a dense, tough bread.
- Manage vegetable moisture: If using very watery vegetables like zucchini, gently pat them dry with a paper towel after shredding to prevent a soggy loaf.
- Room temperature ingredients are key: Ensure your eggs and yogurt are at room temperature. This helps them emulsify better with the oil, resulting in a smoother, more uniform batter.
- Trust the tester: The most reliable way to check for doneness is to insert a wooden skewer or cake tester into the center of the loaf. It should come out with only a few moist crumbs attached, not wet batter.
- Cool completely before slicing: Allow the bread to cool entirely on a wire rack. Slicing it while still warm can compromise its texture, leading to a gummy interior and making it prone to crumbling.
Professional Cooking Secrets
- For an extra layer of nutty depth, consider browning the butter before incorporating the oil and yogurt. Gently melt the butter in a small saucepan over medium heat until it turns amber and smells nutty, then cool it slightly before adding to the wet ingredients.
- Infuse your oil with aromatics: Gently warm the neutral vegetable oil with a cinnamon stick, a few cardamom pods, or a strip of orange zest for about 10-15 minutes over low heat. Let it cool completely, then strain out the solids before using the infused oil in the recipe.
- Enhance with spices: A touch of freshly grated nutmeg, a pinch of ground ginger, or an additional 1/2 teaspoon of cinnamon added to the dry ingredients can elevate the vegetable flavors and add a subtle warmth to the bread.
Notes
- Storage: Store the cooled loaf wrapped tightly in plastic wrap or in an airtight container at room temperature for up to 3 days, or in the refrigerator for up to 5 days. For longer storage, this bread freezes beautifully for up to 3 months; wrap individual slices or the whole loaf in plastic wrap, then foil, before freezing.
- Variations: Feel free to customize your bread by adding 50 grams (1/2 cup) of chopped nuts (such as walnuts or pecans), 30 grams (1/4 cup) of dried cranberries or raisins, or a teaspoon of lemon zest to the batter along with the vegetables for an extra burst of flavor and texture.
Frequently Asked Questions
Can I use frozen shredded vegetables for this recipe?
While fresh vegetables generally yield the best texture, you can use frozen shredded vegetables. It's crucial to thaw them completely and then squeeze out as much excess moisture as possible using a clean kitchen towel or paper towels. This step prevents the loaf from becoming watery and dense.
How can I tell if my breakfast bread is perfectly baked without a tester?
Beyond the visual cues of a golden-brown top and edges pulling away from the pan, you can gently press the center of the bread. If it springs back, it's likely done. However, for complete certainty and the best results, using a wooden skewer or cake tester is always the most reliable method.
Is it possible to make this recipe gluten-free or dairy-free?
Yes, you can adapt the recipe. For a gluten-free version, substitute the all-purpose and whole-wheat flours with a 1:1 gluten-free all-purpose flour blend that contains xanthan gum. If your blend doesn't include it, add 1/2 teaspoon per cup of flour. For a dairy-free option, simply replace the whole-milk plain yogurt with an unsweetened, plain plant-based yogurt (such as almond or soy), ensuring your vegetable oil is dairy-free.
Nutrition Facts (Per Serving)
Calories: 280, Protein: 6g, Fat: 12g, Carbs: 38g, Fiber: 3g (per slice, estimated based on common ingredients and serving size)
Allergy Information
Contains wheat (gluten), dairy, and eggs. For a gluten-free alternative, use a certified gluten-free all-purpose flour blend. For a dairy-free version, substitute whole-milk plain yogurt with a plant-based plain yogurt.


No comment