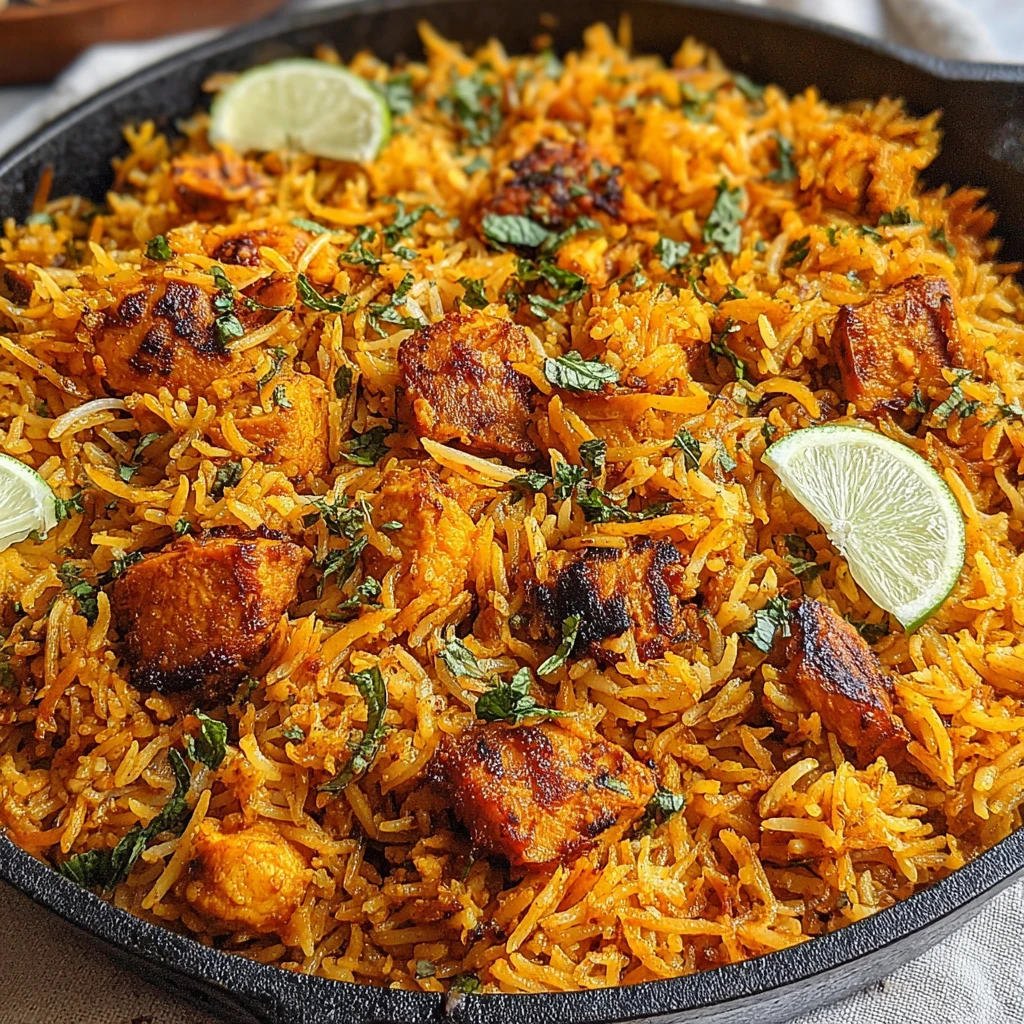
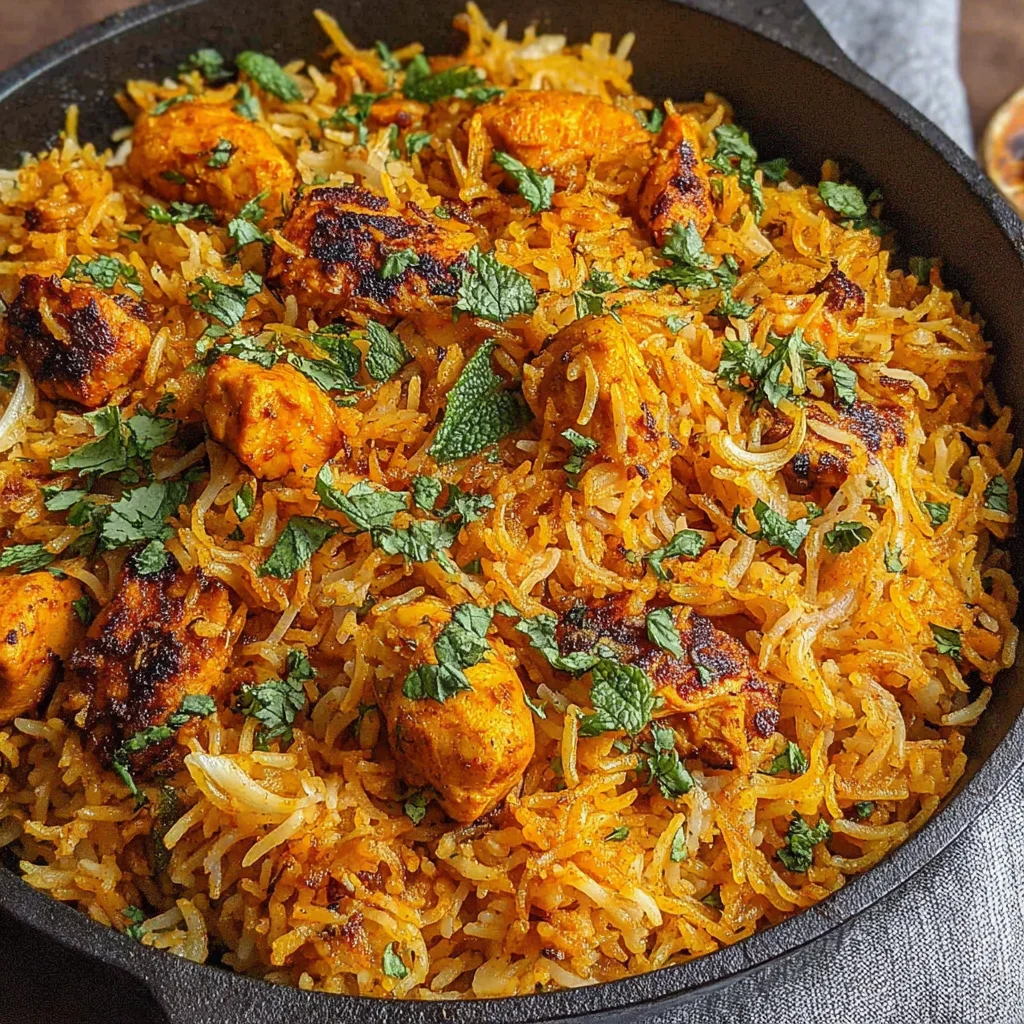
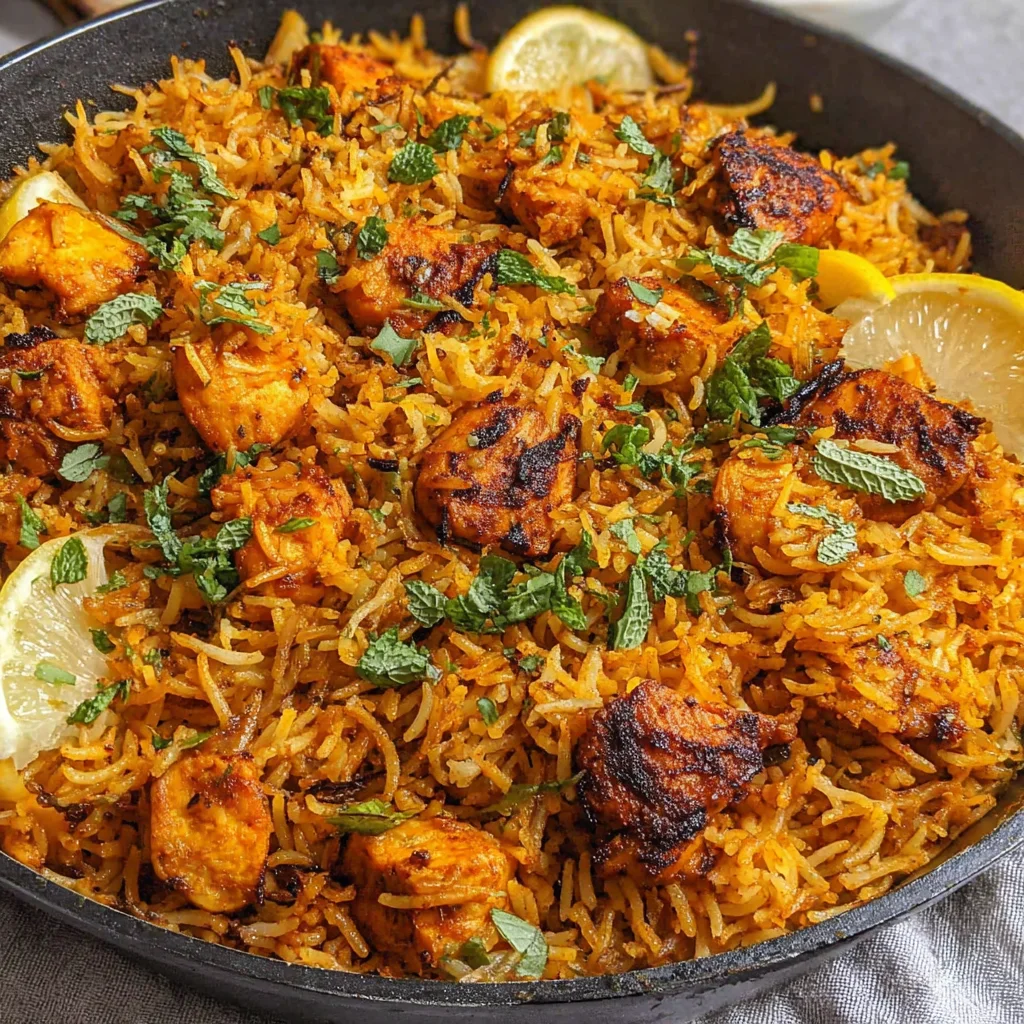
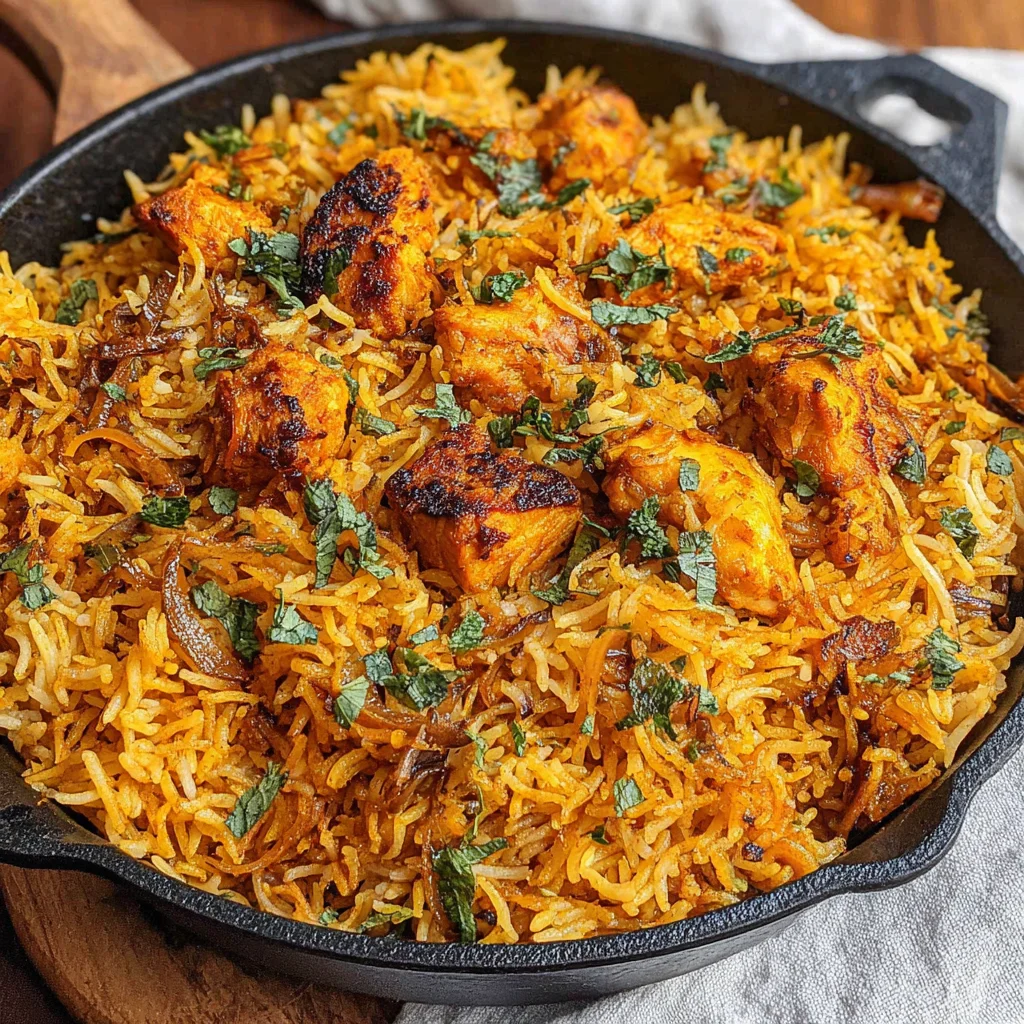
Fragrant Butter Chicken Biryani
Indulge in the rich, aromatic layers of this exquisite Butter Chicken Biryani, a culinary masterpiece that marries the creamy, savory notes of classic butter chicken with the fragrant, perfectly cooked basmati rice of a traditional biryani. Each spoonful delivers a symphony of tender chicken, deeply spiced masala, and aromatic herbs, all brought together through the cherished dum cooking method. This dish is designed to impress and satisfy, offering a luxurious experience in every bite.
Prep Time
45 minutes
Cook Time
50 minutes
Total Time
1 hour 35 minutes
Servings
3-4 servings
Keywords
Why This Recipe Delivers
- A harmonious blend of rich butter chicken flavors with fragrant biryani rice, creating an irresistible fusion.
- Utilizes an air fryer for pre-cooking the chicken, ensuring tender results with less oil and preventing dryness during dum cooking.
- Employs the traditional 'dum style' layered cooking technique, which locks in moisture and maximizes the infusion of aromas and flavors.
- Combines the creamy indulgence of butter chicken with the complex, aromatic spice profile of authentic biryani.
- Perfect for a special occasion, family gathering, or when you simply desire a deeply satisfying and impressive meal.
Ingredients
- 200 g (approx. 7 oz) chicken breast, cut into 2.5 cm (1-inch) pieces
- 2.5 mL (1/2 tsp) ginger garlic paste (for marination)
- 1.25 mL (1/4 tsp) turmeric powder
- 2.5 mL (1/2 tsp) coriander powder
- 5 mL (1 tsp) red chili powder
- Salt, to taste
- 400 g (2 cups) basmati rice
- 2 L (8 cups) water (for cooking rice)
- 15 mL (1 tbsp) oil (for cooking rice)
- 30 g (2 tbsp) salt (for cooking rice)
- 30 mL (2 tbsp) fresh mint leaves (for cooking rice)
- 2 cloves (for cooking rice)
- 0.5 cm (1/4 cinnamon stick) cinnamon stick (for cooking rice)
- 2 cardamom pods (for cooking rice)
- 1/2 bay leaf (for cooking rice)
- 1 medium onion (approx. 150g), roughly chopped
- 2 large tomatoes (approx. 300g), roughly chopped
- 15 mL (1 tbsp) ginger garlic paste (for masala base)
- 6 cashews
- 30 g (2 tbsp) unsalted butter
- 2.5 mL (1/2 tsp) cumin seeds
- 2 cloves (for masala base)
- 0.5 cm (1/4 cinnamon stick) cinnamon stick (for masala base)
- 1 cardamom pod (for masala base)
- 1/2 bay leaf (for masala base)
- 15 mL (1 tbsp) kasuri methi (dried fenugreek leaves)
- 30 g (2 tbsp) plain yogurt
- 60 mL (1/4 cup) water (if needed)
- 5 mL (1 tsp) garam masala powder (optional, for garnish)
- 60 mL (1/4 cup) fresh mint leaves and/or cilantro, chopped (for garnish)
- 80 g (1/3 cup) crispy fried onions (for garnish)
Instructions
- Cut the chicken breast into 2.5 cm (1-inch) pieces and wash thoroughly under cold water. In a mixing bowl, combine the chicken pieces with 2.5 mL (1/2 teaspoon) ginger garlic paste, 1.25 mL (1/4 teaspoon) turmeric powder, 2.5 mL (1/2 teaspoon) coriander powder, 5 mL (1 teaspoon) red chili powder, and salt to taste. Mix everything well to ensure each piece is coated, then cover the bowl and allow the chicken to marinate for at least 30 minutes, or up to 1 hour, in the refrigerator. This crucial step tenderizes the chicken and infuses it with deep, aromatic flavors.
- Wash 400 g (2 cups) of basmati rice thoroughly under running water until the water runs clear. Soak the rice in ample water for approximately 30 minutes to ensure even cooking. In a large, heavy-bottomed pot, bring 2 liters (8 cups) of water to a rolling boil. Add the drained, soaked rice to the boiling water, along with 30 g (2 tablespoons) salt, 30 mL (2 tablespoons) fresh mint leaves, half of the whole spices (2 cloves, 0.5 cm (1/4 cinnamon stick) cinnamon stick, 2 cardamom pods, and 1/2 bay leaf), and 15 mL (1 tablespoon) oil. Cook the rice until it is 80% done, which typically takes about 8-10 minutes. The grains should be cooked on the outside but still have a slight bite or graininess in the center when pressed. Drain the water immediately and set the par-cooked rice aside to prevent further cooking.
- Preheat your air fryer to 200°C (400°F) for 5 minutes. Lightly brush 15 mL (1 tablespoon) of oil onto the air fryer rack or line it with parchment paper to prevent the chicken from sticking. Arrange the marinated chicken pieces from the First Step evenly on the rack, ensuring not to overcrowd it. For extra succulence, you may optionally brush an additional 5 mL (1 teaspoon) of oil over the chicken. Cook in the preheated air fryer for 9 minutes. The chicken should be about halfway cooked, which helps it remain tender and prevents it from becoming rubbery when it's slow-cooked later. Remove the chicken and set it aside.
- Prepare the masala base. Roughly chop the medium onion and two large tomatoes. In a blender, combine the chopped onion, tomatoes, 15 mL (1 tablespoon) ginger garlic paste, and 6 cashews. Blend until you achieve a perfectly smooth, fine paste. Next, grease your claypot (or a heavy-bottomed pot) with 30 g (2 tablespoons) of unsalted butter. Heat the pot over medium flame, then add the remaining whole spices: 2.5 mL (1/2 teaspoon) cumin seeds, 2 cloves, 0.5 cm (1/4 cinnamon stick) cinnamon stick, 1 cardamom pod, and 1/2 bay leaf. Allow them to sizzle and become aromatic for about 30 seconds. Carefully stir in the blended onion-tomato-cashew paste. Cook this paste, stirring frequently, until the raw smell of the onions and tomatoes disappears and the oil or butter begins to separate from the paste, indicating it is well-cooked. Stir in 15 mL (1 tablespoon) of kasuri methi (dried fenugreek leaves).
- Gently add the half-cooked chicken from the Third Step to the aromatic gravy base in the pot. Stir well to ensure each chicken piece is thoroughly coated with the rich masala. Incorporate 30 g (2 tablespoons) of plain yogurt and mix until fully combined. If the mixture appears too thick for your preference, you may add up to 60 mL (1/4 cup) of water to achieve the desired consistency. Simmer the mixture for 2 minutes, allowing the flavors to meld and the chicken to absorb the spices. This is an opportune moment to taste and adjust the salt level as needed before combining all components.
- Carefully spread the 80% cooked basmati rice from the Second Step evenly over the simmering chicken and gravy mixture in the claypot. If desired, sprinkle 5 mL (1 teaspoon) of garam masala powder over the rice layer for an added layer of aroma. Generously garnish the top with 60 mL (1/4 cup) of fresh mint leaves and/or cilantro, and 80 g (1/3 cup) of crispy fried onions. Cover the pot with a tight-fitting lid to trap the steam. Cook on a high flame for the first 5 minutes to build up steam, then reduce the flame to low and continue cooking for another 10 minutes. This 'dum' cooking method allows the flavors to infuse beautifully.
- After the cooking time, turn off the heat but do not open the lid. Let the biryani rest, covered, for an additional 5 minutes. This crucial resting period allows the steam to finish cooking the rice gently, ensuring fluffy grains and allowing all the intricate flavors to meld perfectly. Once rested, gently fluff the rice with a fork or spatula from the sides to avoid breaking the delicate grains. Serve the fragrant butter chicken biryani hot, accompanied by raita (yogurt dip) or your favorite complementary side dish.
Tools You’ll Need
- Large mixing bowl
- Large pot with lid (for rice)
- Air fryer
- Blender or food processor
- Heavy-bottomed pot or claypot with a tight-fitting lid
- Chopping board and knife
- Measuring cups and spoons
- Spatula or large spoon
- Fork
Essential Success Tips
- Do not overcook the rice in the initial boiling step; it should be 80% cooked to allow it to finish perfectly during the 'dum' cooking without becoming mushy.
- Ensure your pot or claypot has a very tight-fitting lid for the 'dum' cooking. If necessary, you can seal the edges with a simple dough made from flour and water to prevent steam from escaping.
- Marinating the chicken for the full duration is key; it significantly tenderizes the meat and allows the spices to penetrate deeply, enhancing the overall flavor of the dish.
- Never skip the resting period after the 'dum' cooking. This crucial step allows the internal steam to redistribute, finishing the rice perfectly and allowing all the complex flavors to meld and intensify.
- Taste and adjust seasoning, especially salt, at various stages, particularly after adding the yogurt to the masala base, as this ensures a balanced flavor profile in the final biryani.
Professional Cooking Secrets
- For an even deeper, more nuanced flavor profile, lightly toast the whole spices (cloves, cinnamon, cardamom, bay leaf) in a dry pan for about 30 seconds before adding them to the butter for the masala base. This awakens their essential oils.
- To achieve truly restaurant-quality crispy fried onions for garnish, slice them uniformly thin and fry them in oil over medium-low heat until they turn a deep golden brown and are crisp. Drain them thoroughly on paper towels immediately.
- For an extra touch of luxury and authentic aroma, steep a small pinch of saffron strands in about 30 mL (2 tablespoons) of warm milk for 10 minutes. Drizzle this saffron milk over the rice layer just before covering the pot for the final 'dum' cooking.
Notes
- Storage: Leftover biryani can be stored in an airtight container in the refrigerator for up to 3 days. To reheat, gently warm on the stovetop over low heat with a splash of water, or in the microwave until heated through, stirring occasionally to prevent drying.
- Variations: For a vegetarian version, substitute the chicken with paneer (Indian cheese) cubes or a mix of your favorite vegetables (such as potatoes, carrots, peas, and green beans), adjusting cooking times as needed. You can also add a few drops of rose water or kewra water to the rice before the 'dum' cooking for an additional layer of aromatic complexity.
- Heat Level: The amount of red chili powder can be adjusted to your personal preference. For a milder dish, reduce the quantity or use Kashmiri red chili powder, which provides vibrant color with less heat.
Frequently Asked Questions
Can I make this biryani without an air fryer?
Yes, if you do not have an air fryer, you can pan-fry the marinated chicken pieces until they are about halfway cooked and lightly browned on all sides. This will achieve a similar tender texture before adding them to the masala base for simmering.
What is kasuri methi and can I substitute it?
Kasuri methi refers to dried fenugreek leaves, which impart a distinct, slightly bitter yet earthy and aromatic flavor that is quintessential to many Indian dishes, particularly in Butter Chicken. While it's difficult to find a perfect substitute for its unique profile, a tiny pinch of ground fenugreek seeds or a very small amount of finely chopped fresh fenugreek leaves could be used, though the flavor will differ.
How do I know when the rice is 80% cooked?
When the rice is 80% cooked, the grains should appear elongated and mostly tender, but still possess a slight firmness or 'al dente' chew in the very center. If you press a grain between your thumb and forefinger, it should yield but not be completely soft or mushy throughout.
Nutrition Facts (Per Serving)
Calories: 550, Protein: 28g, Fat: 27g, Carbs: 75g (per serving, estimated for 4 servings)
Allergy Information
Contains dairy (yogurt, butter) and tree nuts (cashews). For a nut-free version, the cashews can be omitted from the masala paste. Ensure all individual spices are certified gluten-free if you have sensitivities.


No comment