
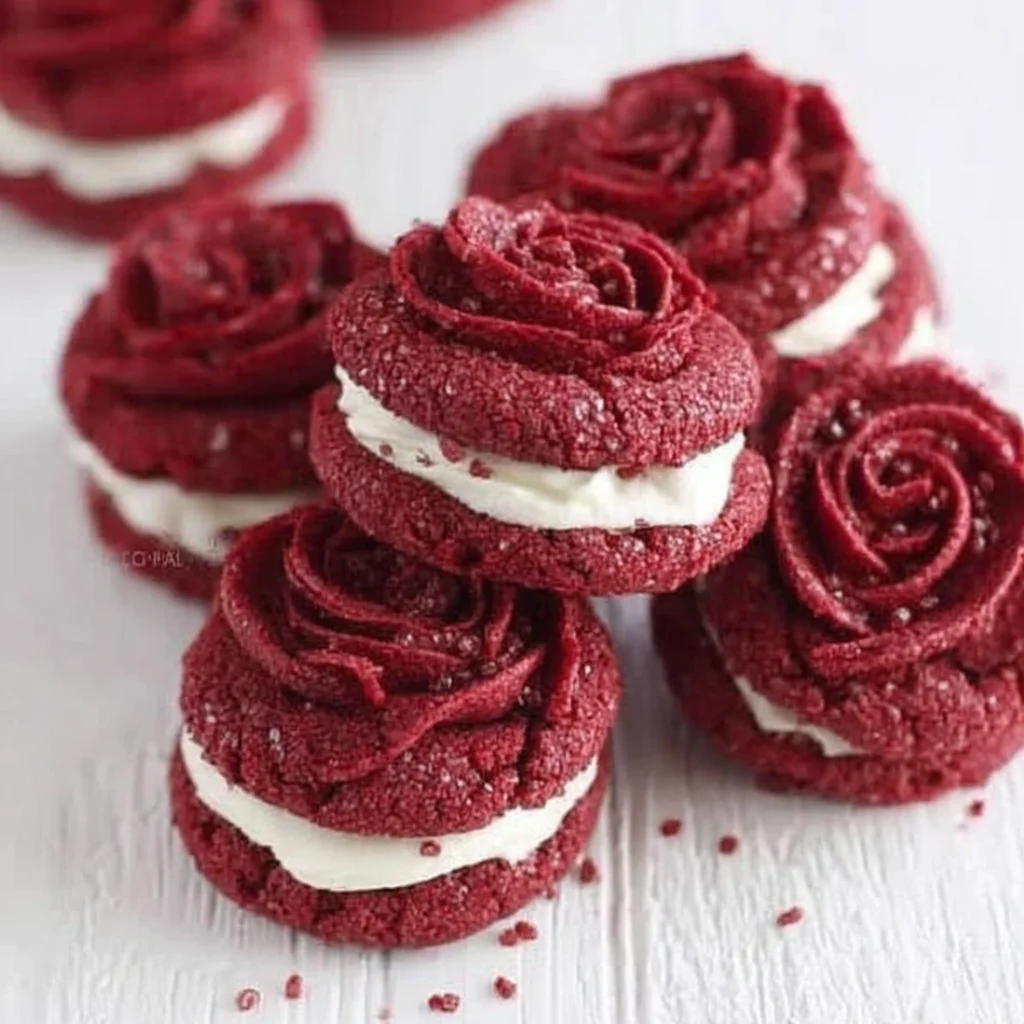
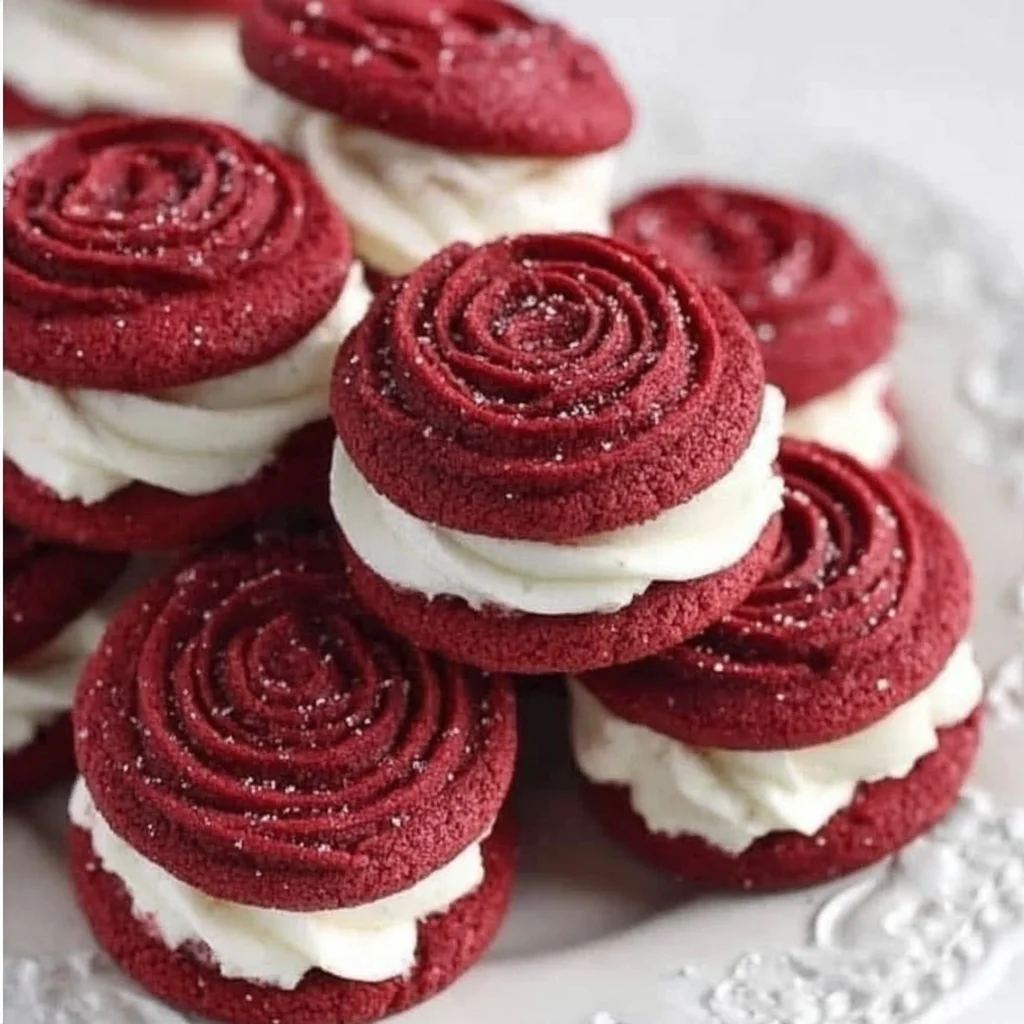
Red Velvet Rose Cookies
These Red Velvet Rose Cookies are a feast for both the eyes and the palate, offering a delightful combination of classic red velvet flavor and an elegant, piped rosette design. Each tender, slightly chewy cookie delivers a hint of cocoa and a vibrant red hue, perfectly complemented by a sweet, creamy filling when made into a sandwich. They're ideal for special occasions, gifting, or simply adding a touch of sophisticated charm to your dessert table.
Prep Time
30 minutes
Cook Time
6-8 minutes
Total Time
Approximately 45 minutes, plus cooling time
Servings
Makes approximately 24-30 individual cookies, or 12-15 cookie sandwiches.
Keywords
Why This Recipe Delivers
- Visually stunning, making them perfect for any celebration.
- Delivers the classic, subtly cocoa-infused flavor of red velvet.
- The piped rosette design adds a sophisticated, professional touch.
- A delightful texture that is tender and slightly chewy.
- Can be served individually or as decadent cookie sandwiches.
Ingredients
- 150 grams (2/3 cup) shortening
- 350 grams (1 3/4 cups) granulated white sugar
- 2 large eggs, at room temperature
- 5 milliliters (1 teaspoon) pure vanilla extract
- 60 milliliters (1/4 cup) buttermilk, plus up to an additional 60 milliliters (1/4 cup) if needed
- 5 milliliters (1 teaspoon) red gel food coloring (high-quality recommended for vibrant color)
- 240 grams (2 cups) all-purpose flour
- 60 grams (1/2 cup) unsweetened cocoa powder
- 2.5 milliliters (1/2 teaspoon) fine sea salt
- Marshmallow buttercream, for filling cookie sandwiches (approximately 250 grams or 1 cup)
Instructions
- Preheat your oven to 175 degrees Celsius (350 degrees Fahrenheit). Line two large baking sheets with parchment paper to prevent sticking and ensure even baking.
- In the bowl of a stand mixer fitted with the paddle attachment, cream together the shortening and granulated white sugar on medium speed until the mixture is light, fluffy, and well combined, approximately 3-4 minutes. Scrape down the sides of the bowl as needed.
- Add the eggs, one at a time, to the creamed mixture on medium-low speed, beating well after each addition until fully incorporated. This ensures a smooth emulsion and prevents the batter from separating.
- With the mixer on low speed, carefully add the vanilla extract, buttermilk, and red gel food coloring. Mix until the color is evenly distributed and the ingredients are just combined. Avoid overmixing at this stage.
- In a separate medium bowl, whisk together the all-purpose flour, unsweetened cocoa powder, and fine sea salt until thoroughly combined. This step helps to distribute the leavening and prevents lumps in the final dough.
- Gradually add the dry ingredients to the wet ingredients in the stand mixer, mixing on low speed until just combined. Mix only until no streaks of flour remain; overmixing can lead to tough cookies.
- Assess the dough's consistency. If it appears too dry or crumbly, you may need to add a small amount of additional buttermilk, up to 60 milliliters (1/4 cup) total, one tablespoon at a time, until the dough reaches a pliable, pipeable consistency. It should be soft enough to pipe but firm enough to hold its shape. Do not add more than 60 milliliters (1/4 cup) extra buttermilk to avoid a sticky dough.
- Prepare a piping bag by fitting it with a 1M or 2D star tip. Using a small spatula or spoon, carefully transfer a small amount of dough into the piping bag. Pipe individual rosettes onto the prepared parchment-lined baking sheets, leaving about 2-3 centimeters (1 inch) between each cookie to allow for slight spreading.
- Bake the cookies for 6-8 minutes. The cookies will still appear somewhat "wet" or soft in the center when they are done, and this is perfectly normal for red velvet cookies. They will firm up as they cool. Do not overbake.
- Carefully remove the baking sheets from the oven and let the cookies cool on the sheets for 5 minutes before transferring them to a wire rack to cool completely to room temperature. This helps them set and prevents breakage.
- To create exquisite cookie sandwiches, take one cooled cookie and spread approximately 15 milliliters (1 tablespoon) of marshmallow buttercream on its flat bottom. Gently place another cookie on top and press lightly to form a sandwich. Repeat with the remaining cookies and buttercream.
Tools You’ll Need
- Stand mixer with paddle attachment
- Large mixing bowls (2)
- Whisk
- Measuring cups and spoons (or kitchen scale)
- Parchment paper
- Baking sheets
- Piping bag
- 1M or 2D star tip
- Wire cooling rack
Essential Success Tips
- Ensure all cold ingredients, especially eggs and buttermilk, are at room temperature for a smoother, more emulsified dough.
- Use a high-quality gel food coloring for a vibrant, rich red hue without adding too much liquid to the dough, which could alter its consistency.
- Do not overmix the dough once the flour is added; this can develop gluten and result in tough cookies. Mix only until just combined.
- When piping, apply even pressure and work quickly to ensure uniform cookie shapes. Pipe small rosettes, as they will expand slightly during baking.
- Watch the baking time closely; red velvet cookies are easily overbaked, which can dry them out. They should still look a bit soft in the center when removed from the oven.
Professional Cooking Secrets
- For an even more intense red velvet flavor, lightly toast your cocoa powder before adding it to the dry ingredients. Spread it on a baking sheet and bake at 150°C (300°F) for 5-7 minutes, then let it cool. This deepens its chocolate notes.
- To achieve perfectly consistent cookie sizes and shapes when piping, practice on a piece of parchment paper without dough first, or use a template drawn on the underside of your parchment.
- If making ahead, pipe the unbaked dough onto parchment-lined baking sheets and freeze until solid. Transfer frozen dough rosettes to an airtight container. Bake from frozen, adding 1-2 minutes to the bake time.

Notes
- Storage: Store individual cookies or cookie sandwiches in an airtight container at room temperature for up to 3 days. If filled with buttercream, refrigerate if your buttercream requires it, then bring to room temperature before serving for best texture.
- Variations: While marshmallow buttercream is suggested, a classic cream cheese frosting is also an excellent pairing for red velvet and can be piped elegantly between the cookies. For a different twist, add 1/4 teaspoon of almond extract along with the vanilla.
- Gifting: These cookies make a beautiful gift. Arrange them in a decorative box with parchment or tissue paper for a truly impressive presentation.
Frequently Asked Questions
Can I use liquid food coloring instead of gel?
While you can use liquid food coloring, it's highly recommended to use gel food coloring. Gel colors are more concentrated, giving a much more vibrant red hue without adding excess liquid to the dough, which could alter its consistency.
My cookies spread too much and lost their rose shape. What went wrong?
This can happen if your dough was too warm or too soft, or if your oven temperature was too low. Ensure your dough is chilled slightly if it feels too warm after mixing. Also, double-check your oven temperature with an oven thermometer to ensure accuracy, as an underheated oven can cause cookies to spread excessively before setting.
Can I make the dough ahead of time?
Yes, the cookie dough can be made ahead. Wrap it tightly in plastic wrap and refrigerate for up to 2-3 days. When ready to use, let it sit at room temperature for about 15-20 minutes to soften slightly before piping, as it will be quite firm when cold.
Nutrition Facts (Per Serving)
Calories: 180, Protein: 2g, Fat: 10g, Carbs: 22g (per cookie, estimated without filling)
Allergy Information
Contains dairy (buttermilk, potentially in buttercream) and gluten (all-purpose flour) and eggs. For a gluten-free version, use a 1:1 gluten-free all-purpose flour blend. For a dairy-free version, use a dairy-free shortening and a plant-based buttermilk substitute (e.g., plant milk with lemon juice or vinegar).


No comment