
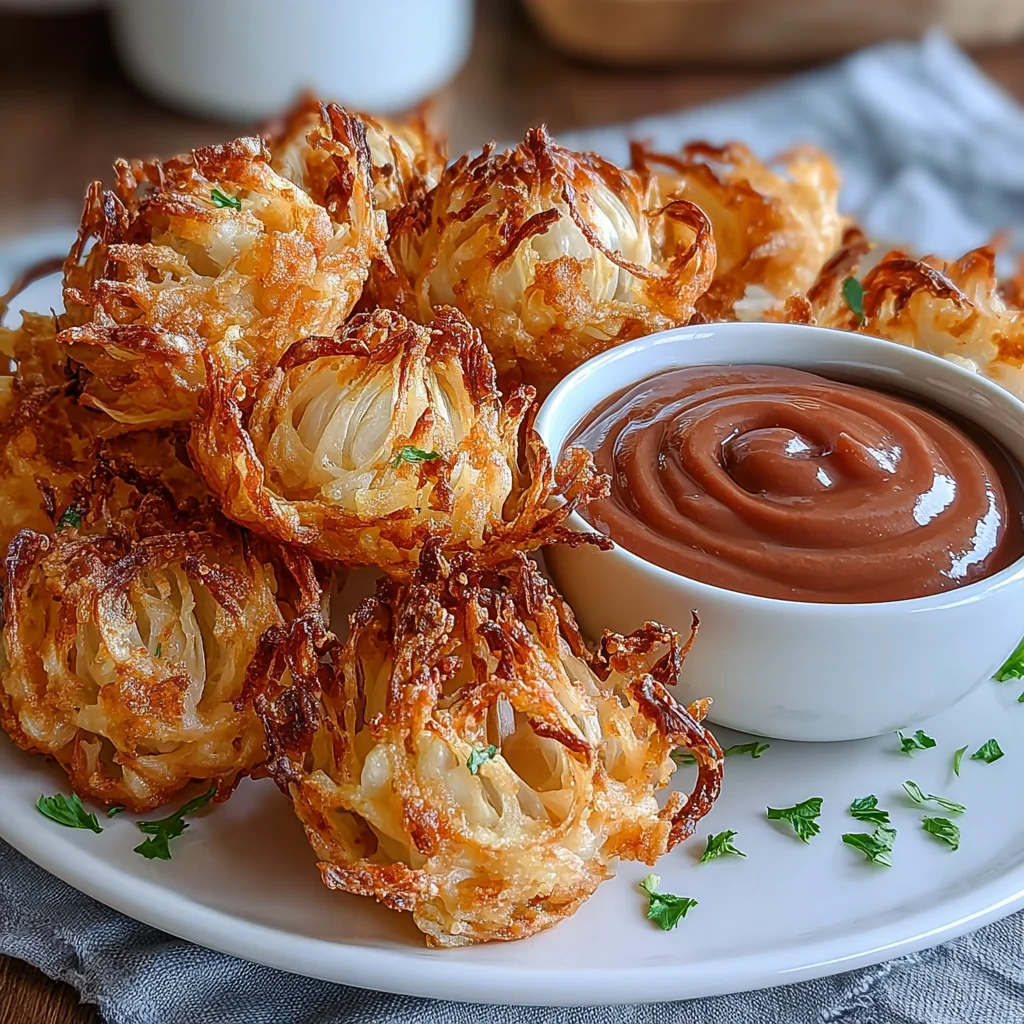
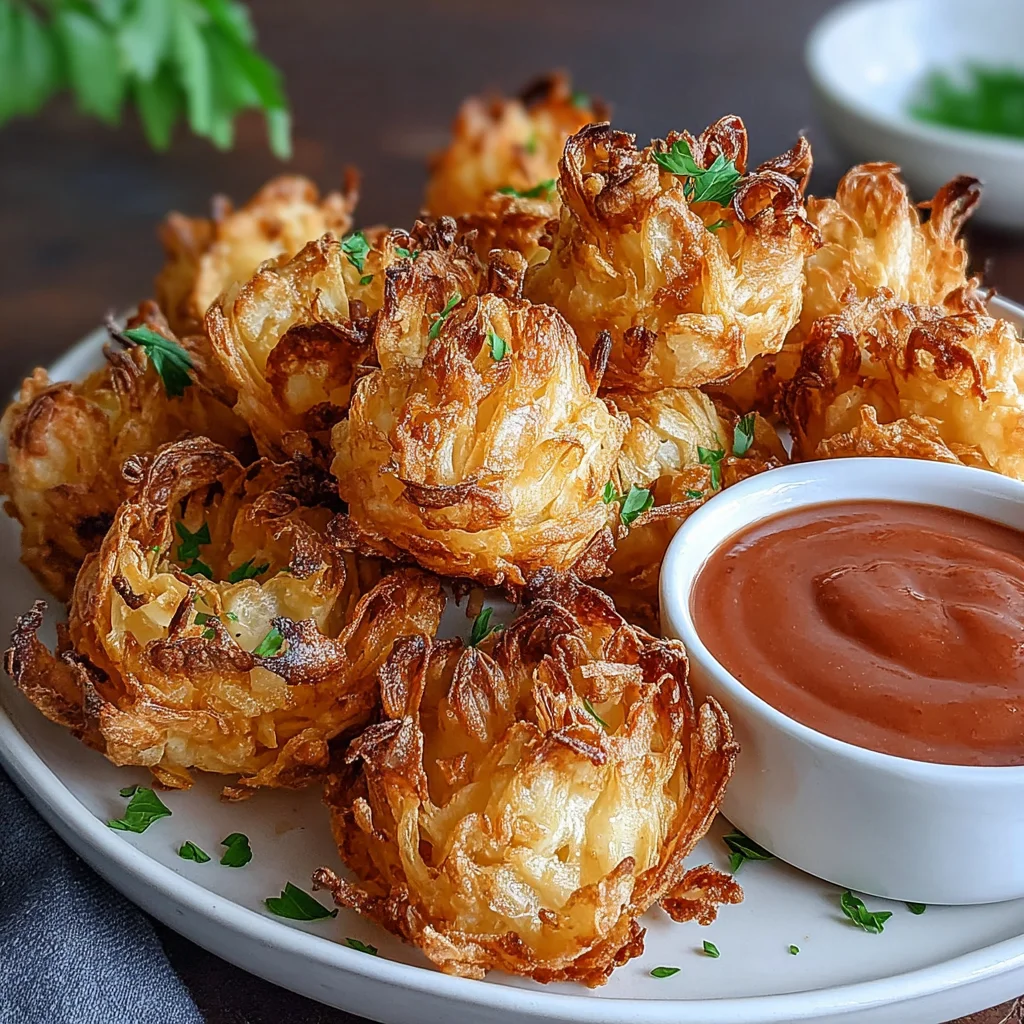
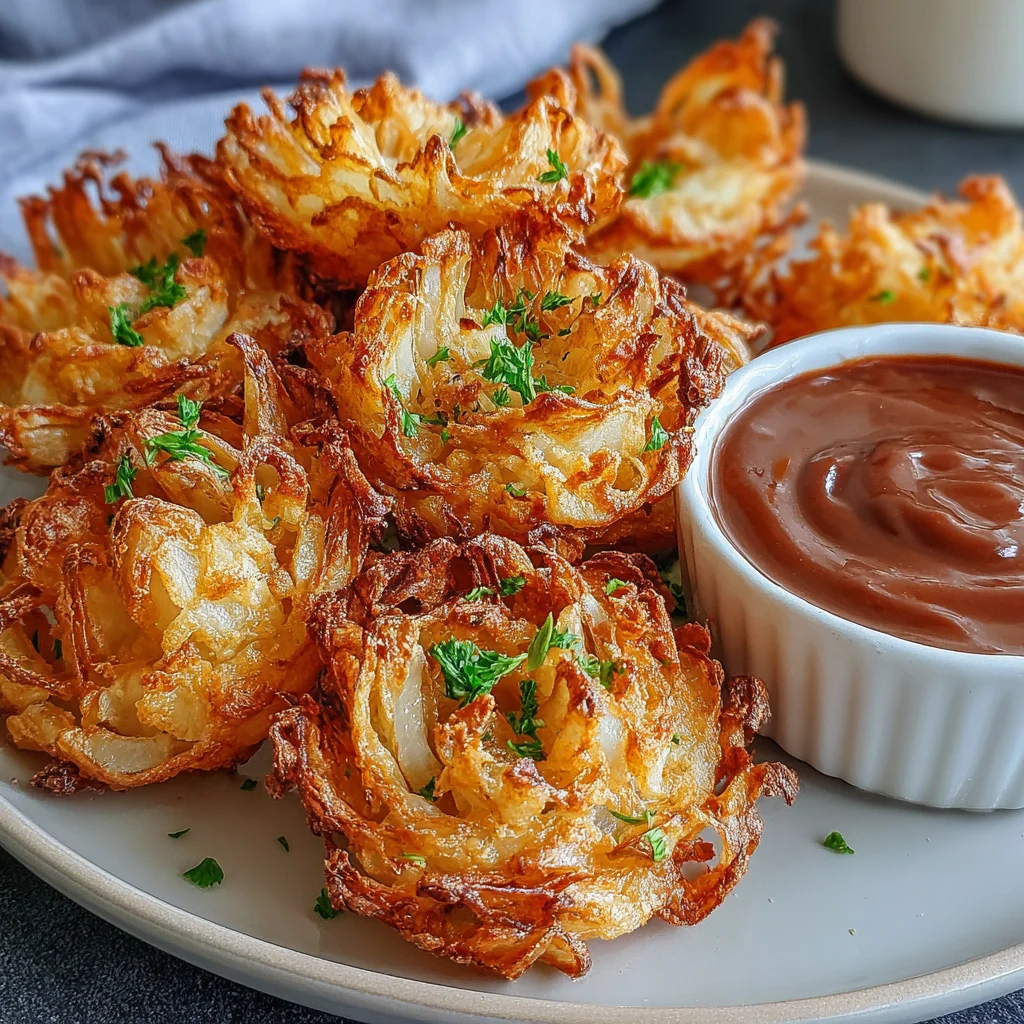
Air Fryer Crispy Mini Blooming Onions for Guilt-Free Snacking
Indulge in the irresistible crunch and sweet-savory flavor of blooming onions without the deep-fried guilt. These mini versions are perfectly air-fried to a golden crisp, offering a healthier twist on a beloved appetizer. They're quick to prepare, incredibly satisfying, and destined to be your new go-to snack.
Prep Time
20 minutes
Cook Time
10-12 minutes
Total Time
30-35 minutes
Servings
2-4 servings (2 mini blooming onions)
Keywords
Why This Recipe Delivers
- Achieves incredible crispness without deep frying, making it a healthier alternative.
- Bursting with savory, slightly spicy flavor from the seasoned coating.
- A fantastic appetizer or snack that's surprisingly easy to make at home.
- Visually stunning, resembling a blooming flower, perfect for entertaining.
- Customizable spice level allows you to tailor it to your preference.
Ingredients
- For the Batter:
- 240 ml (1 cup) Buttermilk (or 240 ml (1 cup) milk + 15 ml (1 tbsp) fresh lemon juice)
- 120 g (1 cup) All-Purpose Flour (substitute with gluten-free flour for a gluten-free option)
- 15 g (1 tbsp) Paprika (smoked paprika recommended for richer flavor)
- 5 g (1 tsp) Garlic Powder
- 5 g (1 tsp) Onion Powder
- 2.5 g (0.5 tsp) Cayenne Pepper (adjust to taste for desired heat)
- 5 g (1 tsp) Salt
- 5 g (1 tsp) Black Pepper
- For the Onions:
- 2 medium Sweet Onions (such as Vidalia, approximately 400-500 g total)
- For Cooking:
- As needed Cooking Spray or 5-10 ml (1-2 tsp) High-Heat Oil (like avocado or grapeseed oil)
- For the Dipping Sauce (Optional but Recommended):
- 120 ml (0.5 cup) Mayonnaise
- 60 ml (0.25 cup) Ketchup
- 15 ml (1 tbsp) Prepared Horseradish Sauce
- 5 ml (1 tsp) Fresh Lemon Juice
- 2.5 ml (0.5 tsp) Smoked Paprika
- 2.5 ml (0.5 tsp) Garlic Powder
- Pinch of Salt and Black Pepper (to taste)
Instructions
- In a small bowl, combine 240 milliliters (1 cup) buttermilk. If using the milk and lemon juice alternative, mix 240 milliliters (1 cup) milk with 15 milliliters (1 tablespoon) fresh lemon juice and let it sit for 5 minutes until it slightly curdles. This creates a homemade buttermilk that helps the coating adhere and tenderizes the onion.
- Prepare the sweet onions by peeling them thoroughly. Carefully slice off a small portion from the top and bottom of each onion to create a stable, flat base. Place one onion flat-side down on a cutting board. Starting about 1.5-2.5 centimeters (0.5-1 inch) from the root end (which should remain intact to hold the petals together), make even vertical cuts all the way through the onion, dividing it into 12-16 equal
- petals
- without detaching them from the root. Gently pry apart the petals to create a blooming effect. Repeat with the second onion.
- In a separate, shallow bowl, thoroughly whisk together 120 grams (1 cup) all-purpose flour (or gluten-free flour), 15 grams (1 tablespoon) paprika (smoked paprika will add a fantastic smoky depth), 5 grams (1 teaspoon) garlic powder, 5 grams (1 teaspoon) onion powder, 2.5 grams (0.5 teaspoon) cayenne pepper (adjust according to your spice preference), 5 grams (1 teaspoon) salt, and 5 grams (1 teaspoon) black pepper until well combined.
- Take one bloomed onion and completely submerge it into the buttermilk mixture, ensuring all the
- petals
- are saturated. Lift the onion, allowing any excess liquid to drip away. Immediately transfer the wet onion to the seasoned flour mixture. Carefully work the flour into all the crevices and between the petals, pressing gently to ensure a thick, even coating. Repeat this coating process for the second onion.
- Preheat your air fryer to 190°C (380°F) for at least 5 minutes. This crucial step ensures the air fryer is at the optimal temperature for immediate crisping, preventing the onions from becoming soggy.
- Carefully place the coated onions into the air fryer basket. Depending on the size of your air fryer, you may need to cook them one at a time to ensure there is sufficient space around each onion for proper air circulation. Overcrowding will steam the onions instead of crisping them.
- Lightly spray the tops and any exposed sides of the onions with cooking spray or gently brush them with a small amount of high-heat oil. This added fat is key to achieving that desirable golden-brown and extra-crispy exterior.
- Cook the onions in the preheated air fryer for 10-12 minutes. Halfway through the cooking time (around 5-6 minutes), carefully open the air fryer, gently shake the basket, or use tongs to slightly shift the onions. This promotes even browning and ensures all sides become perfectly crispy. Continue cooking until the onions are golden brown and tender inside.
- While the onions are cooking, prepare the dipping sauce. In a small bowl, combine 120 milliliters (0.5 cup) mayonnaise, 60 milliliters (0.25 cup) ketchup, 15 milliliters (1 tablespoon) prepared horseradish sauce, 5 milliliters (1 teaspoon) fresh lemon juice, 2.5 milliliters (0.5 teaspoon) smoked paprika, and 2.5 milliliters (0.5 teaspoon) garlic powder. Whisk everything together thoroughly until smooth. Taste and adjust seasonings (salt, pepper, or additional cayenne) as desired.
- Once the Air Fryer Crispy Mini Blooming Onions are cooked to a beautiful golden crisp, immediately transfer them to a serving platter. Serve them warm, alongside the homemade dipping sauce for an irresistible and satisfying snack.
Tools You’ll Need
- Sharp chef's knife
- Cutting board
- Two shallow mixing bowls
- Whisk
- Air fryer
- Tongs or spatula
- Measuring cups and spoons
Essential Success Tips
- Proper Onion Cut: The key to a good bloom is to leave the root end intact. Make sure your cuts go all the way through to create distinct petals without detaching them. A very sharp knife is essential for clean cuts.
- Even Coating: Take your time to thoroughly coat each onion. Gently separate the petals and press the flour mixture into all the crevices. This ensures every bite is crispy and flavorful.
- Don't Overcrowd the Air Fryer: For optimal crispness, cook one onion at a time if necessary. Air circulation is vital for achieving a truly crispy texture, and overcrowding will lead to steaming.
- Light Oil Spray: Don't skip the cooking spray or brushing with oil. This helps the coating brown beautifully and become extra crispy, mimicking the texture of deep-fried versions.
- Serve Immediately: These blooming onions are best enjoyed fresh out of the air fryer when they are at their crispiest. Have your dipping sauce ready to go!
Professional Cooking Secrets
- Pre-chilling the Onions: For a slightly firmer texture and easier cutting, chill your sweet onions in the refrigerator for at least 30 minutes before cutting. This can also help reduce tear-inducing fumes.
- Double Dredge for Extra Crunch: For an ultra-crispy crust, consider a double dredging. After the first flour coat, dip the onion back into a very light buttermilk wash, then back into the flour for a second, thicker layer. This works best with a slightly thicker batter.
- Spice Bloom: Elevate the flavor profile by adding a pinch of smoked paprika or a touch more cayenne to your dipping sauce. A small amount of finely chopped chives or cilantro can also brighten the sauce.
Notes
- Storage: These blooming onions are best enjoyed immediately. Leftovers can be stored in an airtight container in the refrigerator for up to 1 day, but they will lose their crispness.
- Reheating: To reheat, place in the air fryer at 175°C (350°F) for 3-5 minutes until warmed through and re-crisped.
- Flavor Variations: Experiment with different spice blends in the flour mixture, such as adding a pinch of chili powder, a dash of dried oregano, or a touch of celery salt for a unique twist.
- Gluten-Free Option: Use a 1:1 gluten-free all-purpose flour blend to make this dish suitable for gluten-sensitive diets. Ensure all other ingredients are also certified gluten-free.
Frequently Asked Questions
Can I make these blooming onions ahead of time?
While the dipping sauce can be prepared a day in advance and stored in the refrigerator, it's highly recommended to prepare and cook the blooming onions just before serving. They are at their absolute best when fresh and hot out of the air fryer, as they tend to lose their crispness over time.
What kind of sweet onion is best for this recipe?
Vidalia onions are an excellent choice due to their inherent sweetness and large size, which makes them ideal for blooming. Other sweet onion varieties like Walla Walla or Maui onions would also work wonderfully, providing a milder flavor that balances the savory seasoning.
My blooming onion didn't crisp up evenly. What went wrong?
Uneven crisping is often due to overcrowding the air fryer basket, insufficient cooking spray, or not shaking/flipping the onion halfway through. Ensure ample space for air circulation around the onion, apply a generous but even spray of oil, and always agitate the basket during cooking to promote even browning.
Nutrition Facts (Per Serving)
Calories: Approximately 380-450 per blooming onion half (includes batter and some sauce). Protein: 10-12g, Fat: 20-25g, Carbs: 45-55g, Fiber: 5-7g.
Allergy Information
Contains gluten and dairy (if using buttermilk). For a gluten-free option, use a certified gluten-free flour blend. For a dairy-free option, ensure milk used with lemon juice is dairy-free (e.g., unsweetened almond milk) or use a plant-based buttermilk substitute.


No comment