
Vegetarian Chili
Dive into a bowl of robust flavor with this hearty vegetarian chili, featuring a remarkably satisfying 'meat' substitute crafted from wholesome walnuts and mushrooms. This dish is slow-simmered to perfection, allowing the aromatic spices and rich tomato base to meld, creating a deeply comforting and surprisingly complex meal that will please even the most dedicated meat-eaters.
Prep Time
25 minutes
Cook Time
60 minutes
Total Time
1 hour 25 minutes
Servings
6-8 generous servings
Keywords
Why This Recipe Delivers
- Boasts an incredibly rich, savory flavor that satisfies like traditional chili.
- Features a unique, texture-rich "meat" substitute made from wholesome walnuts and mushrooms.
- Packed with nutrient-dense vegetables, making it a healthy and fulfilling meal.
- Perfect for meal prepping, as flavors deepen wonderfully overnight.
- A comforting, warming dish ideal for chilly evenings or gathering with friends.
Ingredients
- 100 grams (1 cup) raw walnuts
- 225 grams (8 ounces) fresh mushrooms, such as cremini or button, washed and stems removed
- 4 medium carrots, roughly chopped into chunks
- 30 ml (2 tablespoons) olive oil
- 1 large onion, finely diced (about 250g)
- 4 cloves garlic, minced (about 20g)
- 170 grams (6-ounce can) diced green chiles, or 1-2 fresh jalapeños, minced (seeds removed for less heat)
- 45 grams (3 tablespoons) tomato paste
- 30-45 ml (2-3 tablespoons) chili powder, adjust to taste and desired heat
- 10 ml (2 teaspoons) ground cumin
- 5 ml (1 teaspoon) smoked paprika
- 30 ml (2 tablespoons) soy sauce (or tamari for gluten-free)
- 5-10 grams (1-2 teaspoons) sea salt, or to taste
- 800 grams (two 14-ounce cans) diced or crushed tomatoes, with their juices
- 400 grams (one 14-ounce can) beans of choice (e.g., kidney, black, pinto), rinsed and drained (optional, see notes)
- 240 ml (1 cup) water, or vegetable broth
Instructions
- Prepare the "meat" substitute by combining the walnuts, fresh mushrooms (stems removed), and roughly chopped carrots in a food processor. Pulse the ingredients until they are finely broken down into a chunky, paste-like texture that resembles ground meat. Be careful not to over-process it into a complete paste; you want some texture. Transfer this mixture to a separate bowl and set aside.
- Heat the olive oil in a large, heavy-bottomed pot or Dutch oven over medium heat. Once the oil is shimmering, add the finely diced onion and minced garlic. Sauté for 5 to 10 minutes, stirring occasionally, until the onions become very soft and translucent, and the garlic is fragrant. This slow sautéing builds a foundational layer of flavor.
- Introduce the aromatic spices and flavor enhancers. Add the diced green chiles (or minced jalapeños), tomato paste, chili powder, ground cumin, and smoked paprika to the pot. Stir well to combine, allowing the tomato paste to cook slightly and the spices to toast for about 1-2 minutes until very fragrant. This step significantly deepens the flavor profile of the chili.
- Add your prepared walnut-mushroom-carrot "meat" mixture to the pot. Stir it thoroughly into the spice and onion mixture. As it cooks and mixes with the other ingredients, it will start to brown and take on the appearance and texture similar to ground chili meat. Continue to cook, stirring frequently, for approximately 10 minutes to allow the vegetables in the "meat" to soften and integrate their flavors. Season the mixture with salt at this stage.
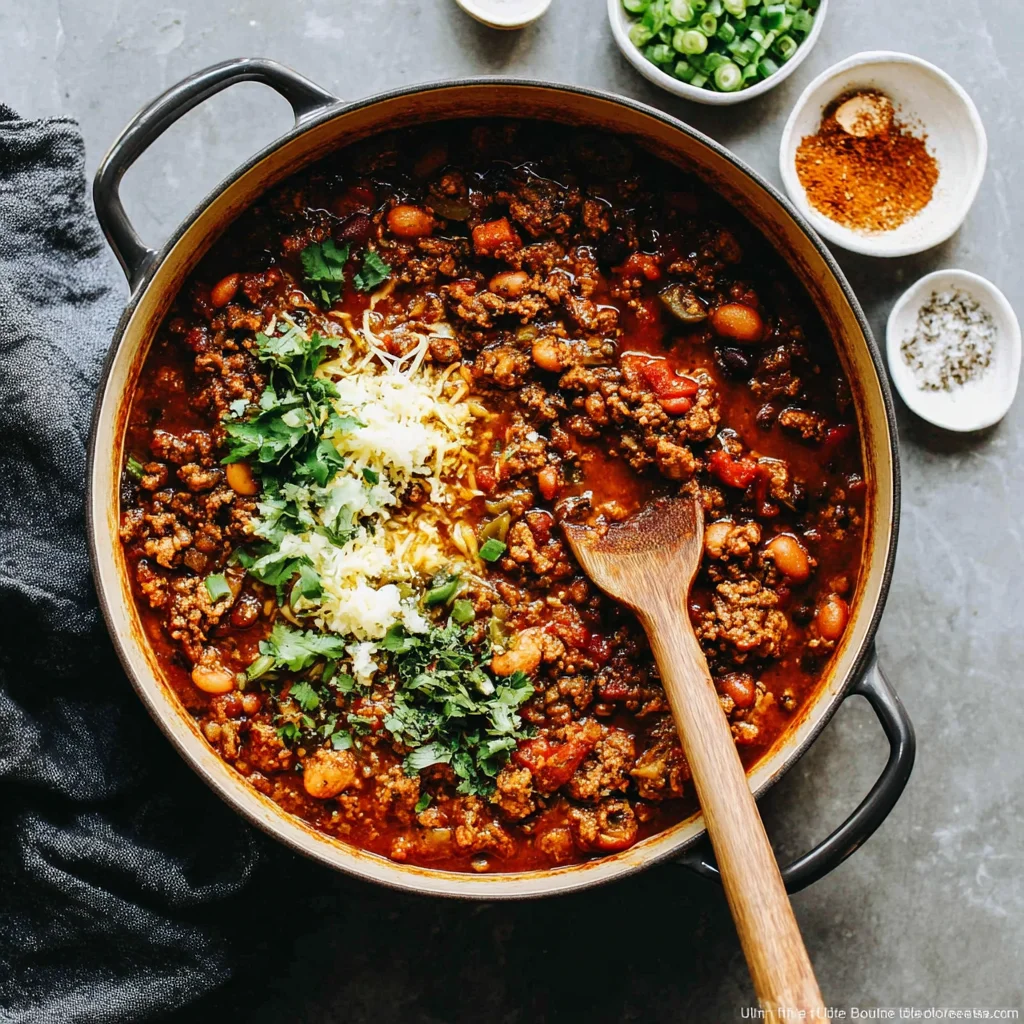
- Pour in the diced or crushed tomatoes (with their juices), the rinsed and drained beans if you are using them, and the water or vegetable broth. Stir everything together, ensuring all ingredients are well combined. Bring the mixture to a gentle simmer, then reduce the heat to low, cover the pot, and let it cook for at least 45 minutes. This extended simmering time is crucial for softening all the vegetables, thickening the chili to a perfect consistency, and allowing all the incredible flavors to fully meld and deepen. Stir occasionally to prevent sticking.
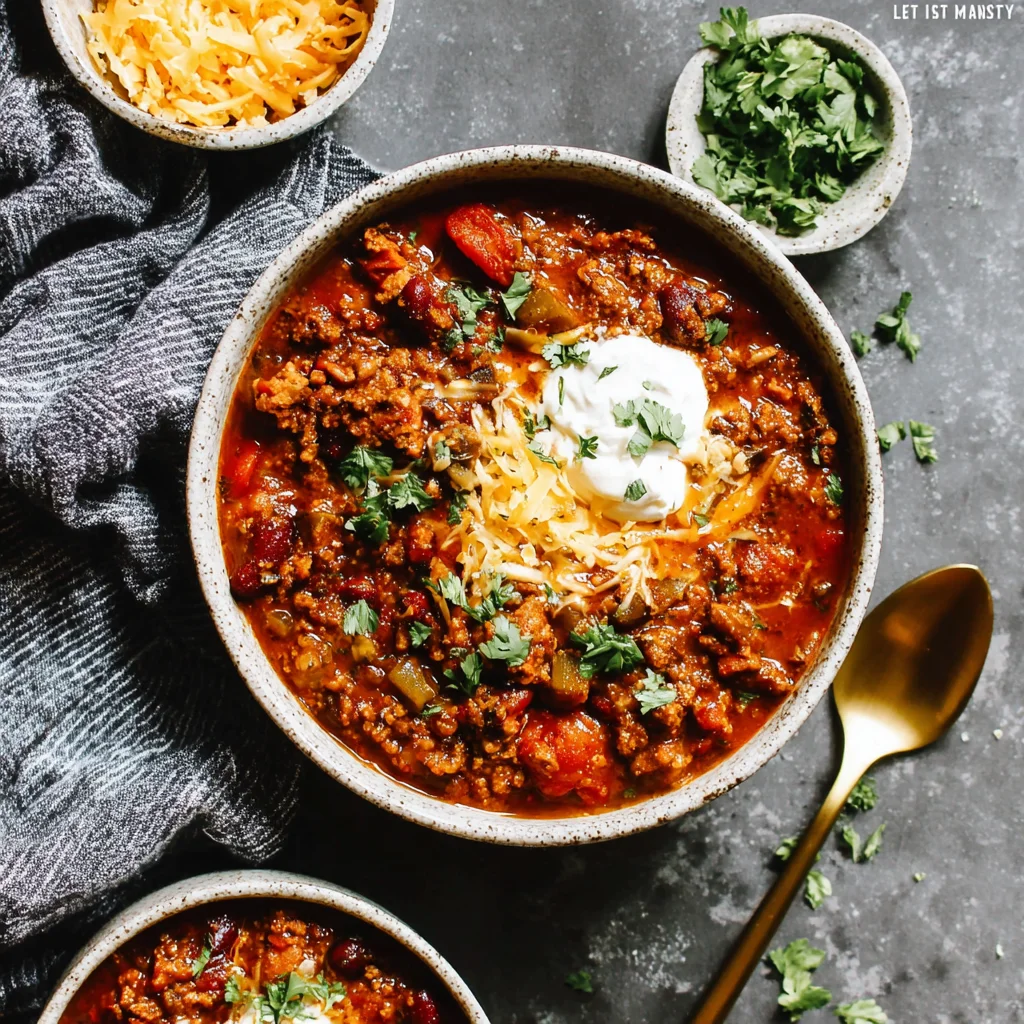
- Taste the chili and adjust seasonings as needed. You may want to add more salt, chili powder, or a touch of hot sauce for extra heat. Serve the piping hot vegetarian chili with your favorite toppings and enjoy your delicious, homemade creation!

Tools You’ll Need
- Large food processor
- Large, heavy-bottomed pot or Dutch oven
- Sharp knife
- Cutting board
- Measuring cups and spoons
- Wooden spoon or spatula
- Can opener
Essential Success Tips
- Do not over-process the "meat" mixture; aim for a chunky texture, not a paste, to mimic ground meat best.
- Allow the onions and garlic to fully soften and become fragrant in the early steps to build a strong flavor base.
- Let the tomato paste cook for a minute or two with the spices to deepen its flavor before adding liquids.
- Taste and adjust seasoning throughout the cooking process, especially after the long simmer. A little extra salt, a squeeze of lime, or a dash of hot sauce can really make it sing.
- For an even richer flavor, prepare the chili a day ahead. The flavors meld and deepen beautifully after resting.
Professional Cooking Secrets
- To elevate the "meatiness," try adding a tablespoon of nutritional yeast along with the spices. It imparts a cheesy, umami depth without dairy.
- For a complex smokiness, char a poblano pepper or two directly over a gas flame or under a broiler, then peel, deseed, chop, and add it with the green chiles.
- Finish the chili with a splash of apple cider vinegar or a squeeze of fresh lime juice right before serving. This brightens the overall flavor and cuts through the richness beautifully.
Notes
- Regarding the optional beans: You can use any canned beans you prefer, such as kidney, black, or pinto beans. If you opt not to use beans, you might want to slightly reduce the water or broth to maintain the desired thickness, or add another half can of crushed tomatoes.
- Storage: Leftover chili can be stored in an airtight container in the refrigerator for up to 4-5 days. It also freezes exceptionally well for up to 3 months. Thaw overnight in the refrigerator and reheat gently on the stovetop or in the microwave.
- Variations: Feel free to add other vegetables like bell peppers, zucchini, or corn during the last 20 minutes of simmering. For extra heat, include a pinch of cayenne pepper or a chopped habanero with the green chiles.
Frequently Asked Questions
Can I make this chili spicier?
Absolutely! To increase the heat, you can add an extra tablespoon of chili powder, a pinch of cayenne pepper, or a finely minced fresh jalapeño or serrano pepper along with the diced green chiles. You can also serve it with a dash of your favorite hot sauce.
What are some good topping suggestions for this vegetarian chili?
This chili is fantastic with a variety of toppings! Popular choices include shredded cheddar cheese (or a dairy-free alternative), a dollop of sour cream or Greek yogurt, fresh cilantro, diced avocado, sliced green onions, a squeeze of lime juice, or a sprinkle of tortilla chips for crunch.
Is this recipe suitable for a gluten-free diet?
Yes, this vegetarian chili is naturally gluten-free, provided you use tamari instead of regular soy sauce (which often contains wheat). All other ingredients typically used are gluten-free, but always check labels for certified gluten-free products if you have a severe allergy.
Nutrition Facts (Per Serving)
Per serving (approximate): Calories: 380, Protein: 18g, Fat: 22g, Saturated Fat: 3g, Carbohydrates: 32g, Fiber: 10g, Sodium: 850mg.
Allergy Information
Contains tree nuts (walnuts) and soy (from soy sauce, use tamari for gluten-free option). For a soy-free version, substitute soy sauce with coconut aminos or a savory broth with a pinch of salt. Naturally gluten-free if using tamari.


No comment