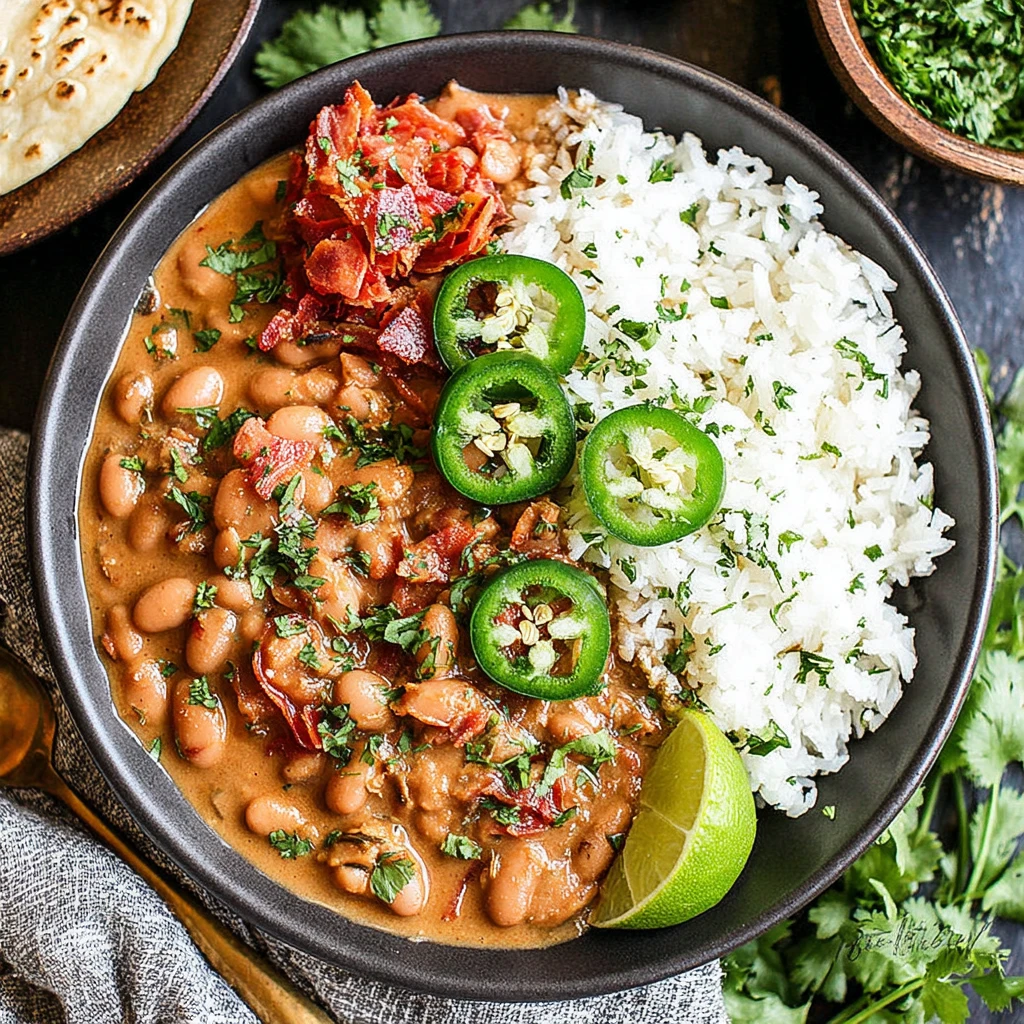
Creamy & Flavorful Easy Pinto Beans
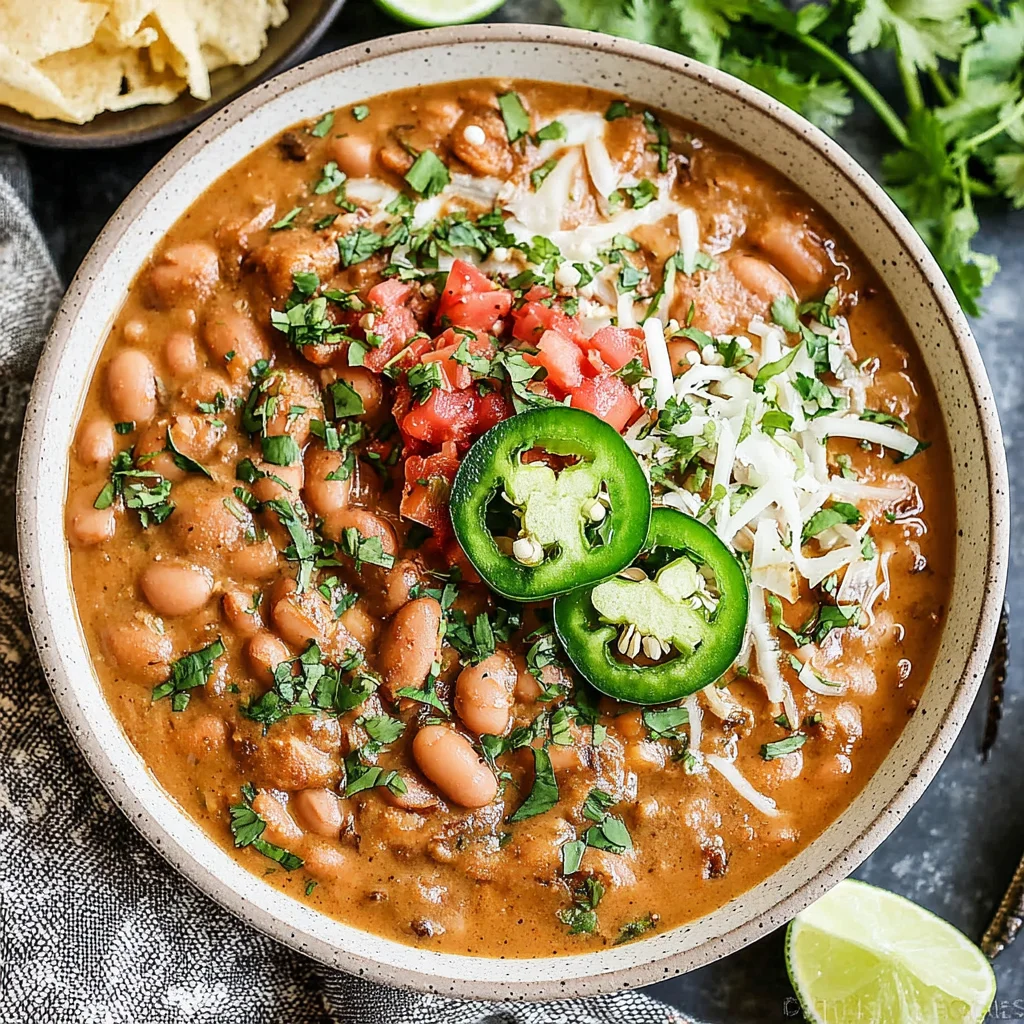
Discover the ultimate easy pinto bean recipe that delivers a rich, creamy texture and depth of flavor in under 20 minutes. This dish transforms simple canned beans into a gourmet experience, perfect as a side or a hearty main. It's a versatile and satisfying addition to any meal, proving that quick cooking doesn't compromise on taste.
Prep Time
10 minutes
Cook Time
8-12 minutes
Total Time
18-22 minutes
Servings
4 servings
Keywords
Why This Recipe Delivers
- Incredibly quick to prepare, perfect for busy weeknights.
- Transforms canned beans into a restaurant-quality dish.
- Offers a wonderfully creamy texture alongside hearty whole beans.
- Packed with robust, smoky, and savory flavors.
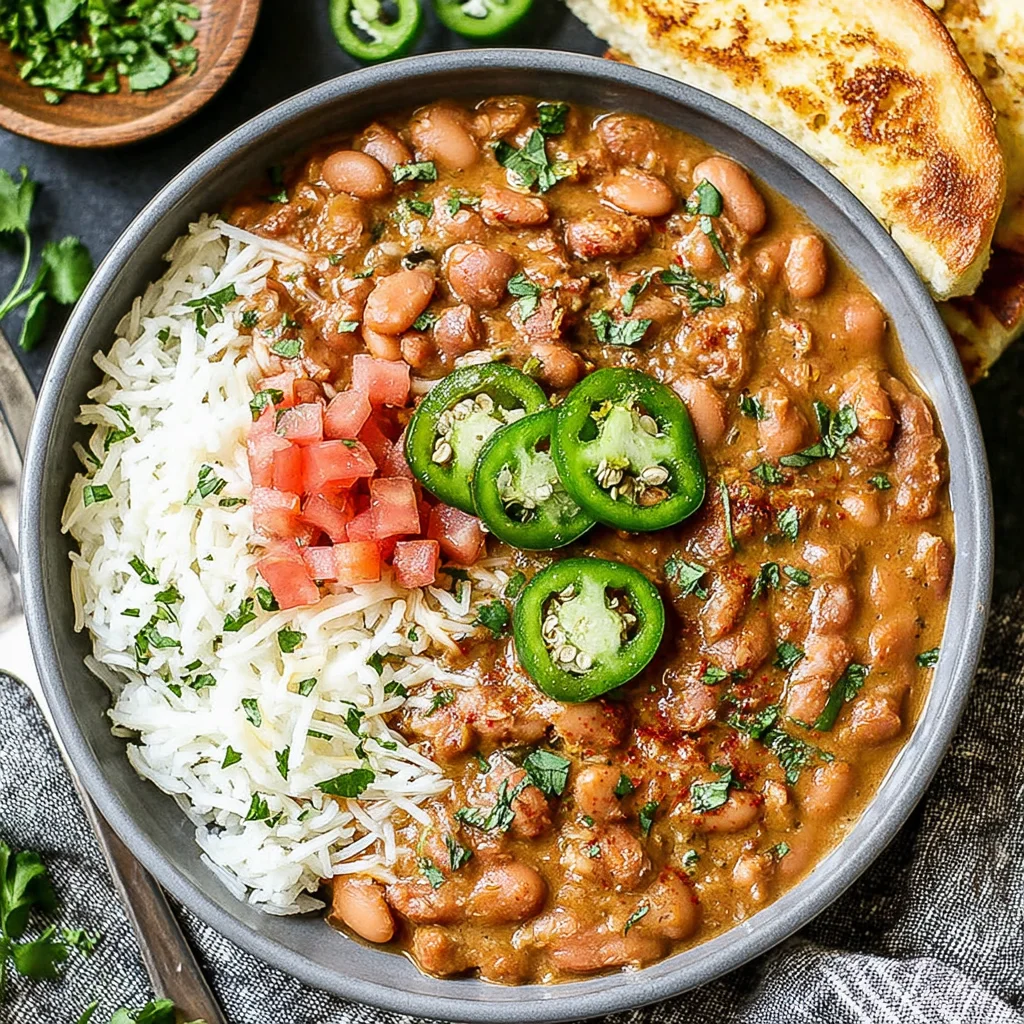
- Highly versatile, serving as a side, dip, or main ingredient.
Ingredients
- 2 cans (each approximately 425 grams or 15 ounces) pinto beans, undrained for one can, drained and rinsed for the other
- 15 ml (1 Tablespoon) extra virgin olive oil
- 1 small shallot or 1/2 medium yellow onion, finely minced
- 1 jalapeño, seeds and ribs removed, finely minced
- 2 cloves garlic, pressed or minced
- 1.25 ml (1/4 teaspoon) smoked paprika
- 1.25 ml (1/4 teaspoon) ground cumin
- Salt and freshly ground black pepper, to taste
- Hot sauce, to taste (optional)
- 60-120 ml (1/4 to 1/2 cup) chicken broth, vegetable broth, or water (optional, for thinning)
Instructions
- Prepare the creamy base. Pour one can of pinto beans, along with its canning liquid, into a high-speed blender. Blend until the mixture is completely smooth and creamy, ensuring no lumps remain. Set this bean puree aside. Separately, drain and thoroughly rinse the second can of pinto beans under cold water, then set these whole beans aside.
- Build the aromatic foundation. Heat the extra virgin olive oil in a small pan or skillet over medium heat. Once the oil shimmers, add the finely minced shallots (or yellow onion) and minced jalapeño. Sauté these aromatics for 5-7 minutes, stirring occasionally, until they become tender and translucent, releasing their sweet and spicy fragrances. Next, add the pressed or minced garlic to the pan and continue to sauté for just 1 minute more, until the garlic becomes extremely fragrant and golden, being careful not to let it brown.
- Combine and simmer to perfection. Add the reserved pureed beans, the drained and rinsed whole pinto beans, smoked paprika, ground cumin, and freshly ground black pepper to the pan. If using, now is the time to add a dash of your favorite hot sauce for an extra kick. Stir all the ingredients well to combine everything thoroughly. If the beans appear too thick for your preference, gradually add chicken broth, vegetable broth, or water, 30 ml (2 tablespoons) at a time, stirring constantly until you achieve your desired consistency. Continue to cook, stirring frequently, until the beans are warmed through and flavors have melded, which typically takes 4-5 minutes.
- Season and serve. Taste the beans and adjust the seasoning as needed, adding salt to taste. Remember that many broths contain salt, so season carefully. Serve the creamy, flavorful pinto beans hot as a delicious side dish or a versatile base for other meals. Keep in mind that the beans will thicken further as they cool.

Tools You’ll Need
- High-speed blender
- Small saucepan or skillet
- Spatula or wooden spoon
- Measuring spoons and cups
- Cutting board and knife (for shallot/jalapeño)
- Garlic press (optional)
Essential Success Tips
- Don't skip the step of blending one can of beans with its liquid; this is key to achieving the dish's signature creamy texture.
- Carefully monitor the garlic while sautéing; it can burn quickly and turn bitter. Cook just until fragrant.
- When adding broth or water, do so gradually. Start with a smaller amount and add more only if needed, to avoid making the beans too thin.
- Taste and adjust seasoning meticulously before serving. Canned beans vary in sodium content, and your broth choice also plays a role.
- Remember the note about thickening: if serving later, you might need to thin the beans with a splash of broth or water when reheating.
Professional Cooking Secrets
- To infuse deeper flavor, consider adding a small bay leaf or a sprig of epazote to the pan during the simmering stage, removing it before serving.
- For an extra layer of complexity, roast the jalapeño before mincing and adding it to the dish. This imparts a sweeter, smokier heat.
- Before serving, a squeeze of fresh lime juice can brighten the flavors considerably, adding a zesty finish that balances the richness.
Notes
- The beans will thicken considerably as they cool. If reheating, you may need to add a splash of water or broth to restore the desired consistency.
- For a spicier kick, leave some of the seeds and ribs in the jalapeño. For milder flavor, omit the hot sauce.
- These beans are excellent as a side to tacos, burritos, grilled meats, or as a base for a hearty bean and cheese dip. They can also be enjoyed simply with warm tortillas.
Frequently Asked Questions
Can I use dried pinto beans instead of canned?
Yes, you can. You'll need to cook dried pinto beans from scratch until very tender, then measure out the equivalent of two cans (about 340 grams or 1.5 cups cooked beans) for the recipe, reserving some cooking liquid for the puree.
How long do these pinto beans last in the refrigerator?
Stored in an airtight container, these pinto beans will stay fresh in the refrigerator for up to 3-4 days. They also freeze well for up to 2-3 months.
What can I serve with these easy pinto beans?
These versatile pinto beans pair wonderfully with a variety of dishes. They are perfect alongside grilled chicken or steak, as a side for tacos, burritos, or enchiladas, or even topped with a fried egg for a hearty breakfast or brunch.
Nutrition Facts (Per Serving)
Calories: approximately 250, Protein: 14g, Fat: 7g, Carbs: 35g, Fiber: 12g (per serving, estimated based on general ingredients and quantities)
Allergy Information
This recipe is naturally gluten-free and dairy-free. It contains no common allergens unless chicken broth is used (which may contain chicken). Always check your broth labels if you have specific dietary concerns.

No comment