
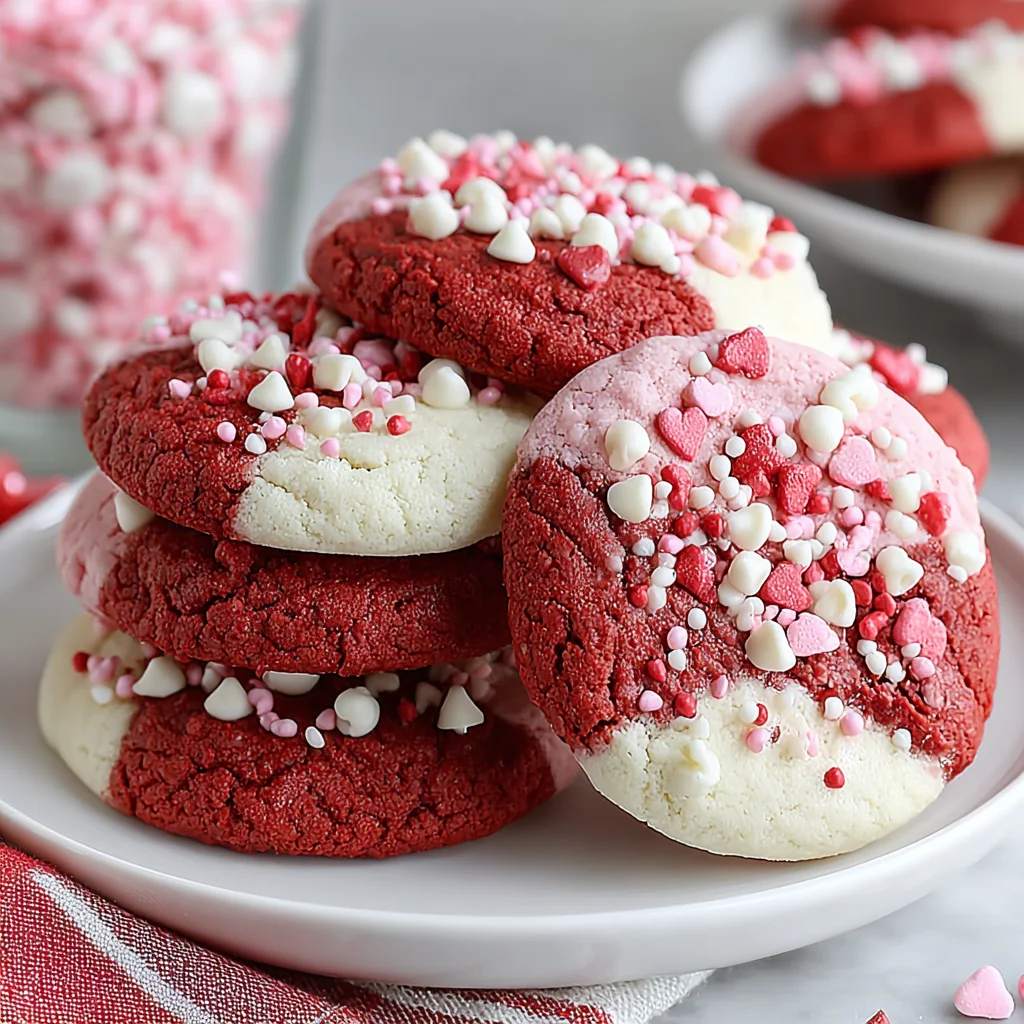
Valentines Day Red Velvet Cookies Recipe
Indulge in the romantic allure of these Valentine's Day Red Velvet Cookies, a delightful treat perfect for sharing with loved ones. These soft, chewy cookies boast a vibrant crimson hue, a hint of cocoa, and are studded with creamy white chocolate chips, making every bite a celebration of flavor and affection. They're a simple yet elegant way to express your love through homemade baking.
Prep Time
20 minutes
Cook Time
11-12 minutes
Total Time
35-40 minutes
Servings
Makes approximately 24-30 cookies
Keywords

Why This Recipe Delivers
- Features a stunning, vibrant red color perfect for Valentine's Day.
- Offers a delightfully soft, chewy texture with a subtle cocoa flavor.
- Comes together quickly, making it ideal for a last-minute homemade gift.
- The sweet white chocolate chips provide a lovely contrast and added indulgence.
- Always a crowd-pleaser and a beautiful addition to any holiday spread.
Ingredients
- 210 grams (1 3/4 cups) all-purpose flour
- 22 grams (1/4 cup) unsweetened cocoa powder
- 2.5 grams (1/2 teaspoon) baking soda
- 1.2 grams (1/4 teaspoon) salt
- 113 grams (1/2 cup) unsalted butter, softened
- 150 grams (3/4 cup) light brown sugar, packed
- 50 grams (1/4 cup) granulated sugar
- 1 large egg
- 15 milliliters (1 tablespoon) milk
- 10 milliliters (2 teaspoons) vanilla extract
- 10 milliliters (2 teaspoons) red food coloring
- 170 grams (1 cup) white chocolate chips
Instructions
- Preheat your oven to 175°C (350°F). Prepare two large baking sheets by lining them with parchment paper. This prevents sticking and ensures even baking, making cleanup a breeze.
- In a medium-sized bowl, thoroughly whisk together the all-purpose flour, unsweetened cocoa powder, baking soda, and salt. Whisking ensures these dry ingredients are fully combined and evenly distributed throughout the dough, which is crucial for uniform texture and rise. Set this mixture aside.
- In a separate large mixing bowl, using an electric mixer, beat the softened unsalted butter, light brown sugar (packed), and granulated sugar together until the mixture becomes light, creamy, and smooth. This creaming process incorporates air, which contributes to the cookies' soft texture.
- To the creamed butter and sugar mixture, add the large egg, milk, vanilla extract, and the vibrant red food coloring. Continue to mix on medium speed until all these wet ingredients are thoroughly combined and the color is evenly distributed throughout, creating that signature red velvet hue.
- Gradually add the previously prepared dry ingredients to the wet mixture, mixing on low speed only until just combined. Be careful not to overmix, as this can develop the gluten in the flour too much, resulting in tough cookies. Stop mixing as soon as no streaks of flour are visible.
- Gently fold in the white chocolate chips using a spatula. Distribute them evenly throughout the dough without crushing them. The contrast of the sweet white chocolate with the subtle cocoa of the red velvet is delightful.
- Scoop tablespoon-sized portions of dough and place them onto the prepared baking sheets, ensuring they are spaced approximately 5 cm (2 inches) apart. This spacing allows the cookies to spread without touching each other.
- Bake the cookies in the preheated oven for 11-12 minutes. The cookies are ready when the edges are lightly set but the centers still appear soft and slightly underbaked. This ensures a wonderfully chewy interior once cooled.
- Once baked, remove the baking sheets from the oven and allow the cookies to cool on the sheets for 5 minutes. This brief cooling period helps the cookies set further before you carefully transfer them to a wire rack to cool completely.

Tools You’ll Need
- Large mixing bowls
- Medium mixing bowl
- Electric mixer (handheld or stand mixer)
- Whisk
- Rubber spatula
- Measuring cups and spoons
- Parchment paper
- Baking sheets
- Cookie scoop (optional, but recommended for even sizing)
- Wire cooling rack
Essential Success Tips
- Ensure your butter is truly softened to room temperature for the best creaming results, but not melted, as this affects the cookie's texture.
- Use good quality red food coloring, preferably gel food coloring, to achieve a deep, vibrant red hue without over-wetting the dough.
- Avoid overmixing the dough once the flour is added; mix only until just combined to keep the cookies tender and soft.
- Don't overbake! These cookies are best when slightly underbaked in the center for a chewy texture. They will continue to set as they cool.
- Measure your flour correctly, either by weight (grams) or by spooning it into the measuring cup and leveling it off, rather than scooping directly from the bag.
Professional Cooking Secrets
- For an even more intense red color, you can briefly warm the red food coloring in a microwave safe bowl for 5-10 seconds before adding it to the wet ingredients. This can sometimes help to deepen the pigment.
- Chill the dough for 30 minutes to an hour before baking. This helps prevent the cookies from spreading too much, resulting in thicker, chewier cookies, and also allows the flavors to meld beautifully.
- To achieve perfectly round cookies, use a large circular cookie cutter or the rim of a glass immediately after they come out of the oven. Gently swirl it around each cookie to reshape any irregular edges.
Notes
- Storage: Store leftover cookies in an airtight container at room temperature for up to 3-4 days. For longer storage, freeze cooled cookies in a freezer-safe bag or container for up to 3 months. Thaw at room temperature.
- Variations: For an extra touch of decadence, drizzle cooled cookies with melted cream cheese frosting or a simple white chocolate drizzle. You can also experiment with dark chocolate chips instead of white chocolate.
Frequently Asked Questions
Can I make these cookies without food coloring?
Yes, you can omit the red food coloring, but they won't have the signature red velvet appearance. They will still taste like a delicious chocolate chip cookie with a hint of cocoa.
What if my cookies spread too much?
This could be due to several factors: butter being too soft or melted, not enough flour, or overmixing. Try chilling the dough for at least 30 minutes before baking the next batch, and ensure your oven temperature is accurate.
Can I use different chocolate chips?
Absolutely! While white chocolate chips provide a classic contrast, semi-sweet or dark chocolate chips would also be delicious and complement the red velvet flavor.
Nutrition Facts (Per Serving)
Calories: ~180, Protein: ~2g, Fat: ~10g, Carbs: ~20g (per cookie, estimated for 28 cookies)
Allergy Information
Contains wheat (gluten), dairy, and egg. May contain traces of soy depending on the brand of chocolate chips. For a gluten-free version, substitute all-purpose flour with a 1:1 gluten-free baking flour blend that contains xanthan gum. Ensure all other ingredients are certified gluten-free.


No comment