
The Best Sugar Cookie Icing Recipe for Decorating
This versatile sugar cookie icing recipe is your secret weapon for beautifully decorated cookies. It strikes the ideal balance between pourable consistency and firm drying, creating a smooth, professional finish without being overly sweet or brittle. Whether you're a seasoned baker or just starting your decorating journey, this guide will help you achieve stunning results every time.
Prep Time
10 minutes
Cook Time
0 minutes
Total Time
10 minutes
Servings
Yields approximately 360 grams (1.5 cups) of icing, enough to decorate 2-3 dozen standard sugar cookies
Keywords

Why This Recipe Delivers
- Achieves a beautiful, smooth, and professional-looking finish.
- Dries firm, allowing for easy stacking and transport of decorated cookies.
- Customizable with various flavor extracts and food colorings.
- Simple to make with common pantry ingredients.
- Versatile for both intricate piping and smooth flooding techniques.
Ingredients
- 240 grams (2 cups) powdered sugar, sifted
- 30-60 ml (2-4 tablespoons) whole milk, or as needed
- 15 ml (1 tablespoon) light corn syrup or honey
- 5 ml (1 teaspoon) pure vanilla extract (or almond, peppermint, coconut, lemon extract)
- Food coloring (gel or liquid), optional
Instructions
- In a medium mixing bowl, combine the sifted powdered sugar, an initial 30 ml (2 tablespoons) of milk, the light corn syrup (or honey), and your chosen extract.
- Using a whisk or a rubber spatula, stir the ingredients together until a thick, smooth paste forms. It will seem quite stiff at first.
- Gradually add more milk, a few milliliters (about a quarter teaspoon) at a time, mixing thoroughly after each addition. The goal is to reach your desired consistency.
- For piping outlines and intricate details, or for a thicker spreadable icing, aim for a consistency that holds its shape when piped but can still be smoothed out with a knife. For "flood" icing (for dipping or filling in outlines), continue adding milk until the icing is thinner and flows slowly off the spoon, but isn't watery. A good test is to drizzle a spoonful back into the bowl; if the ribbon disappears after 8-10 seconds, it's perfect for flooding.
- If using food coloring, divide the icing into separate bowls before coloring. Add gel food coloring sparingly, mixing well to achieve your desired shade, as the color will deepen slightly as it sets.
- Transfer the icing to piping bags fitted with your preferred tips, or use an offset spatula for spreading. Decorate your cooled, baked cookies as desired.
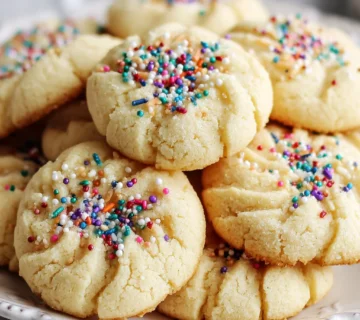
- If you plan to add sprinkles, edible glitter, or other decorative elements, apply them immediately after icing the cookie, before the icing has a chance to set and dry.

Tools You’ll Need
- Medium mixing bowl
- Whisk or rubber spatula
- Measuring cups and spoons (metric and imperial)
- Sifter (for powdered sugar)
- Small bowls (for dividing and coloring icing)
- Piping bags and tips (optional, for detailed decorating)
- Offset spatula or butter knife (for spreading)
Essential Success Tips
- Always sift your powdered sugar to prevent lumps and ensure a perfectly smooth icing.
- Add milk gradually, a very small amount at a time, until you reach the desired consistency. It's much easier to thin icing than to thicken it.
- Ensure your cookies are completely cooled before applying icing; warm cookies will cause the icing to melt or run.
- Keep any unused icing covered tightly with plastic wrap directly touching the surface to prevent it from drying out, especially when working on a large batch.
- For vibrant colors without adding too much liquid, opt for gel food coloring over liquid dyes.
Professional Cooking Secrets
- For an ultra-glossy finish and extra durability, a tiny pinch of meringue powder can be added to the powdered sugar before mixing. This adds stability, especially in humid environments, though it's not strictly necessary for this recipe.
- When coloring icing, let it sit for about 10-15 minutes after mixing. The colors often deepen and become more vibrant as they rest, which can prevent you from over-coloring.
- If your icing becomes too thick while decorating, add a tiny drop of milk and stir gently until it returns to the desired consistency. If it becomes too thin, stir in a spoonful of sifted powdered sugar.

Notes
- Storage: Store any leftover icing in an airtight container at room temperature for up to 3 days, or in the refrigerator for up to 1 week. Stir well before using, adding a drop or two of milk if it has stiffened.
- Flavor Variations: Experiment with different extracts like lemon, orange, peppermint, or even a touch of rum or bourbon extract for adult-themed cookies.
- Honey vs. Corn Syrup: While light corn syrup is traditional for its clear consistency and shine, honey can be used as a natural alternative. Note that honey will impart a subtle flavor and a slightly less crystal-clear finish.
Frequently Asked Questions
Why is my icing too thick or too thin?
The consistency of your icing is crucial for decorating. If it's too thick, add milk a few drops at a time until it reaches the desired flow. If it's too thin, carefully mix in a teaspoon of sifted powdered sugar at a time until it thickens. Always adjust gradually.
How long does it take for the icing to dry?
The drying time for this icing can vary based on consistency, humidity, and thickness of application. Generally, a thin layer will be dry to the touch in 1-2 hours, but for full hardening and stacking, it's best to allow 6-8 hours, or even overnight.
Can I use regular granulated sugar instead of powdered sugar?
No, powdered sugar (confectioners' sugar) is essential for this recipe. Its fine texture and added cornstarch create a smooth, lump-free icing that sets properly. Granulated sugar would result in a gritty, runny icing.
Nutrition Facts (Per Serving)
Approximate per 30g serving (uncolored): Calories: 120, Protein: 0g, Fat: 0g, Carbs: 30g, Sugars: 28g
Allergy Information
Contains dairy (milk). Can be made dairy-free by substituting with a plant-based milk alternative (e.g., almond milk, soy milk). Naturally gluten-free. For a vegan option, ensure the sugar used is bone-char free and use agave nectar instead of honey if preferred, and use plant-based milk.


No comment