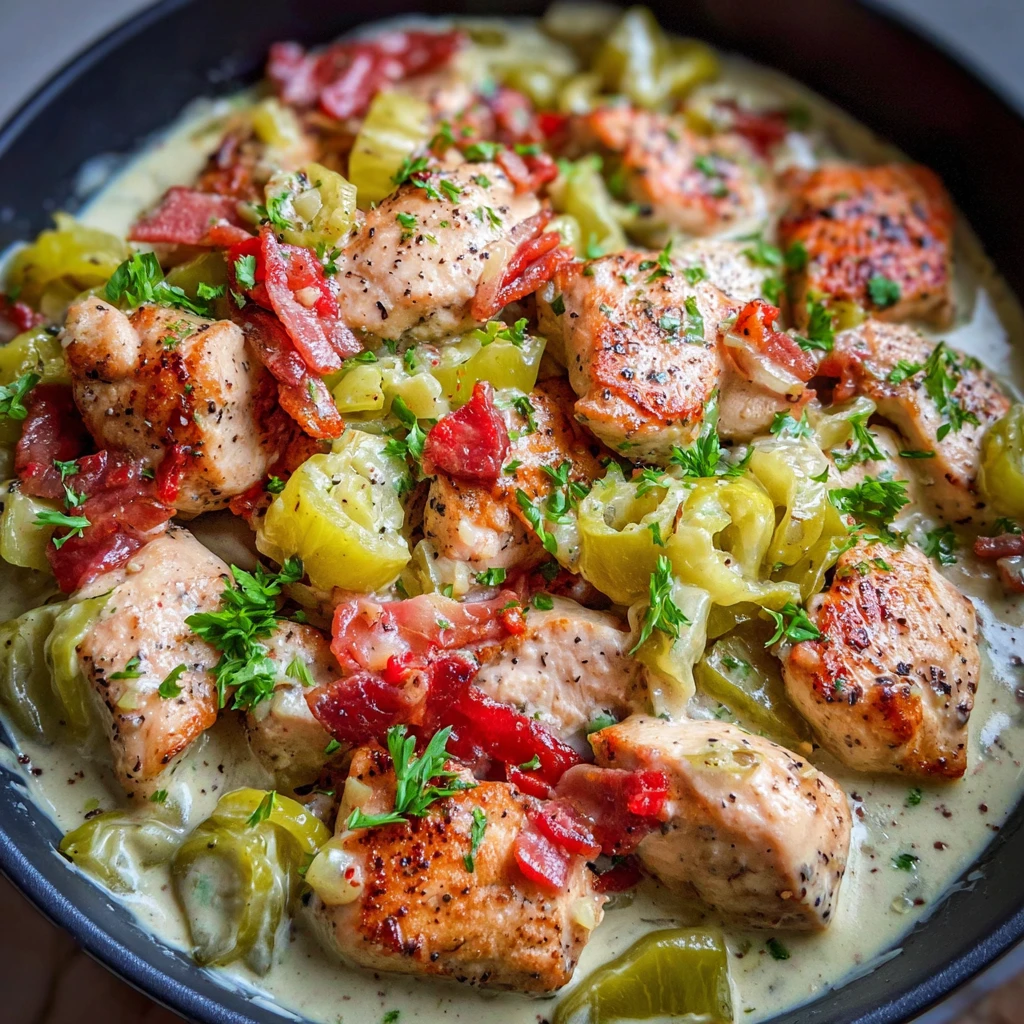
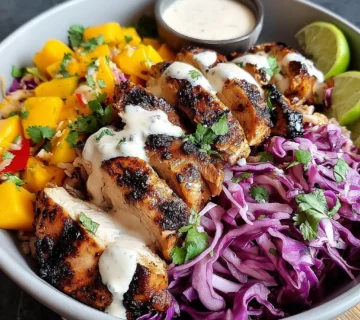
Pepperoncini Chicken Skillet: Easy One-Pan Recipe
Unleash a burst of tangy, savory flavor with this incredibly simple Pepperoncini Chicken Skillet. Featuring tender chicken bathed in a creamy, zesty sauce infused with the piquant kick of pepperoncini peppers, this dish is a weeknight warrior's dream. It comes together quickly in just one pan, promising maximum flavor with minimal cleanup.
Prep Time
15 minutes
Cook Time
25 minutes
Total Time
40 minutes
Servings
4 servings
Keywords
Why This Recipe Delivers
- One-pan convenience means less cleanup and more enjoyment.
- Packed with a vibrant, tangy, and subtly spicy flavor profile that excites the palate.
- Quick to prepare, making it an ideal choice for busy weeknights.
- Versatile and satisfying, pairing perfectly with pasta, rice, or a crusty bread.
- Tender chicken enveloped in a rich, creamy sauce makes every bite delicious.
Ingredients
- 680 g (1.5 lbs) boneless, skinless chicken breasts, cut into 2.5 cm (1-inch) cubes
- 1 (450 g / 16 ounce) jar pepperoncini peppers, drained (reserve 60 ml / 1/4 cup of the juice) and roughly chopped
- 1 medium yellow onion, chopped
- 4 cloves garlic, minced
- 30 ml (2 tablespoons) extra virgin olive oil
- 120 ml (1/2 cup) low-sodium chicken broth
- 120 ml (1/2 cup) heavy cream
- 15 ml (1 tablespoon) Italian seasoning
- 1.25 ml (1/4 teaspoon) red pepper flakes (or more, to taste)
- 2.5 ml (1/2 teaspoon) salt (or to taste)
- 1.25 ml (1/4 teaspoon) black pepper (or to taste)
- 30 ml (2 tablespoons) chopped fresh parsley, for garnish
- Optional: Cooked pasta (such as penne or rotini) or rice, for serving
Instructions
- Prepare the chicken and aromatics by patting the chicken cubes dry with paper towels. This crucial step helps achieve a beautiful sear and prevents steaming. Season generously with salt and pepper on all sides. Chop the yellow onion into small, even pieces to ensure it cooks down consistently, and mince the garlic finely. Drain the pepperoncini peppers, making sure to reserve 60 ml (1/4 cup) of the flavorful brine, then roughly chop the peppers for texture and to release their full tang.
- Cook the chicken by heating the olive oil in a large skillet or cast-iron pan over medium-high heat until shimmering. Add the seasoned chicken to the hot skillet in a single layer, ensuring not to overcrowd the pan; cook in batches if necessary. Cook for about 5-7 minutes, turning occasionally, until the chicken is golden brown on all sides and cooked through, reaching an internal temperature of 74°C (165°F). Remove the cooked chicken from the skillet and set it aside on a plate.
- Sauté the aromatics. Reduce the heat to medium. Add the chopped onion to the same skillet, utilizing the flavorful fond left by the chicken. Cook for about 5 minutes, stirring occasionally, until the onion softens and becomes translucent. Add the minced garlic and cook for an additional minute, stirring continuously, until it becomes fragrant. Be careful not to burn the garlic, as it can turn bitter quickly.
- Create the sauce by pouring in the reserved pepperoncini juice. Use a wooden spoon to scrape up any browned bits (fond) from the bottom of the skillet; this deglazing step adds immense depth of flavor to the sauce. Add the chopped pepperoncini peppers, low-sodium chicken broth, Italian seasoning, and red pepper flakes to the skillet. Stir thoroughly to combine all the ingredients.
- Simmer and thicken the sauce. Bring the mixture to a gentle simmer and let it cook for about 5 minutes. This allows the flavors to meld beautifully and the sauce to reduce slightly, intensifying its taste.
- Add cream and warm the chicken. Pour in the heavy cream and stir it into the simmering sauce until fully incorporated. Reduce the heat to low and continue to simmer for another 5 minutes, allowing the sauce to thicken further to a luxurious consistency that will coat the chicken beautifully.
- Combine and season. Return the cooked chicken to the skillet, gently stirring to ensure each piece is thoroughly coated in the rich, creamy pepperoncini sauce. Taste the sauce and adjust the seasoning with additional salt and pepper as needed. Remember that the pepperoncini brine already contributes a significant salty and tangy flavor.
- Serve the dish. Garnish generously with fresh chopped parsley, which adds a vibrant color and fresh herbaceous note that complements the richness of the sauce. Serve the Pepperoncini Chicken Skillet hot over cooked pasta, such as penne or rotini, or fluffy rice to soak up every drop of that incredible sauce.

Tools You’ll Need
- Large skillet (cast iron or heavy-bottomed)
- Cutting board
- Sharp chef's knife
- Measuring spoons and cups
- Wooden spoon or spatula
- Meat thermometer (optional, but recommended)
Essential Success Tips
- Do not overcrowd the skillet when browning the chicken; this ensures a good sear instead of steaming. Cook in batches if necessary.
- Pat the chicken dry thoroughly before seasoning and cooking. Moisture on the surface inhibits browning.
- Scrape up the fond (browned bits) from the bottom of the skillet when deglazing with pepperoncini juice. These bits are full of flavor.
- Taste and adjust seasoning often, especially after adding the pepperoncini juice, as its saltiness can vary.
- Allow the sauce to simmer for the recommended times; this helps the flavors meld and the sauce to thicken properly.
Professional Cooking Secrets
- For an extra layer of flavor, consider adding a splash of dry white wine after the onions and garlic are cooked, before adding the pepperoncini juice. Let it reduce by half to concentrate its essence.
- To achieve an even creamier, richer sauce, whisk in a tablespoon of grated Parmesan cheese at the very end, just before serving. It will melt into the sauce beautifully.
- For a slight smokiness, add a pinch of smoked paprika along with the Italian seasoning. It complements the tang of the pepperoncini wonderfully.
Notes
- Storage: Leftovers can be stored in an airtight container in the refrigerator for up to 3-4 days. Reheat gently on the stovetop or in the microwave.
- Variations: Feel free to add a handful of spinach or sun-dried tomatoes during the last few minutes of simmering for added vegetables and color. You can also swap chicken thighs for breasts for an even more succulent result.
- Spice Level: Adjust the red pepper flakes to your preferred level of heat. For more kick, add a pinch more; for less, omit entirely.
Frequently Asked Questions
Can I make this dish ahead of time?
Yes, this Pepperoncini Chicken Skillet can be made a day in advance. Reheat gently over low heat on the stovetop, adding a splash of chicken broth or cream if the sauce has become too thick. It often tastes even better the next day as the flavors deepen.
What kind of pepperoncini peppers should I use?
Use jarred, pickled pepperoncini peppers. The mild to medium heat varieties are typically found in most supermarkets. Ensure you drain them well but definitely reserve the brine, as it's a key flavor component in the sauce.
Can I use a dairy-free alternative for the heavy cream?
While heavy cream provides the best richness and thickness, you can experiment with full-fat coconut milk or a dairy-free cream alternative for a dairy-free version. The flavor profile will shift slightly, but it can still be delicious. Ensure the alternative is unsweetened.
Nutrition Facts (Per Serving)
Calories: 550, Protein: 45g, Fat: 35g, Carbs: 15g (estimates per serving, without pasta/rice)
Allergy Information
Contains dairy. For a gluten-free meal, ensure you serve with gluten-free pasta or rice. Always check ingredient labels for hidden allergens.
No comment