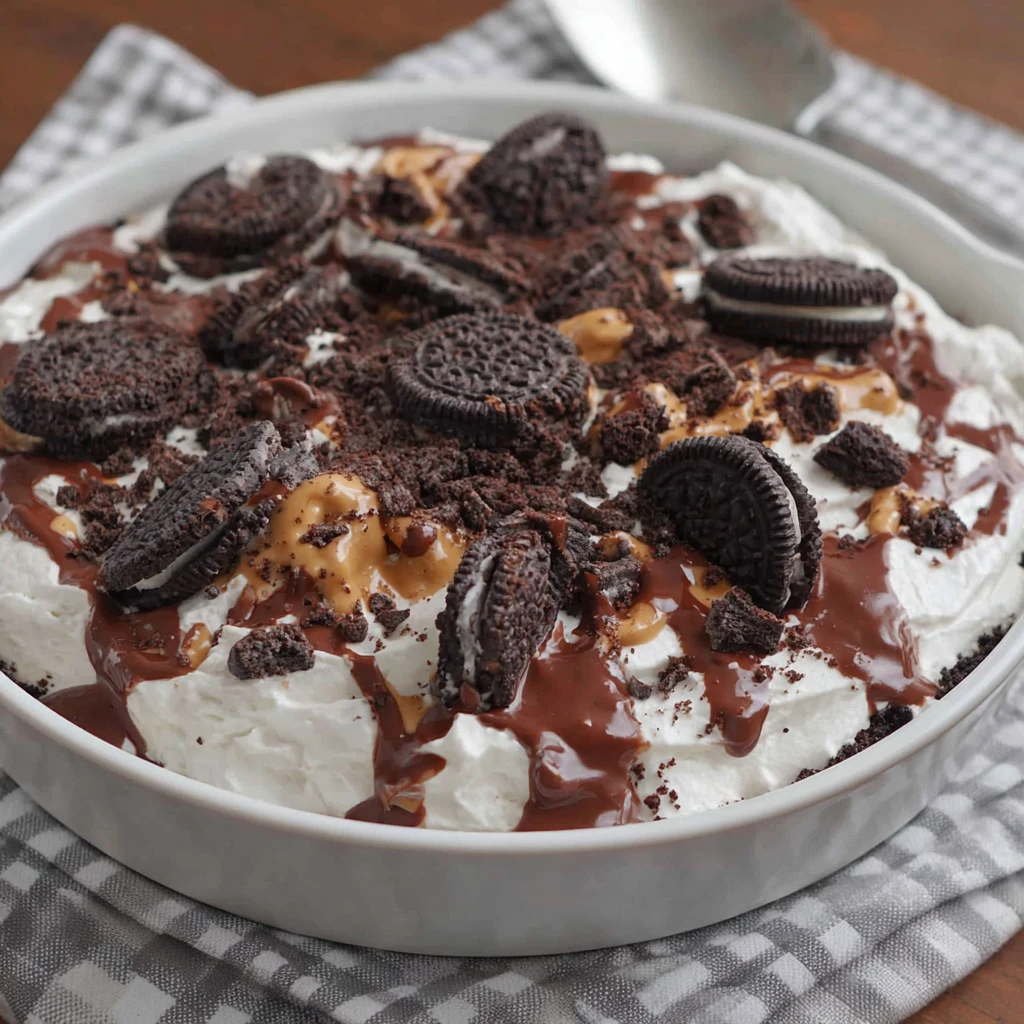
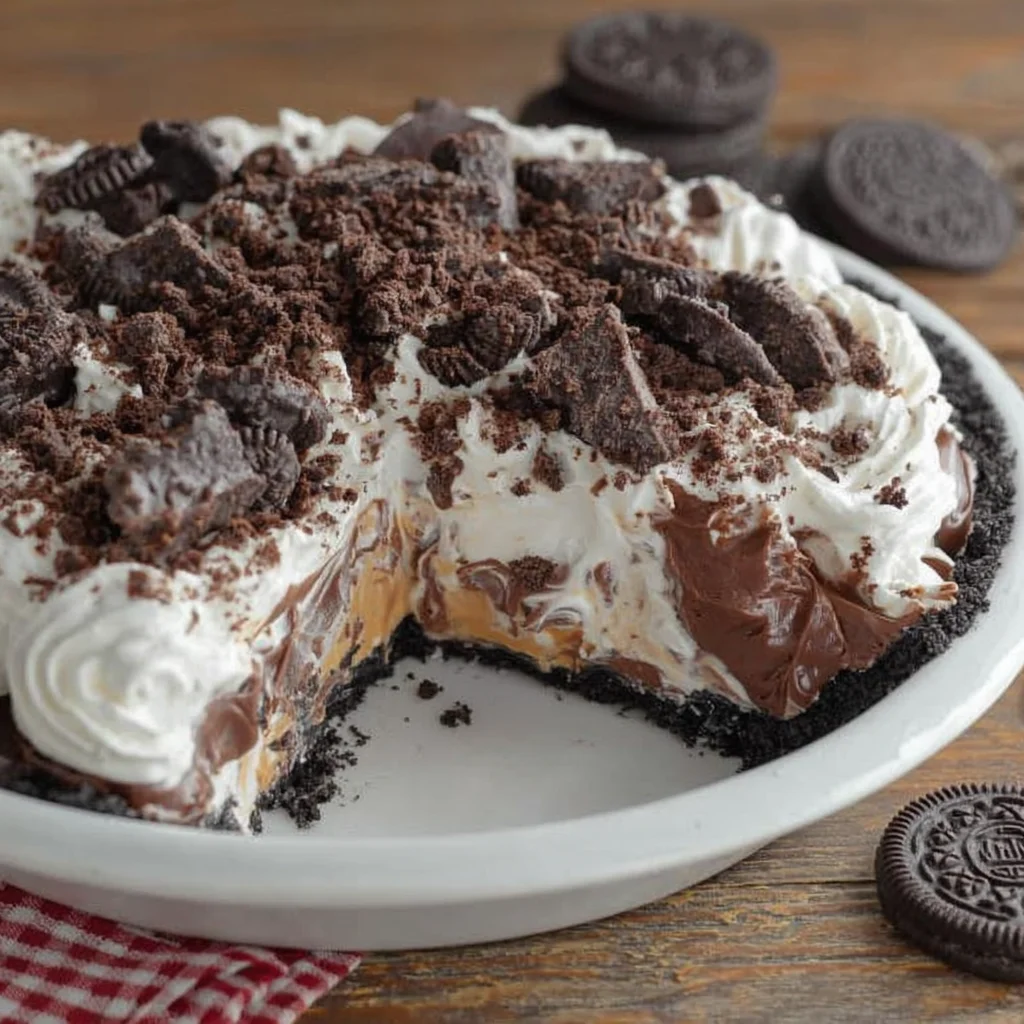
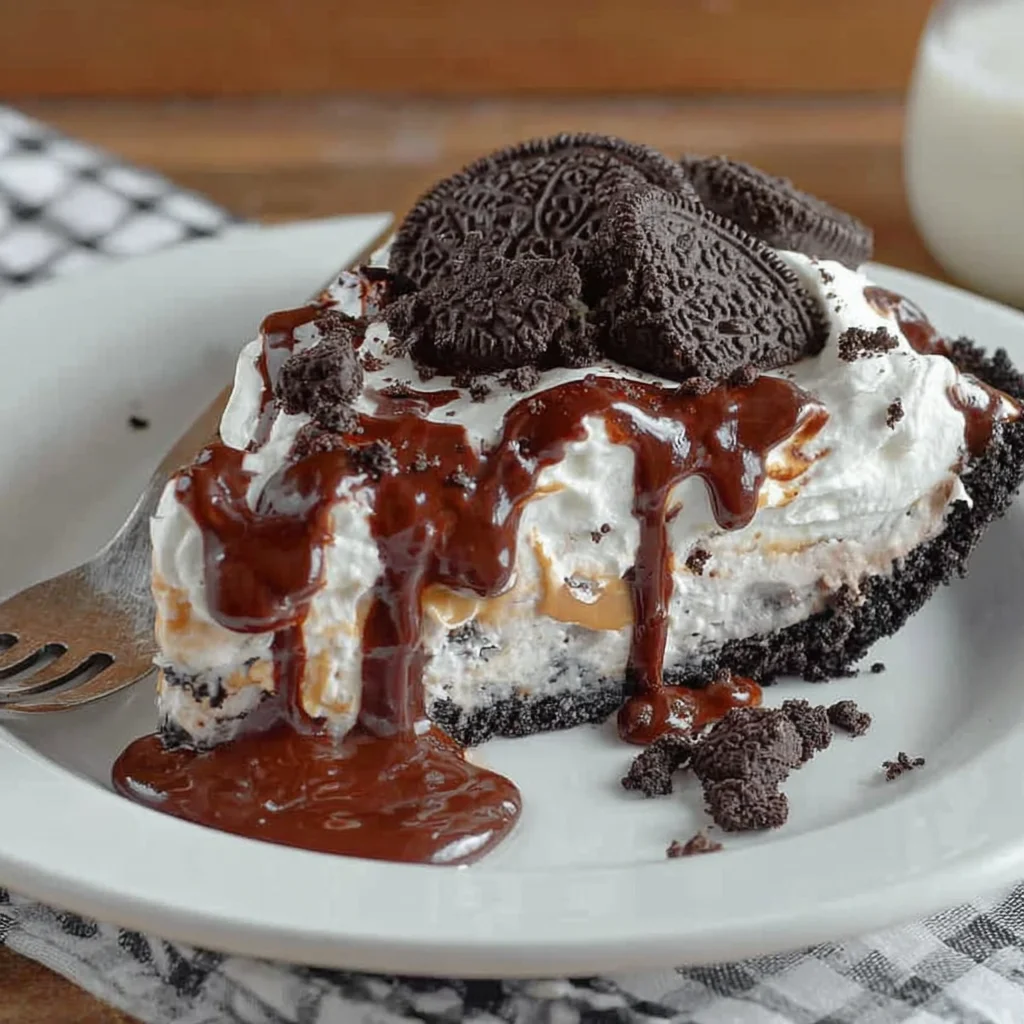
No-Bake Oreo Peanut Butter Pie Recipe
This decadent No-Bake Oreo Peanut Butter Pie is a dream come true for dessert lovers, combining irresistible layers of rich chocolate and creamy peanut butter. Featuring a crunchy Oreo crust, a velvety smooth peanut butter filling, and a luscious chocolate pudding layer, all crowned with whipped topping and delightful garnishes. It's an effortlessly elegant dessert perfect for any occasion, requiring no oven and minimal effort for maximum indulgence.
Prep Time
30 minutes
Cook Time
0 minutes
Total Time
4 hours 30 minutes (including chilling)
Servings
8-10 servings
Keywords
Why This Recipe Delivers
- Effortless Indulgence: Requires no baking, making it perfect for busy schedules or hot days.
- Irresistible Flavor Combination: The classic pairing of chocolate and peanut butter is a guaranteed crowd-pleaser.
- Layered Perfection: Multiple distinct layers create a visually appealing and texturally diverse dessert.
- Make-Ahead Marvel: Can be prepared hours or even a day in advance, ideal for entertaining.
- Customizably Delicious: Easy to adapt with different garnishes or milk alternatives.
Ingredients
- 300g (3 cups) chocolate creme sandwich cookies, crushed
- 56g (4 tablespoons) unsalted butter, melted
- 450g (16 ounces) cream cheese, softened to room temperature
- 167g (5.9 ounces) instant chocolate pudding mix (one large package)
- 240g (2 cups) powdered sugar (confectioners' sugar)
- 60ml (1/4 cup) oat milk or regular dairy milk (for peanut butter layer)
- 250g (1 cup) creamy peanut butter
- 470ml (2 cups) cold milk for pudding (reduce to 350ml or 1.5 cups if using dairy-free milk)
- 225g (8 ounces) whipped topping, thawed (e.g., Cool Whip)
- For Garnish: Chopped roasted peanuts, additional crushed chocolate creme cookies
Instructions
- Begin by meticulously crushing the chocolate creme sandwich cookies until fine crumbs are formed. You can achieve this using a food processor or by placing them in a sealed plastic bag and crushing with a rolling pin. Evenly spread these crushed cookies across the bottom of a 7×10 inch (or similar sized) baking dish. Pour the warm melted butter uniformly over the cookie crumbs. Use the bottom of a measuring cup or a flat object to gently but firmly press the mixture into a compact, even crust. Place the dish in the refrigerator to chill while you proceed with the next steps.
- In a spacious mixing bowl, combine the softened cream cheese, the 60ml (1/4 cup) of milk (oat or dairy), the creamy peanut butter, and the powdered sugar. Beat these ingredients together with an electric mixer on medium speed until the mixture is completely smooth, light, and creamy, ensuring no lumps remain. This ensures a silken texture for your filling. Carefully spread this luscious peanut butter mixture over the thoroughly chilled cookie crust, making sure to create an even layer from edge to edge.
- Now, prepare the instant chocolate pudding. In a separate bowl, whisk together the instant chocolate pudding mix with 470ml (2 cups) of cold milk. If you are using a dairy-free milk alternative, reduce the milk to 350ml (1.5 cups) to ensure the pudding sets properly and achieves the desired thick consistency. Whisk continuously for about 2 minutes until the mixture begins to thicken significantly. Once thickened, gently pour the chocolate pudding over the peanut butter layer, spreading it out evenly with a spatula.
- Conclude the pie assembly by generously spreading the thawed whipped topping over the chocolate pudding layer. For an extra touch of texture and flavor, garnish the top with a sprinkle of chopped roasted peanuts and a scattering of additional crushed chocolate creme cookies. This not only enhances visual appeal but also adds a delightful crunch.
- This crucial step ensures the pie sets perfectly. Cover the baking dish loosely with plastic wrap and refrigerate for a minimum of 4 hours. Ideally, for the firmest and most sliceable results, chill the pie overnight. Once fully set, slice into portions and serve this delightful No-Bake Oreo Peanut Butter Pie.

Tools You’ll Need
- 7×10 inch (or similar) baking dish
- Large mixing bowls (2-3)
- Electric hand mixer or stand mixer
- Whisk
- Measuring cups and spoons (metric and imperial)
- Rubber spatula or offset spatula
- Food processor (optional, for crushing cookies)
- Rolling pin (optional, for crushing cookies)
Essential Success Tips
- Ensure cream cheese is at true room temperature for a lump-free, smooth peanut butter filling. Take it out 30-60 minutes before starting.
- Press the cookie crust firmly. This prevents it from crumbling when serving.
- For the chocolate pudding, use very cold milk and whisk vigorously for the full 2 minutes to ensure it sets quickly and properly.
- If using dairy-free milk for the pudding, strictly adhere to the reduced milk quantity (1.5 cups / 350ml) as recommended to achieve the correct setting consistency.
- Allow ample chilling time. A minimum of 4 hours is necessary, but overnight chilling yields the best, most stable slices.
Professional Cooking Secrets
- To intensify the chocolate flavor in the crust, add 1-2 tablespoons of unsweetened cocoa powder to the crushed cookies before mixing with butter.
- For a gourmet touch, consider using a high-quality, natural creamy peanut butter for the filling, ensuring it's well-stirred to prevent oil separation.
- Elevate your whipped topping by making fresh whipped cream with a touch of vanilla extract and powdered sugar instead of store-bought, if time allows.
Notes
- Storage: Store leftover pie covered in the refrigerator for up to 3-4 days.
- Variations: Try using chocolate peanut butter sandwich cookies for the crust, or add mini chocolate chips to the peanut butter layer for extra texture.
- Freezing: While technically possible, freezing may alter the texture of the pudding and whipped topping. If freezing, consume within 2 weeks for best quality.
Frequently Asked Questions
Can I make this pie gluten-free?
Yes, absolutely! Simply substitute the chocolate creme sandwich cookies with gluten-free chocolate sandwich cookies. Ensure all other ingredients, like the instant pudding mix, are certified gluten-free.
How can I prevent the pie from becoming watery?
The most common cause of a watery pie is not allowing enough chilling time, or using too much liquid in the pudding. Ensure your instant pudding sets properly by using very cold milk and whisking for the full recommended time. If using dairy-free milk, always reduce the amount as specified in the instructions.
Can I use homemade whipped cream instead of store-bought whipped topping?
Yes, homemade whipped cream is an excellent alternative! Whip 250ml (1 cup) of heavy cream with 30g (2 tablespoons) of powdered sugar and 5ml (1 teaspoon) of vanilla extract until stiff peaks form. Spread it over the pie just before the final chill.
Nutrition Facts (Per Serving)
Calories: 580, Protein: 12g, Fat: 40g, Carbs: 48g (per serving, estimated based on 10 servings)
Allergy Information
Contains dairy, peanuts, and gluten. For a gluten-free version, use gluten-free chocolate sandwich cookies. To make it dairy-free, ensure all milk and cream cheese alternatives are dairy-free.

No comment