
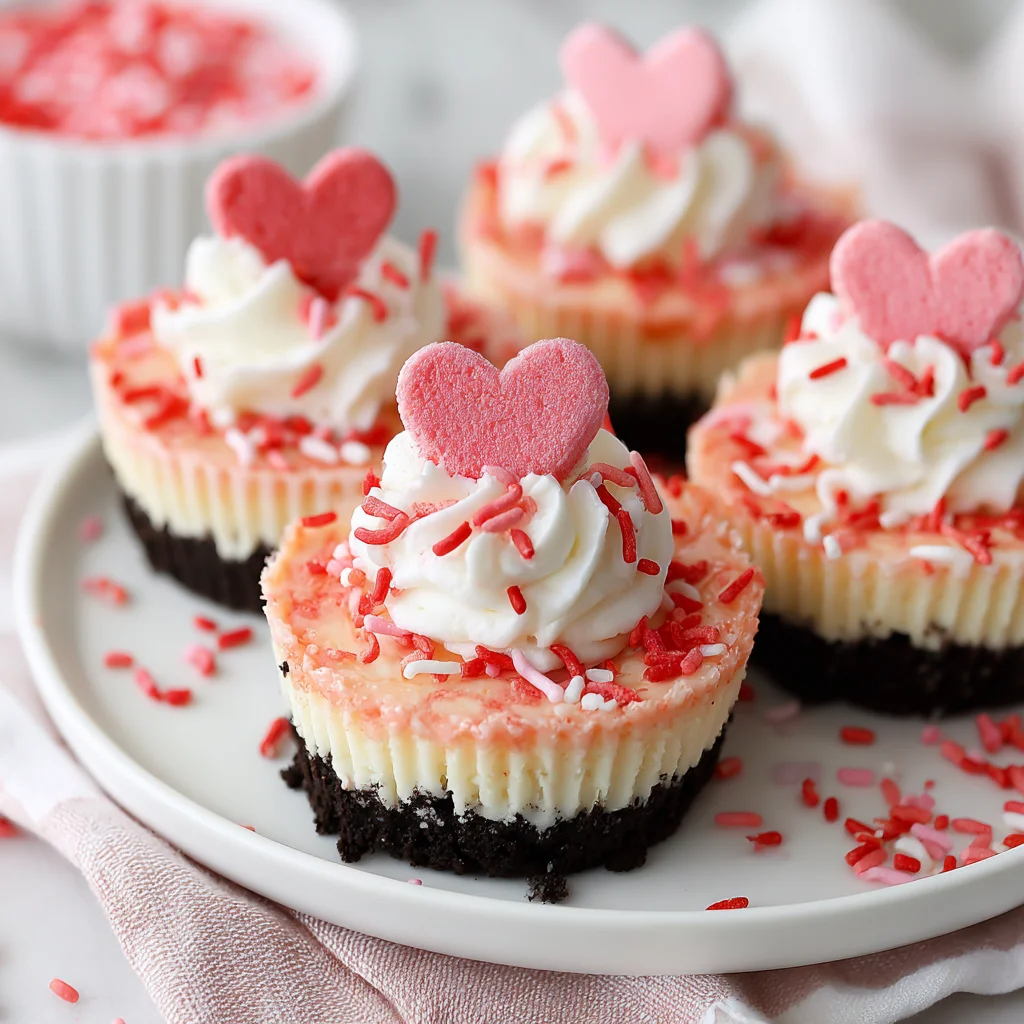
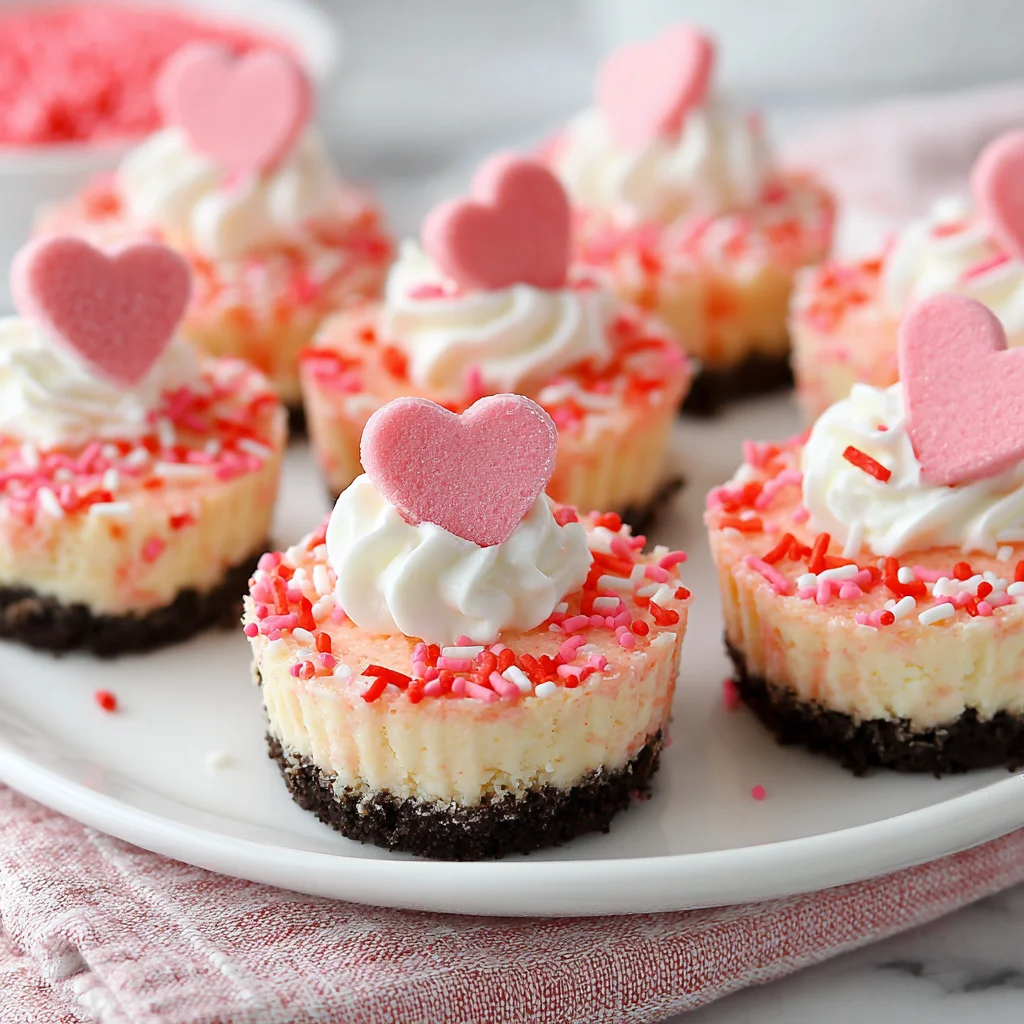
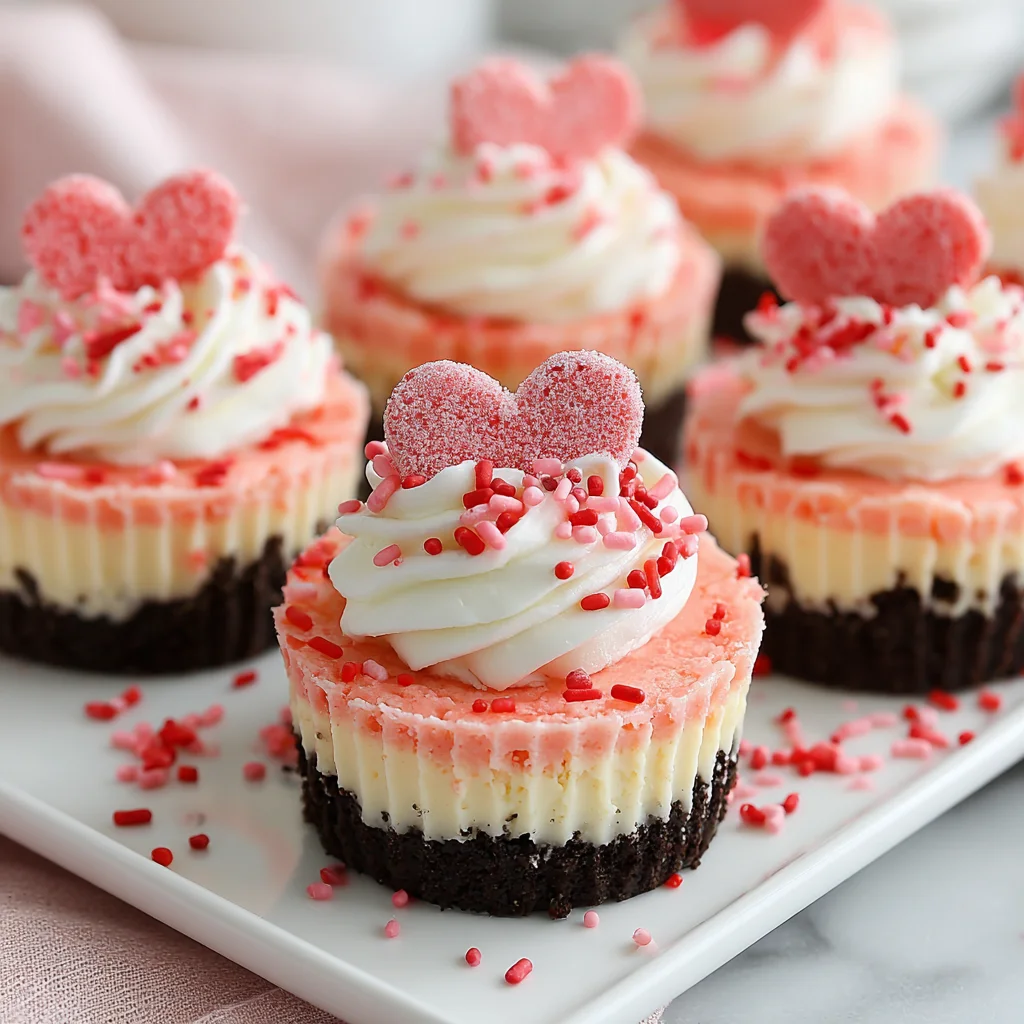
Mini Valentine Cheesecakes
These adorable Mini Valentine Cheesecakes are the perfect bite-sized treat to celebrate love. Featuring a delightful Oreo crust and a creamy, vibrant pink cheesecake filling, they are surprisingly simple to make yet impressive enough for any special occasion. Each mini cheesecake offers a rich, smooth texture that melts in your mouth, making them an irresistible dessert for Valentine's Day or any romantic gesture.
Prep Time
20 minutes
Cook Time
15-17 minutes
Total Time
Approx. 4-5 hours (includes chilling time)
Servings
Makes 12 mini cheesecakes
Keywords
Why This Recipe Delivers
- Perfectly portioned for individual enjoyment, making them ideal for sharing or a sweet personal treat.
- Features a rich, creamy texture contrasted beautifully with a crisp, chocolatey Oreo crust.
- Vibrantly colored with a charming pink hue, perfect for Valentine's Day or any love-themed occasion.
- Relatively simple to prepare, requiring basic baking skills and yielding impressive results.
- Can be made ahead of time, allowing for stress-free entertaining or last-minute celebrations.
Ingredients
- For the Crust:
- 90 grams (1 cup) Oreo cookie crumbs (from approximately 10-11 standard Oreo cookies)
- 37.5 grams (2.5 tablespoons) unsalted butter, melted
- For the Cheesecake Filling:
- 452 grams (two 226g/8 oz packages) cream cheese, full-fat, softened at room temperature
- 100 grams (1/2 cup) granulated sugar
- 2 large eggs, at room temperature
- 5 milliliters (1 teaspoon) pure vanilla extract
- Neon red food coloring gel (adjust to desired pink hue)
- For Garnish (Optional):
- Whipped cream
- Valentine-themed sprinkles
Instructions
- Preheat your oven to 175°C (350°F). Prepare a standard 12-cup muffin tin by lining each cup with paper cupcake liners. This ensures easy removal and a clean presentation for your mini cheesecakes.
- Prepare the Oreo crust. In a food processor, pulse the whole Oreo cookies (approximately 10-11 cookies, depending on size, including the cream filling) until finely ground into crumbs. Add the melted butter to the crumbs and pulse again until the mixture is well combined and resembles wet sand. The butter helps bind the crumbs together for a sturdy crust.
- Distribute the crust mixture evenly among the 12 prepared cupcake liners. Using the bottom of a small glass or your fingers, firmly press the crumbs into the bottom of each liner. A compact crust is essential for holding its shape once baked.
- In a medium-sized mixing bowl, using an electric mixer on medium speed, beat the softened cream cheese and granulated sugar until the mixture is completely smooth and free of lumps. This step is crucial for a silky cheesecake texture, so ensure the cream cheese is truly at room temperature.
- Reduce the mixer speed to low and gently beat in the eggs one at a time, mixing just until combined after each addition. Overmixing the eggs can incorporate too much air, which can lead to cracks in the cheesecake. Stir in the vanilla extract until fully incorporated.
- Add the neon red food coloring gel to the cheesecake batter, starting with a few drops and mixing until you achieve your desired vibrant pink color. Add more coloring gradually until you reach the perfect Valentine's hue.
- Carefully spoon approximately 60 milliliters (1/4 cup) of the pink cheesecake mixture into each prepared cupcake liner, filling them evenly. Tap the muffin tin gently on the counter a few times to release any air bubbles and ensure a smooth top.
- Bake the cheesecakes in the preheated oven for 15-17 minutes. The centers should appear mostly set but still have a slight jiggle when the pan is gently shaken. This indicates they are cooked through without being overbaked. Remove the cheesecakes from the oven and let them cool completely in the muffin pan on a wire rack. This gradual cooling prevents cracking.
- Once completely cool, transfer the muffin tin to the refrigerator and chill the mini cheesecakes for at least 3-4 hours, or preferably overnight, until they are firm. Chilling is essential for the cheesecake to set properly and achieve its dense, creamy texture.
- Before serving, carefully remove the cheesecakes from their liners. If desired, garnish each mini cheesecake with a dollop of whipped cream and a sprinkle of festive Valentine-themed sprinkles for an extra touch of sweetness and charm.
Tools You’ll Need
- Standard 12-cup muffin tin
- Paper cupcake liners
- Food processor (or a zip-top bag and rolling pin for crumbs)
- Medium mixing bowl
- Electric hand mixer or stand mixer
- Measuring cups and spoons
- Wire cooling rack
- Small spoon or portion scoop
Essential Success Tips
- Ensure your cream cheese and eggs are at absolute room temperature before mixing. This creates a smoother batter and prevents lumps, contributing to a wonderfully creamy texture.
- Do not overmix the cheesecake batter, especially after adding the eggs. Overmixing incorporates too much air, which can cause the cheesecakes to puff up excessively in the oven and then sink or crack upon cooling.
- Bake just until the centers have a slight jiggle. Cheesecakes continue to cook and set as they cool. Overbaking leads to dry, cracked cheesecakes.
- Allow the cheesecakes to cool completely in the pan on a wire rack before refrigerating. Sudden temperature changes are a common cause of cracks.
- Chill the cheesecakes for at least 3-4 hours, or overnight, for the best texture and firmness. This crucial step allows the cheesecake to fully set.
Professional Cooking Secrets
- For an extra layer of flavor in your Oreo crust, try adding a pinch of sea salt to the crumbs before mixing with butter. It subtly enhances the chocolate notes beautifully.
- To achieve the smoothest cheesecake batter, consider sifting your granulated sugar before adding it to the cream cheese. This removes any potential clumps and ensures a perfectly uniform, silky texture.
- When using food coloring, opt for gel food coloring over liquid. Gel colors are more concentrated, deliver vibrant hues with less product, and won't thin out your batter as much.
Notes
- Storage: Store leftover Mini Valentine Cheesecakes in an airtight container in the refrigerator for up to 3-4 days. They are best enjoyed chilled.
- Flavor Variations: Experiment with different extracts! A touch of almond extract instead of vanilla can offer a lovely, subtle twist. For a chocolate lover's version, consider adding a tablespoon of unsweetened cocoa powder to the cheesecake batter.
- Crust Variations: Instead of Oreos, you could use graham crackers or shortbread cookies for the crust, adjusting butter as needed to achieve a wet sand consistency.
Frequently Asked Questions
Can I make these mini cheesecakes ahead of time?
Absolutely! These Mini Valentine Cheesecakes are perfect for making in advance. You can prepare them up to 2-3 days before serving. Store them covered in the refrigerator, and add your garnishes just before serving for the freshest look.
Why did my mini cheesecakes crack?
Cracking is often caused by overbaking, overmixing the batter (especially after adding eggs), or a sudden temperature change during cooling. Ensure your ingredients are at room temperature, mix gently, bake until just set with a slight jiggle, and allow them to cool slowly and completely in the pan before chilling.
Can I use low-fat cream cheese?
While technically possible, for the best results and a truly rich, creamy texture, we highly recommend using full-fat cream cheese. Low-fat varieties can result in a thinner, less luxurious cheesecake that may not set as firmly or have the characteristic indulgent taste.
Nutrition Facts (Per Serving)
Approximate per cheesecake (without optional toppings): Calories: 310, Protein: 5g, Fat: 22g, Carbs: 25g.
Allergy Information
Contains dairy (cream cheese, butter, optional whipped cream) and gluten (Oreo cookies). For a gluten-free version, use gluten-free chocolate sandwich cookies for the crust. For a dairy-free option, substitute with plant-based cream cheese and butter alternatives.


No comment