How to Make The Best Banana Pudding Poke Cake At Home
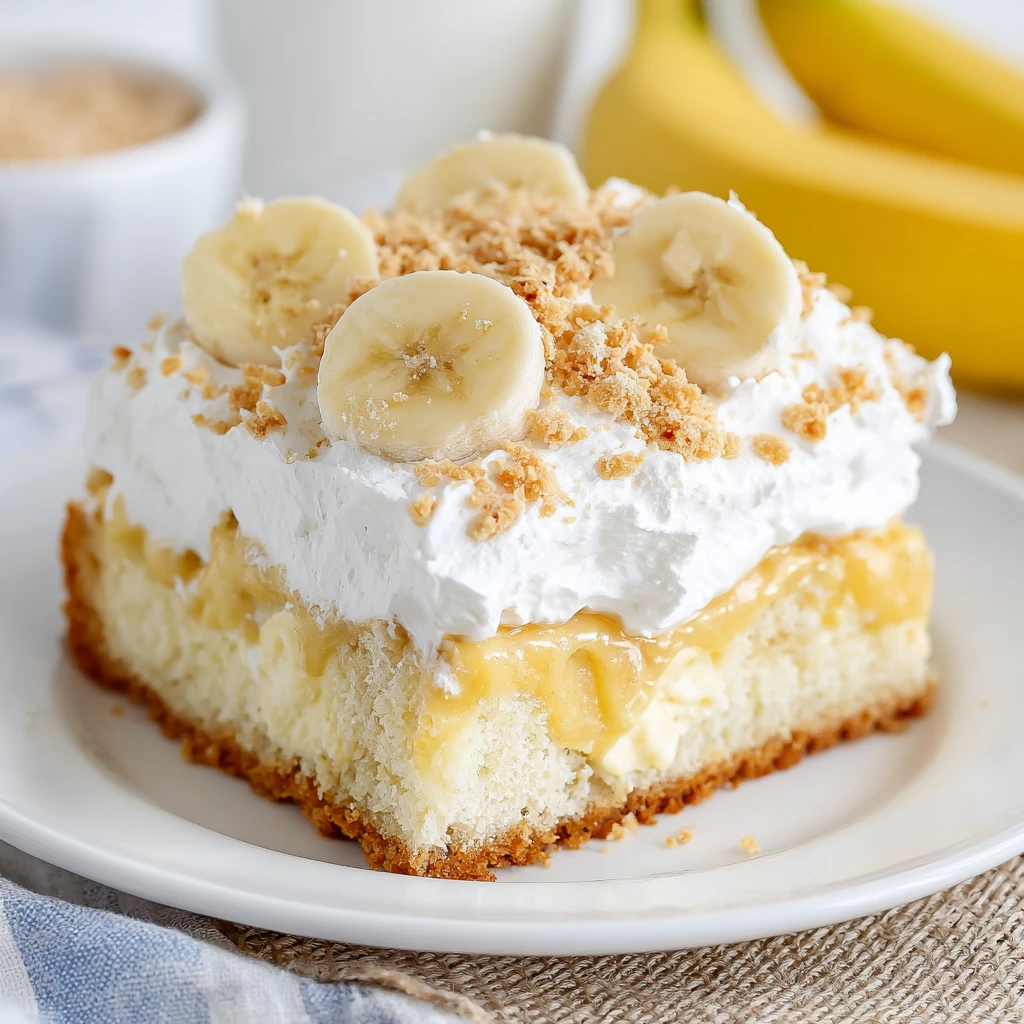
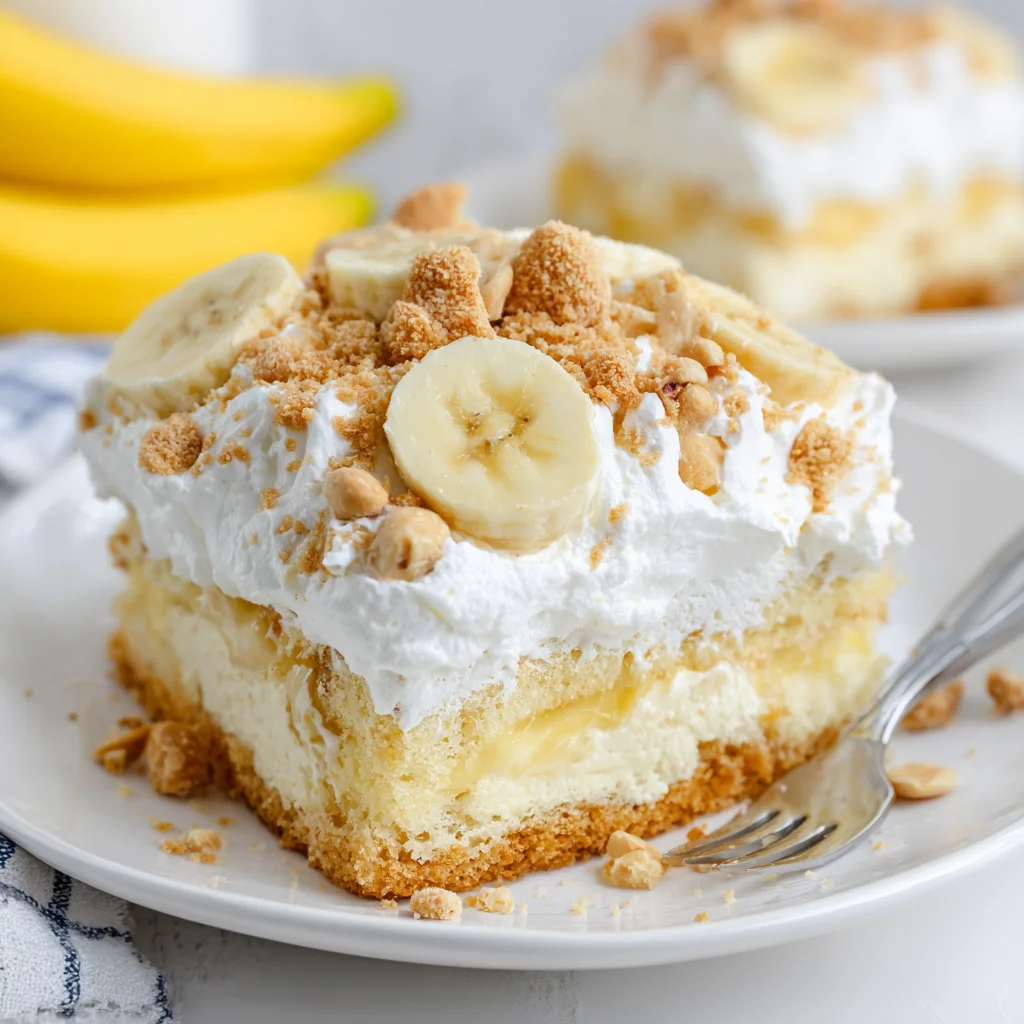
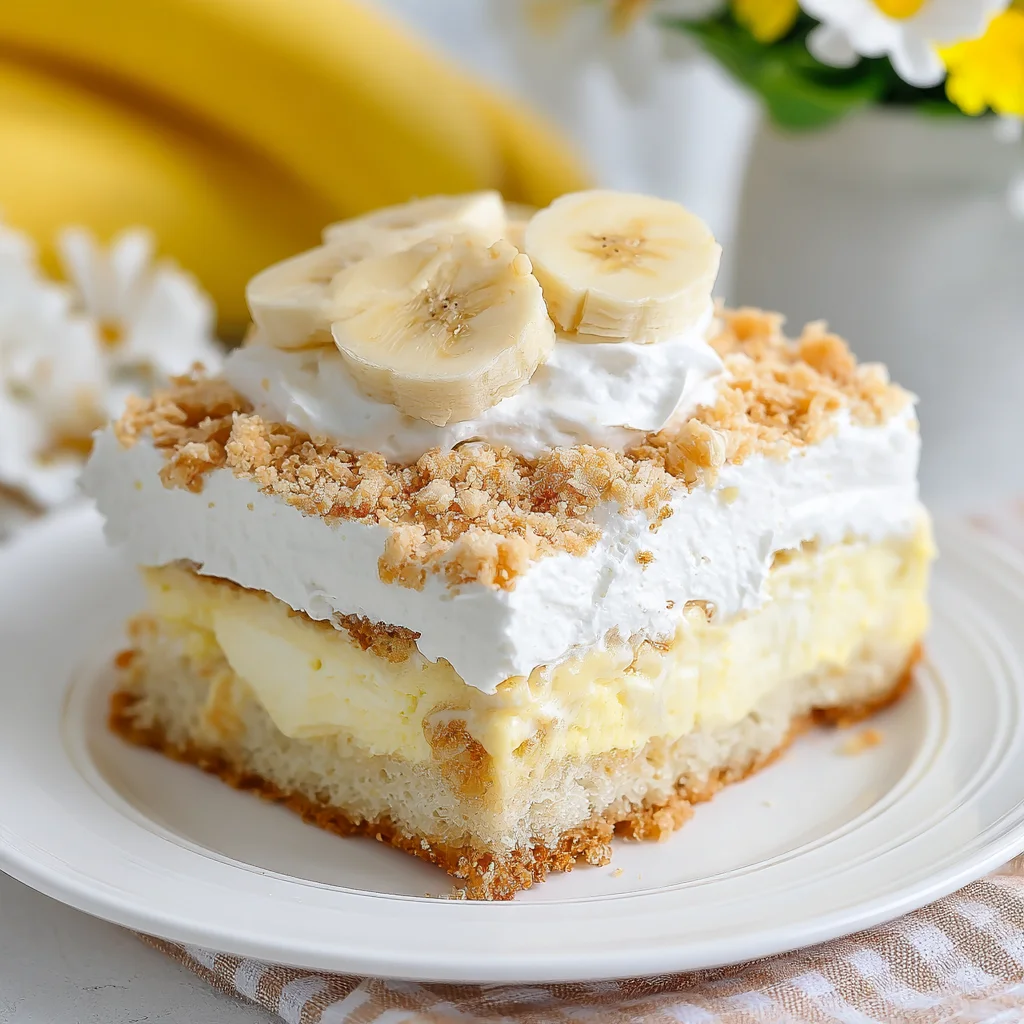
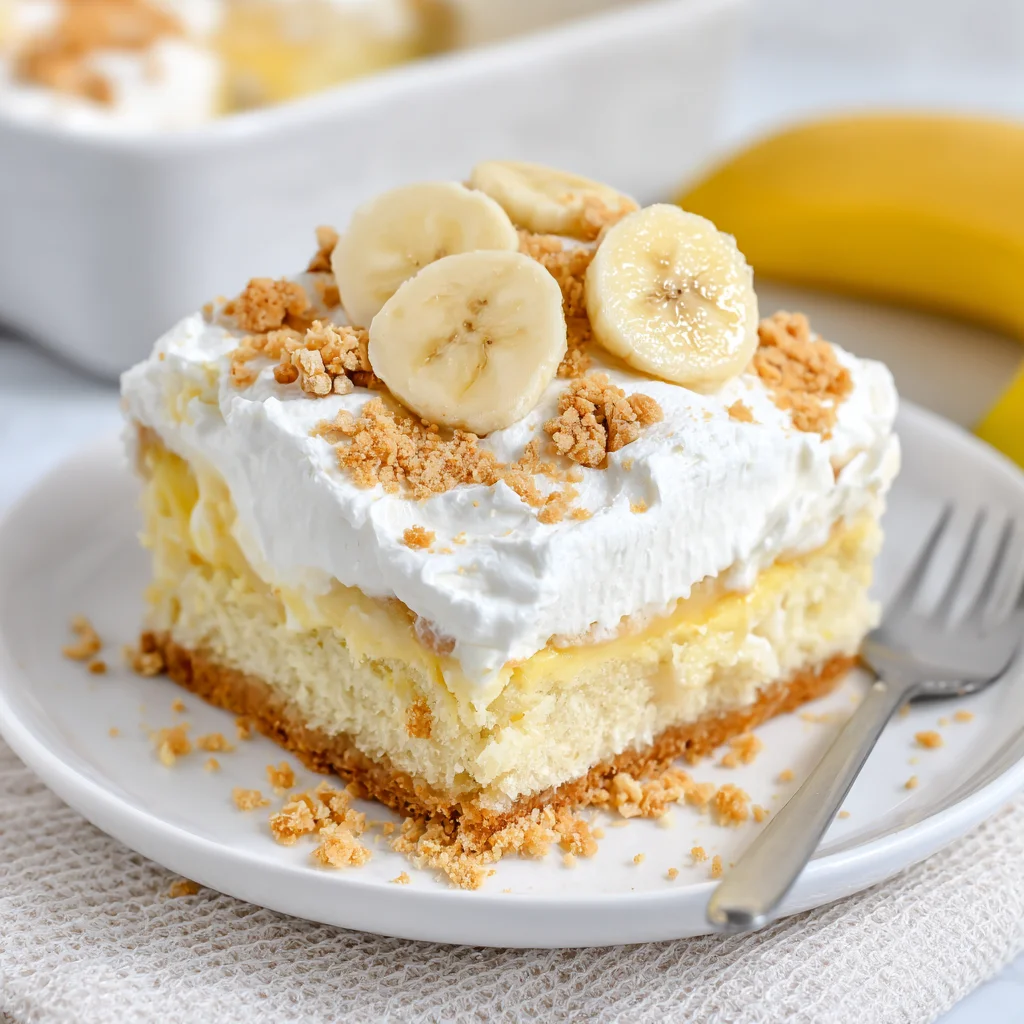
Indulge in a truly extraordinary dessert experience with The Best Banana Pudding Poke Cake. This delightful cake combines a moist, tender yellow cake infused with creamy banana pudding, topped with a luscious layer of whipped cream, fresh banana slices, and a sprinkle of crunchy vanilla wafer crumbs. It's a symphony of textures and flavors that evokes classic comfort while offering a fun, unique twist.
Prep Time
30 minutes
Cook Time
35 minutes
Total Time
2 hours 5 minutes
Servings
12 slices
Keywords
Why This Recipe Delivers
- Combines the beloved flavors of classic banana pudding with a moist, tender cake.
- Effortlessly elegant, making it perfect for gatherings or a comforting treat at home.
- Simple to prepare, utilizing a convenient cake mix for a foolproof baking experience.
- Features multiple textures, from soft cake to creamy pudding and crunchy wafers.
- Always a crowd-pleaser, delivering nostalgic comfort in every bite.
Ingredients
- 1 box (approx. 432 grams) yellow cake mix
- 110 milliliters (½ cup) neutral oil, such as vegetable or canola
- 240 milliliters (1 cup) water
- 3 large eggs
- 470 milliliters (2 cups) prepared banana pudding (can use instant)
- 226 grams (8 ounces) prepared cool whipping cream (e.g., Cool Whip)
- 3 medium ripe bananas, sliced
- 120 grams (2 cups) vanilla wafer crumbs
Instructions
- Preheat your oven to 175°C (350°F). Prepare a 23×33 cm (9×13 inch) baking pan by lightly spraying the bottom with a nonstick cooking spray to ensure the cake releases easily after baking.
- In a large mixing bowl, combine the yellow cake mix, 3 large eggs, 240 milliliters (1 cup) of water, and 110 grams (½ cup) of neutral oil. Mix with an electric mixer on medium speed for approximately 3 to 5 minutes until the batter is just combined and smooth. It is crucial not to over-mix, as excessive mixing can overdevelop the gluten, leading to a denser, tougher cake texture.
- Pour the prepared cake batter evenly into the sprayed baking pan. Gently tap the pan on your counter a few times to help release any trapped air bubbles and ensure the batter settles uniformly across the pan. This promotes even baking.
- Bake the cake in the preheated oven for 35 minutes. To check for doneness, insert a toothpick into the center of the cake; if it comes out clean, the cake is fully cooked. Remove the cake from the oven and transfer it to a wire cooling rack to begin cooling for 15 minutes. This allows the cake to slightly firm up before chilling.
- After the initial cooling period, place the cake, still in its pan, into the refrigerator for another 15 minutes. Chilling the cake further at this stage will make it easier to handle and poke holes without crumbling.
- Once the cake is sufficiently cool, remove it from the refrigerator. Using the handle of a wooden spoon or a similar blunt, round object, carefully poke holes evenly throughout the entire surface of the cake. Aim for approximately 2.5 cm (1 inch) of space between each hole. Ensure the holes penetrate about three-quarters of the way through the cake's thickness, creating reservoirs for the pudding without going entirely through to the bottom.
- Evenly pour the prepared banana pudding over the entire cake, making sure the pudding generously seeps into each poked hole. If using instant banana pudding, prepare it according to the package directions just before this step to ensure it's at the right consistency for pouring.
- Place the cake back into the refrigerator to set for about 15 minutes. This allows the pudding to fully absorb into the cake and begin to firm up, creating that signature moist, infused texture.
- Once the pudding layer has set, gently and evenly spread the cool whipping cream across the entire top surface of the cake, creating a smooth, luscious topping that covers the pudding layer completely.
- Slice the fresh, ripe bananas into even rounds. Arrange the sliced bananas decoratively across the top of the whipped cream layer. You can create any design you prefer, from neat rows to a more artistic pattern.
- Generously sprinkle the vanilla wafer crumbs over the top of the banana slices and whipped cream. The crumbs add a delightful crunch and classic banana pudding flavor element.
- Return the finished cake to the refrigerator to chill for at least 30 minutes. This final chilling period is essential for all the layers to meld together beautifully and for the pudding and whipped cream to set perfectly, resulting in a cohesive and refreshing dessert.
- Thirteenth Step: Once thoroughly chilled, cut the cake into 12 even slices using a sharp knife. Serve immediately and enjoy this delightful homemade Banana Pudding Poke Cake!
Tools You’ll Need
- 9×13 inch (23×33 cm) baking pan
- Large mixing bowl
- Electric mixer (handheld or stand mixer)
- Measuring cups and spoons
- Spatula or offset knife for spreading
- Wire cooling rack
- Wooden spoon handle or similar blunt object for poking holes
- Sharp knife for slicing
Essential Success Tips
- Ensure your bananas are ripe but not overly mushy. They should have a few brown spots for optimal sweetness and flavor.
- Do not skip the chilling steps! They are vital for the pudding to set properly into the cake and for the final dessert to be firm and easy to slice.
- When poking holes, aim for consistent depth and spacing. This ensures an even distribution of the banana pudding throughout the cake.
- Allow the cake to cool completely before adding the pudding and whipped cream. Warm cake will melt the toppings.
- For the best flavor and texture, prepare your banana pudding just before pouring it over the cake, especially if using instant pudding, to ensure it's at its freshest consistency.
Professional Cooking Secrets
- For an elevated flavor, consider making homemade vanilla wafers instead of store-bought. Their rich butteriness adds an unparalleled depth to the crumb topping.
- Infuse extra banana flavor by using a ripe banana in the cake batter itself (mashed) and slightly reducing the liquid, or by brushing the poked cake with a touch of banana liqueur before adding the pudding.
- To achieve perfectly clean slices, dip your knife in hot water and wipe it clean between each cut. This prevents the layers from dragging and creates beautiful presentation.
Notes
- Storage: Store leftover Banana Pudding Poke Cake covered in the refrigerator for up to 3-4 days. The bananas may brown slightly over time, but the flavor will remain delicious.
- Variation: For a richer cake, substitute milk for water in the cake mix batter. You can also experiment with different pudding flavors, like vanilla or butterscotch, for a twist.
- Make Ahead: This cake is excellent for making a day in advance. The flavors meld beautifully overnight in the refrigerator, and it's perfect for entertaining.
Frequently Asked Questions
Can I use fresh whipped cream instead of cool whipping cream?
Yes, you can absolutely use fresh whipped cream for an even richer taste. However, be aware that fresh whipped cream tends to soften more quickly than stabilized cool whipping cream, so keep the cake well-chilled until serving.
How can I prevent my bananas from browning on top of the cake?
To minimize browning, you can lightly toss the sliced bananas in a small amount of lemon juice or a fruit protector like ascorbic acid powder before layering them on the cake. This will help preserve their color longer.
Can I make individual servings of this poke cake?
Yes, you can bake the yellow cake in a muffin tin to create individual poke cake cupcakes. Reduce baking time accordingly (usually 18-22 minutes) and follow the same poking and layering steps for delightful single-serve desserts.
Nutrition Facts (Per Serving)
Estimated per slice (1/12th of cake): Calories: 420-480, Protein: 5-7g, Fat: 22-28g, Carbs: 50-60g. Note: Nutritional values can vary based on specific brands of cake mix, pudding, and whipping cream used.
Allergy Information
Contains wheat, dairy, and eggs. Always check specific product labels for cake mix, pudding, and cool whip for detailed allergen information, especially regarding soy or other potential allergens. For a gluten-free version, use a certified gluten-free yellow cake mix and ensure all other ingredients are gluten-free.


No comment