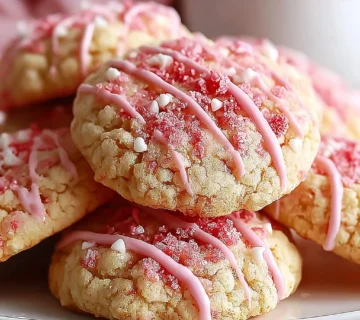
Delicious Red Velvet Chocolate Chip Cookies Recipe to Try Today
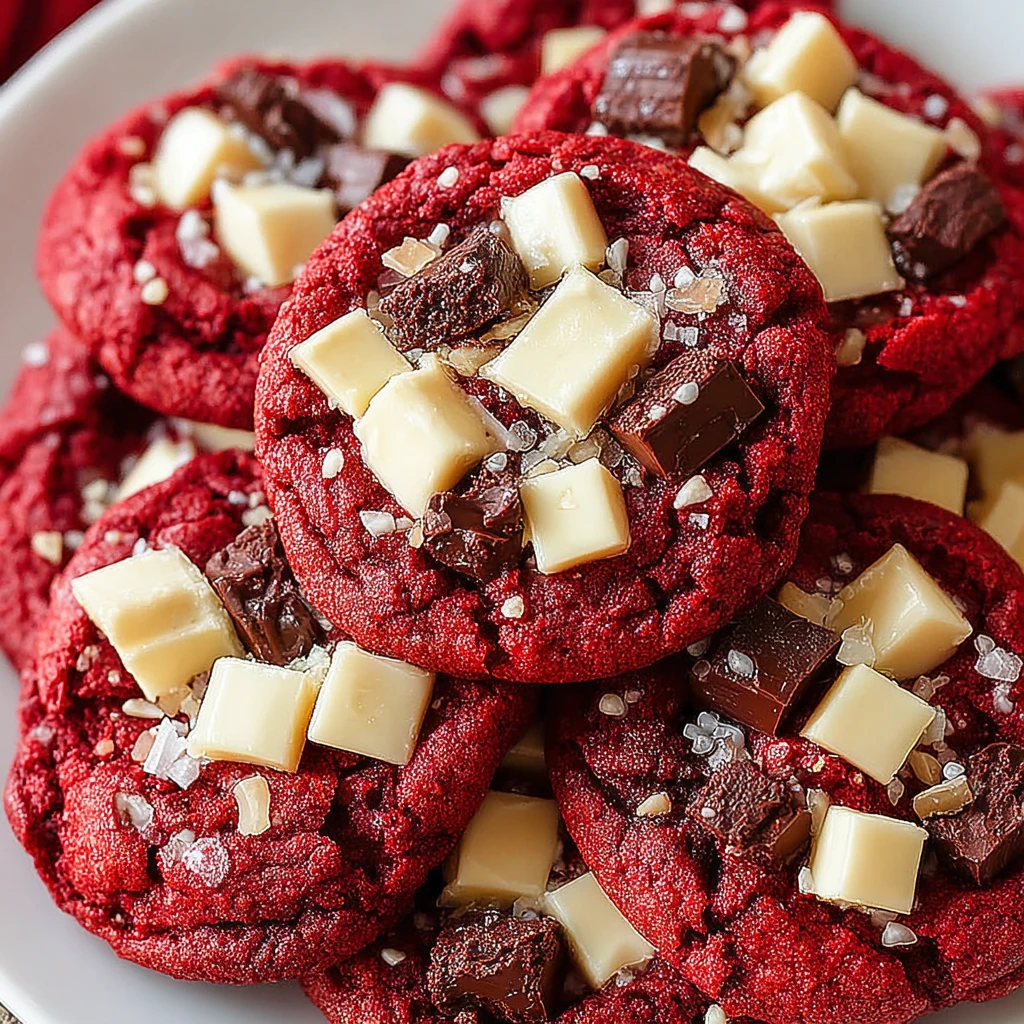
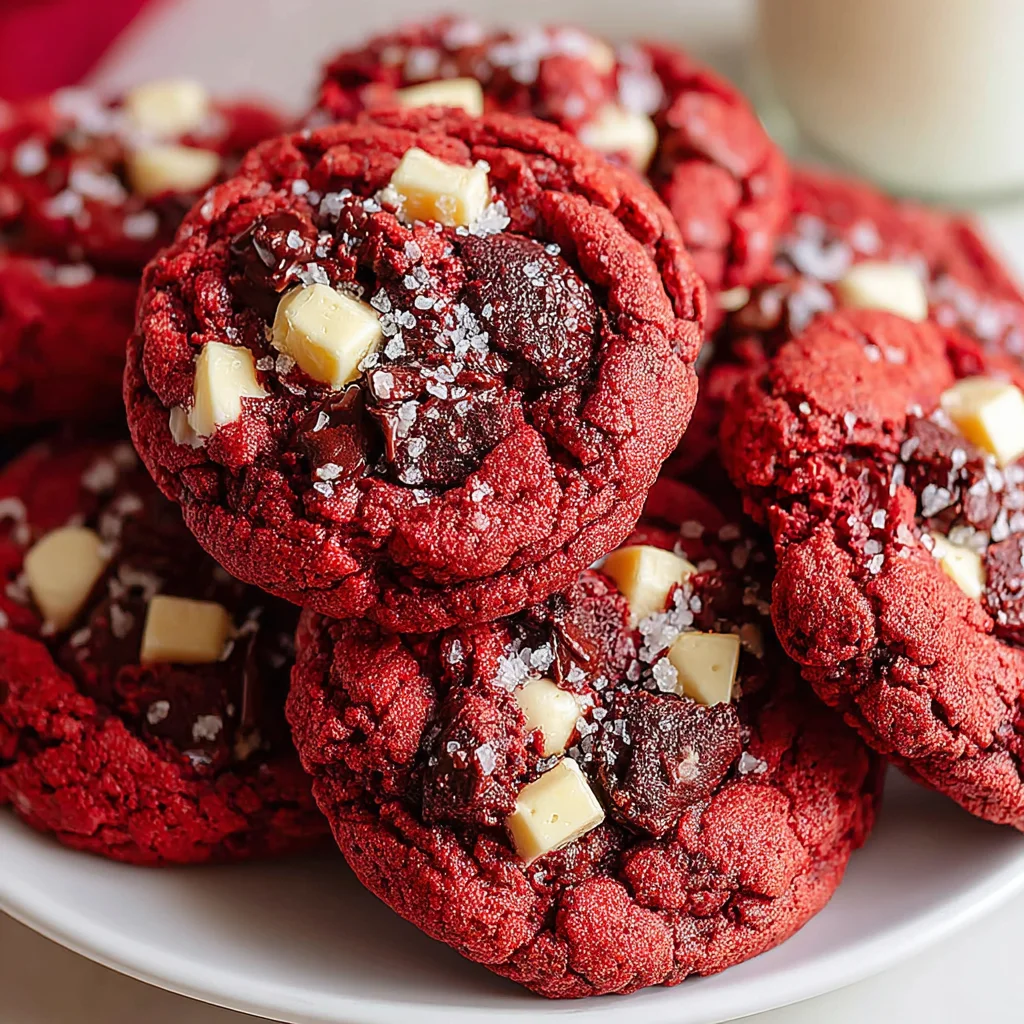
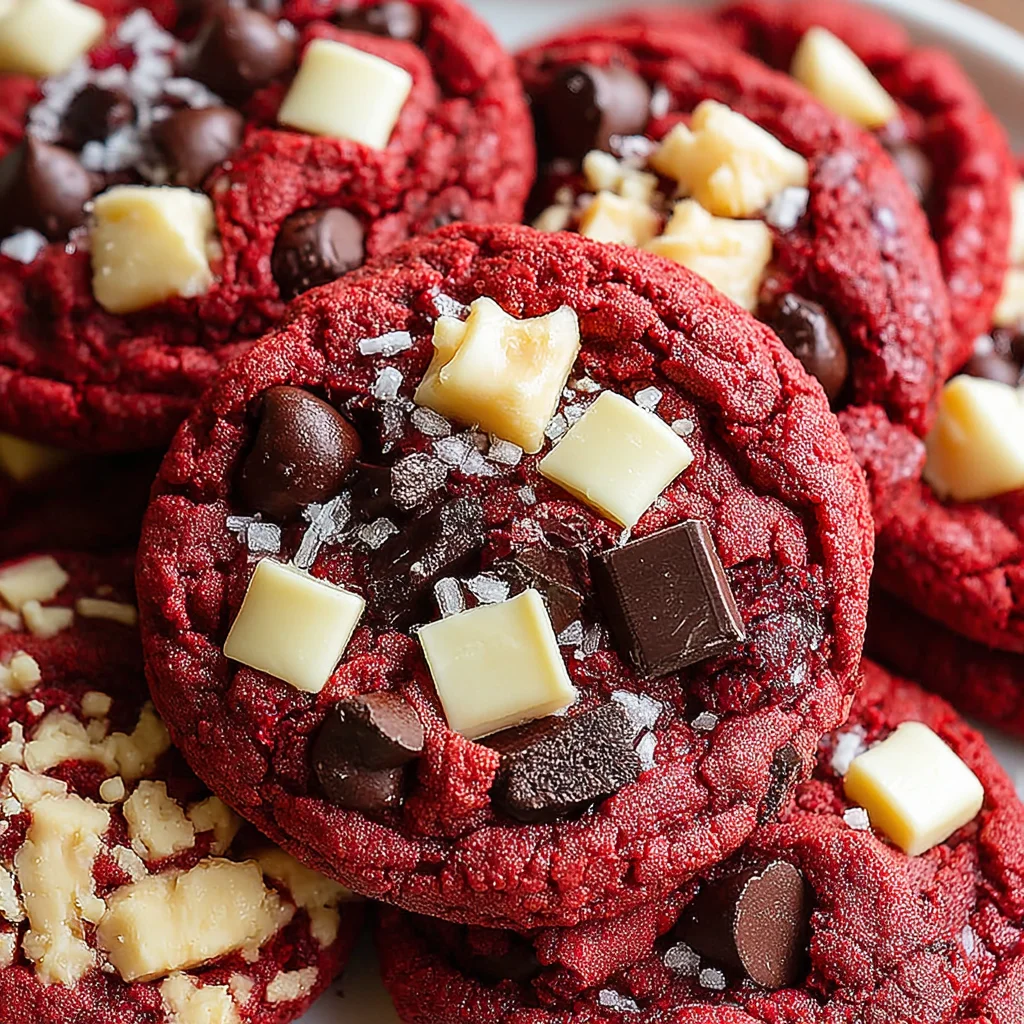
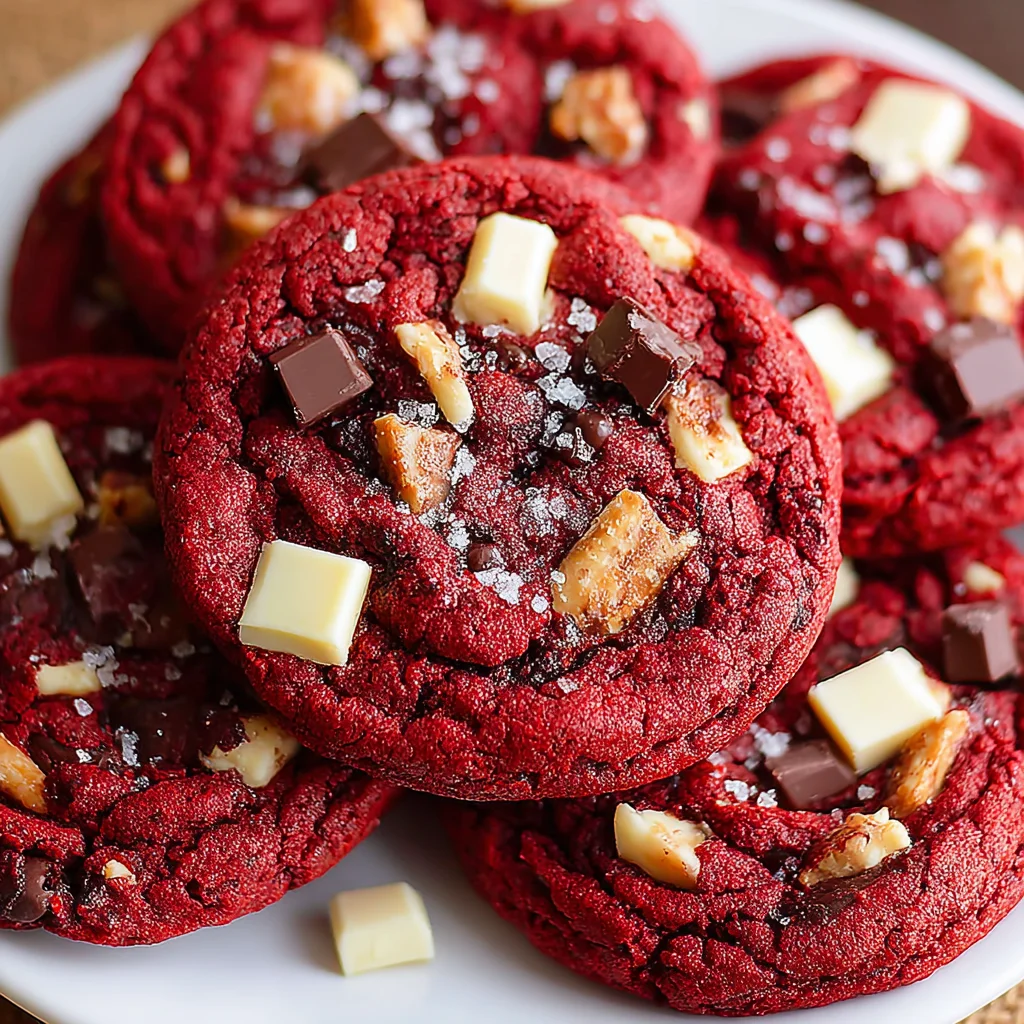
These red velvet chocolate chip cookies are a true masterpiece, combining the classic vibrant hue and subtle tang of red velvet with the irresistible richness of gooey chocolate chips. With their crisp edges, soft chewy centers, and a delightful blend of cocoa and vanilla notes, they are sure to become your new favorite indulgence. Perfect for special occasions or simply a decadent everyday treat.
Prep Time
30 minutes
Cook Time
10-12 minutes
Total Time
Approximately 2 hours 45 minutes (including 2 hours chilling time)
Servings
Makes 10 large cookies
Keywords
Why This Recipe Delivers
- Achieves the perfect balance of classic red velvet tang and rich chocolatey goodness.
- Features browned butter for an incredible depth of flavor that elevates a classic cookie.
- Offers a delightfully soft and chewy texture with perfectly crisp edges.
- Visually stunning with its vibrant red hue and generous chocolate chunks.
- Versatile for any occasion, from casual snacking to elegant dessert platters.
Ingredients
- 140 grams (10 tablespoons) unsalted butter
- 100 grams (½ cup) light or dark brown sugar, packed
- 65 grams (⅓ cup) white sugar
- 1 large egg
- 1 large egg yolk
- 15 milliliters (1 tablespoon) vanilla bean paste
- 2.5 milliliters (½ teaspoon) vinegar
- 7.5 milliliters (½ tablespoon) gel red food color
- 160 grams (1 ¼ cups) all-purpose flour
- 12 grams (2 tablespoons) Dutch processed cocoa powder
- 3.75 milliliters (¾ teaspoon) salt
- 2.5 milliliters (½ teaspoon) baking powder
- 1.25 milliliters (¼ teaspoon) baking soda
- 225 grams (8 ounces) chopped chocolate (mix of white, milk, and dark)
- Flaky sea salt to sprinkle on top (optional)
Instructions
- Begin by melting the unsalted butter in a non-stick pan over medium-low heat. Stir constantly, allowing the butter solids to gently brown and transform into a rich, nutty aroma. This process, known as browning butter, adds incredible depth of flavor to the cookies.
- Once the butter is beautifully browned, reduce the heat to its lowest setting. Add both the light or dark brown sugar and the white sugar to the pan. Whisk vigorously for approximately 1 minute to incorporate the sugars into the warm butter, then immediately remove the pan from the heat.
- Allow the butter and sugar mixture to cool for about 5 minutes. It should still be warm to the touch but not hot, as excessive heat can scramble the eggs in the next step.
- Into the warm sugar mixture, whisk in the large egg, egg yolk, vanilla bean paste, vinegar, and gel red food color. Continue whisking until the mixture is completely smooth, creamy, and vibrant in color. The vinegar helps activate the baking soda and enhances the red velvet tang.
- In a separate, medium-sized bowl, sift together the all-purpose flour, Dutch processed cocoa powder, salt, baking powder, and baking soda. Sifting ensures there are no lumps and that the leavening agents are evenly distributed.
- Verify that the wet ingredients mixture is no longer hot, then gradually add the sifted dry ingredients to the wet ingredients. Fold gently using a spatula until the flour streaks have just disappeared. Be careful not to overmix, as this can lead to tough cookies.
- Gently fold in the chopped chocolate until it is just evenly distributed throughout the dough. Overmixing at this stage can also develop gluten too much.
- Using a 40-gram (2 tablespoon) cookie scoop, divide the dough into 10 uniform balls. Gently roll each portion between your palms to form neat spheres. This ensures even baking.
- Place the formed cookie balls on a plate or a clean baking sheet. For an extra visual appeal and chocolatey bite, press additional chopped chocolate chunks onto the tops of each dough ball if desired.
- Refrigerate the cookie dough for a minimum of 2 hours, or ideally, overnight. This crucial chilling period allows the flavors to meld, the butter to firm up, and results in thicker, chewier cookies with a more developed flavor.
- When ready to bake, preheat your oven to 190 degrees Celsius (375 degrees Fahrenheit). Line a large, light-colored cookie sheet with parchment paper. A light-colored sheet prevents the bottoms of the cookies from browning too quickly.
- Transfer the chilled cookie balls to the prepared baking sheet, ensuring they are spaced at least 7-8 centimeters (3 inches) apart to allow for proper spreading during baking.
- Thirteenth Step: Bake for 10-12 minutes, adjusting the time based on your desired level of softness. For best results and to gauge your oven's specific baking time, we recommend baking a single test cookie first. The edges should be set, but the centers may still appear slightly soft.
- Fourteenth Step: Immediately after removing from the oven, if desired, sprinkle the warm cookies with flaky sea salt. This enhances the chocolate flavor. Allow the cookies to cool on the baking sheet for 10-15 minutes before transferring them to a wire rack. This allows them to set fully and prevents them from breaking.
Tools You’ll Need
- Non-stick Pan
- Whisk
- Mixing Bowls (at least two)
- Cookie scoop (40g / 2 tablespoon capacity)
- Baking sheet (large, light-colored)
- Parchment paper
- Sifter (for dry ingredients)
- Spatula
- Wire rack for cooling
Essential Success Tips
- Do not skip browning the butter; it adds a unique, nutty depth that is essential to the flavor profile of these cookies. Ensure it reaches a golden-brown color and has a distinct aroma.
- Accurately measure your flour by weighing it with a kitchen scale (160g) or by spooning it into the measuring cup and leveling it off, rather than scooping directly from the bag.
- Chilling the dough is paramount for optimal texture and flavor. It allows the butter to firm up, prevents excessive spreading, and gives the ingredients time to meld, resulting in a chewier, more flavorful cookie.
- Do not overmix the dough once the dry ingredients are added. Mix only until just combined to keep the cookies tender.
- Always bake a single test cookie first to fine-tune your oven temperature and baking time for the perfect result. Ovens can vary significantly.
Professional Cooking Secrets
- For an even more pronounced red velvet flavor and a truly professional finish, consider using high-quality Dutch processed cocoa powder. Its darker color and milder flavor will complement the red food coloring and vanilla.
- The combination of an egg and an extra egg yolk contributes significantly to the chewiness and richness of these cookies. The added fat from the yolk provides moisture and tenderness, preventing a dry, crumbly texture.
- Invest in quality chocolate for chopping. Using a mix of white, milk, and dark chocolate creates complex flavor layers and varying melt points, leading to pockets of gooey goodness throughout the cookie. Chopping a bar yourself (instead of using chips) results in irregular pieces that melt more beautifully.
Notes
- Storage: Store cooled cookies in an airtight container at room temperature for up to 3-4 days. They can also be frozen for up to 3 months.
- Dough Freezing: You can freeze individual cookie dough balls for up to 2 months. When ready to bake, place frozen dough on a baking sheet and bake as directed, adding 1-2 minutes to the baking time.
- Flavor Variation: For a hint of citrus, add 1-2 grams of orange zest along with the wet ingredients.
Frequently Asked Questions
Why is chilling the dough so important for these cookies?
Chilling the dough allows the butter to solidify, which prevents the cookies from spreading too much during baking, resulting in thicker, chewier cookies. It also gives the flour time to fully hydrate and the flavors to deepen and meld, leading to a more complex and satisfying taste.
Can I use liquid red food coloring instead of gel?
While liquid red food coloring can be used, we highly recommend gel food coloring. Gel provides a much more intense and vibrant red hue without adding excess moisture to the dough, which can alter the cookie's texture. You might need more liquid coloring to achieve the desired shade, potentially affecting the dough's consistency.
How can I tell when my cookies are perfectly baked?
The cookies are done when their edges are set and slightly firm, but the centers still look slightly soft or underbaked. They will continue to set as they cool on the baking sheet. Overbaking will result in a drier, less chewy cookie.
Nutrition Facts (Per Serving)
Per cookie (estimated): Calories: 380, Protein: 4g, Fat: 24g, Carbs: 40g (These are rough estimates and can vary based on exact ingredients and brands.)
Allergy Information
Contains dairy (butter, milk chocolate, white chocolate), eggs, and gluten (all-purpose flour). May contain soy (from chocolate). For a gluten-free version, substitute all-purpose flour with a 1:1 gluten-free baking blend that contains xanthan gum. Ensure all chocolate used is dairy-free for a dairy-free option.


No comment