
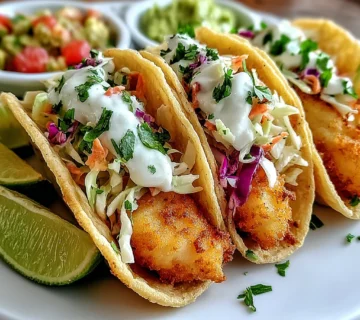
Crispy Cheesy Oven Tacos
Discover the ultimate weeknight winner with these Crispy Cheesy Oven Tacos! Boasting savory seasoned ground beef nestled in perfectly crisp taco shells, topped with a generous blanket of melted cheese, this dish delivers maximum flavor with minimal effort. It's a fast, family-friendly meal that promises a satisfying crunch in every bite.
Prep Time
20 minutes
Cook Time
20 minutes
Total Time
40 minutes
Servings
8 tacos (serves 4)
Keywords

Why This Recipe Delivers
- A lightning-fast dinner solution, ready in under 40 minutes from start to finish.
- Boasts an irresistible combination of perfectly crispy shells, savory seasoned ground beef, and gooey melted cheese.
- Highly customizable, allowing everyone to personalize their tacos with their favorite fresh toppings.
- A fantastic family-friendly meal that consistently receives rave reviews from both kids and adults.
- Baked, not fried, offering a less greasy yet equally satisfying crunch.
Ingredients
- 450 grams (1 lb) ground beef
- 1 small onion, minced
- 2 garlic cloves, finely chopped
- 1 packet taco seasoning (or your own blend)
- 160 ml (⅔ cup) tomato sauce or salsa
- Salt and pepper, to taste
- 8 hard taco shells
- 240 grams (2 cups) shredded cheese (cheddar, Monterey Jack, or Mexican blend)
- 100 grams (1 cup) shredded lettuce
- 75 grams (½ cup) diced tomatoes
- 30 grams (¼ cup) diced red onion
- 30 ml (2 tablespoons) chopped cilantro (optional)
- Sour cream, for serving (optional)
- Guacamole, for serving (optional)
- Jalapeño slices (optional)
- Hot sauce (optional)
Instructions
- Preheat your oven to 200°C (400°F). Position the hard taco shells upright in a sturdy baking dish. This arrangement helps them maintain their classic 'U' shape throughout the baking process and ensures they become uniformly crisp without collapsing.
- In a large skillet or frying pan, warm a small amount of cooking oil over medium heat. Add the ground beef and the minced onion to the pan. Break up the beef with a wooden spoon as it cooks, stirring frequently, until it is thoroughly browned and the onion has softened and turned translucent. Carefully drain any accumulated excess grease from the pan to prevent the tacos from becoming oily. Incorporate the finely chopped garlic and the taco seasoning, stirring continuously for approximately one minute to allow the spices to bloom and release their aromatics. Pour in the tomato sauce or salsa, then bring the mixture to a gentle simmer. Reduce the heat slightly and let it cook for 5-7 minutes, allowing the rich flavors to meld and the sauce to thicken slightly. Season with salt and freshly ground black pepper to your preferred taste.
- Carefully spoon the warm, seasoned beef mixture into each of the upright taco shells, distributing it evenly among all eight shells. To finish, top each filled shell with a generous sprinkle of shredded cheese, ensuring the cheese melts wonderfully into the beef and creates a delightful, crispy golden layer.
- Transfer the baking dish containing the filled tacos into the preheated oven. Bake for 10–15 minutes. Keep a close eye on them during this period; the objective is for the cheese to be perfectly melted and bubbly, and for the taco shells to achieve a light golden brown crispness without burning.
- Once baked, carefully remove the hot tacos from the oven. Immediately load them with a vibrant array of fresh toppings: a bed of shredded lettuce, juicy diced tomatoes, and a scattering of finely diced red onion. For an extra layer of freshness and flavor, sprinkle with freshly chopped cilantro, if desired. Serve the crispy, cheesy tacos warm alongside optional accompaniments like cool sour cream, creamy guacamole, fiery jalapeño slices, or your favorite hot sauce for a complete culinary experience.

Tools You’ll Need
- Large skillet or frying pan
- Baking dish (approximately 9×13 inch or similar)
- Measuring cups and spoons
- Cutting board
- Sharp knife
- Wooden spoon or scoop for filling
Essential Success Tips
- Do not overcrowd the baking dish; ensure each taco has sufficient space to crisp evenly on all sides, allowing for better air circulation.
- Thoroughly drain any excess fat from the cooked ground beef. This crucial step prevents the tacos from becoming soggy and ensures a superior texture.
- For the best melting performance and richest flavor, use a good quality, sharp cheddar or a premium Mexican blend cheese.
- To achieve an extra-crisp shell, consider pre-baking the empty taco shells for 2-3 minutes before adding the filling and cheese, but watch them closely to prevent burning.
- Prepare all your fresh toppings in advance. This allows for immediate assembly and serving of the tacos right after they come out of the oven, ensuring optimal crispness.
Professional Cooking Secrets
- To deepen the beef's flavor profile, ensure the ground beef is thoroughly browned until a rich 'fond' (browned bits) forms on the bottom of the skillet. Deglaze the pan with a splash of beef broth or water before adding the tomato sauce, scraping up all those flavorful bits.
- Elevate your taco seasoning by toasting whole spices like cumin seeds and coriander seeds in a dry pan for a minute or two before grinding them fresh. This unlocks a significantly more aromatic and potent spice blend.
- For an extra layer of richness and creamy texture, stir in a tablespoon of cream cheese (or mascarpone) into the beef filling just before scooping it into the shells. This adds a subtle tang and velvety mouthfeel.

Notes
- Leftover beef filling can be stored in an airtight container in the refrigerator for up to 3 days and makes for a versatile ingredient in nachos, quesadillas, or even loaded baked potatoes.
- For those who enjoy a spicier kick, consider adding a pinch of cayenne pepper or a finely diced jalapeño directly to the beef filling during the simmering stage.
- For a heartier taco, spread a thin layer of warmed refried beans at the bottom of each taco shell before adding the seasoned ground beef.
Frequently Asked Questions
Can I prepare the beef filling ahead of time?
Absolutely! The seasoned ground beef filling can be prepared up to 2 days in advance and stored in an airtight container in the refrigerator. When ready to assemble, simply reheat the filling gently on the stovetop before scooping it into the shells and baking.
What kind of taco shells are best for baking?
Standard hard corn taco shells are ideal for this dish. Look for brands known for their crispness. Ensure your baking dish allows the shells to stand upright without tipping over, which is crucial for even crisping and easy filling.
How can I make these tacos gluten-free?
To make these tacos gluten-free, the primary consideration is the taco shells. Most hard corn taco shells are naturally gluten-free, but it's always best to check the product label to ensure they are certified gluten-free. Also, verify that your taco seasoning packet does not contain any hidden gluten-containing ingredients.
Nutrition Facts (Per Serving)
Calories: 420, Protein: 28g, Fat: 28g, Carbs: 22g (per 2 tacos, estimated without optional toppings).
Allergy Information
Contains dairy (cheese). While most corn taco shells are gluten-free, some brands may contain wheat or cross-contamination; please check the label if you have gluten sensitivities. For a strictly gluten-free version, ensure all ingredients are certified gluten-free.


No comment