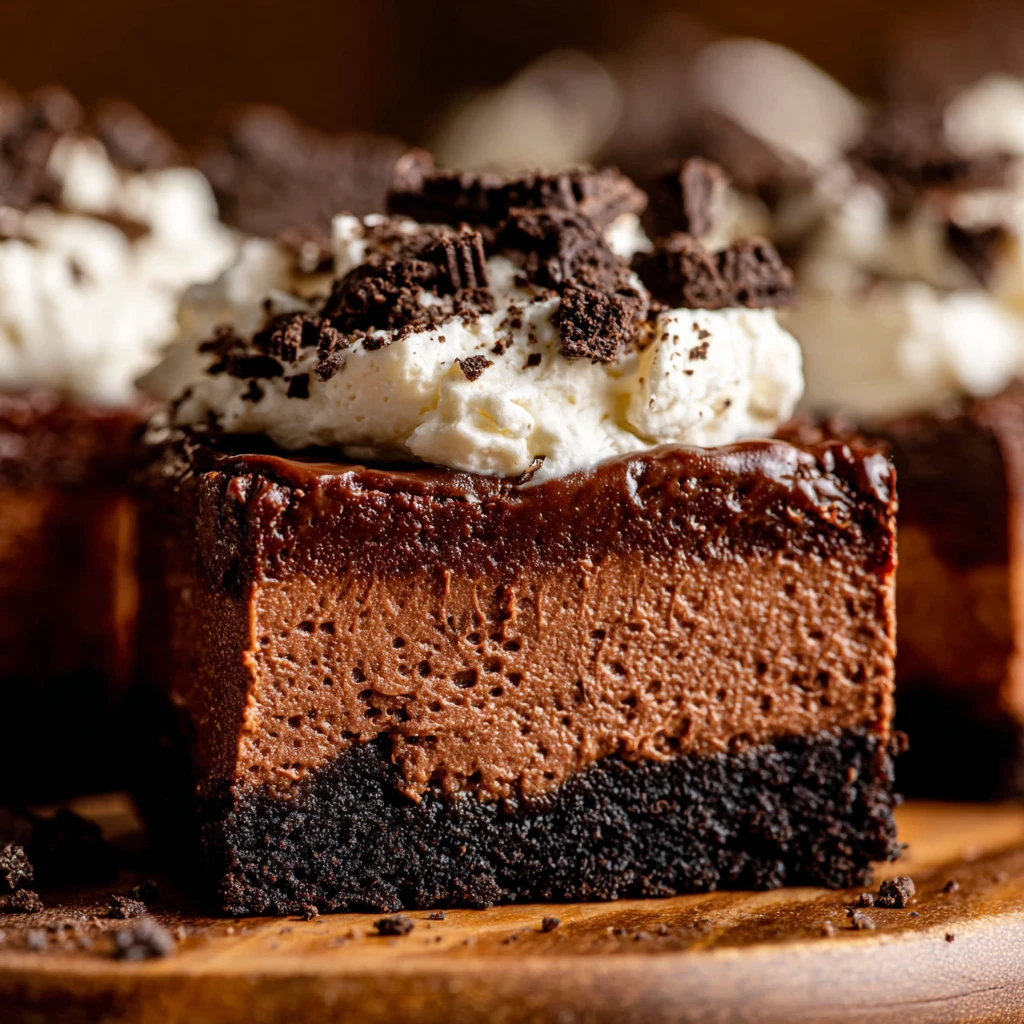
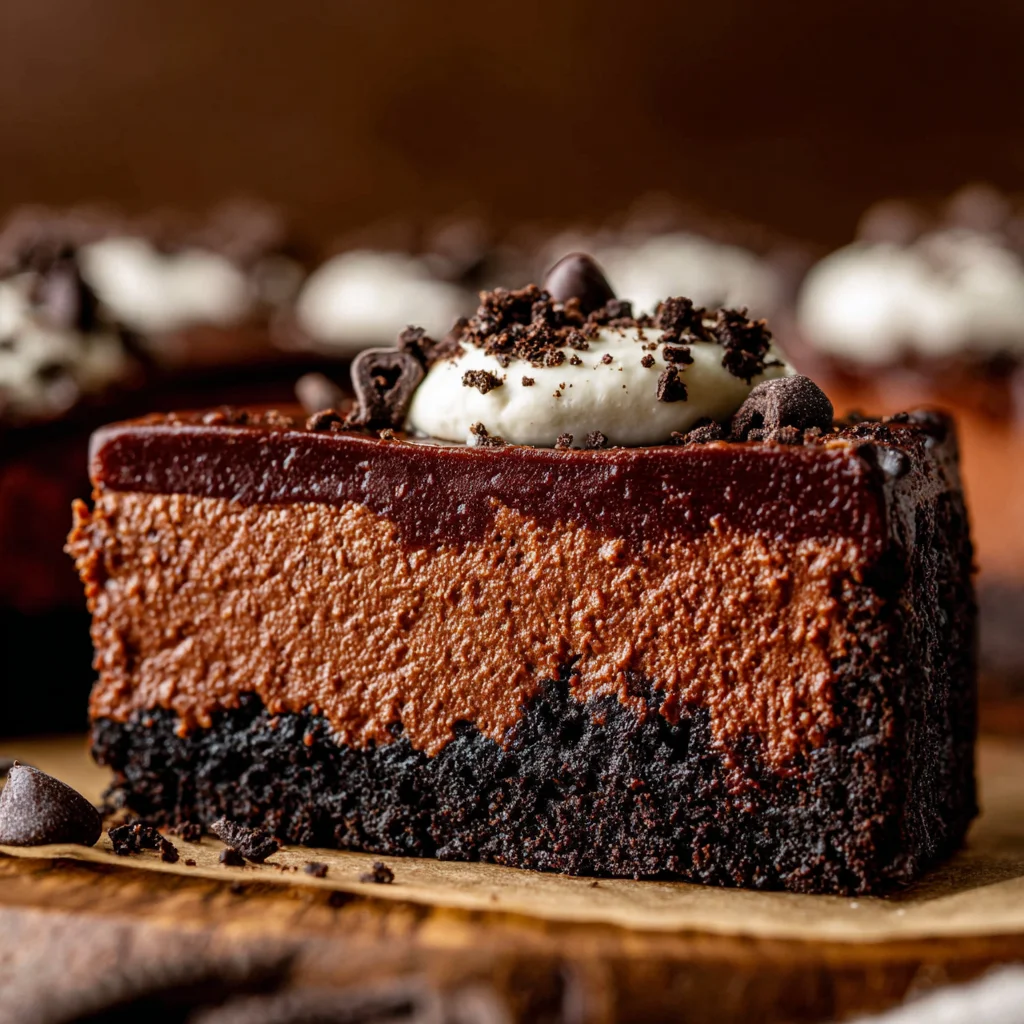
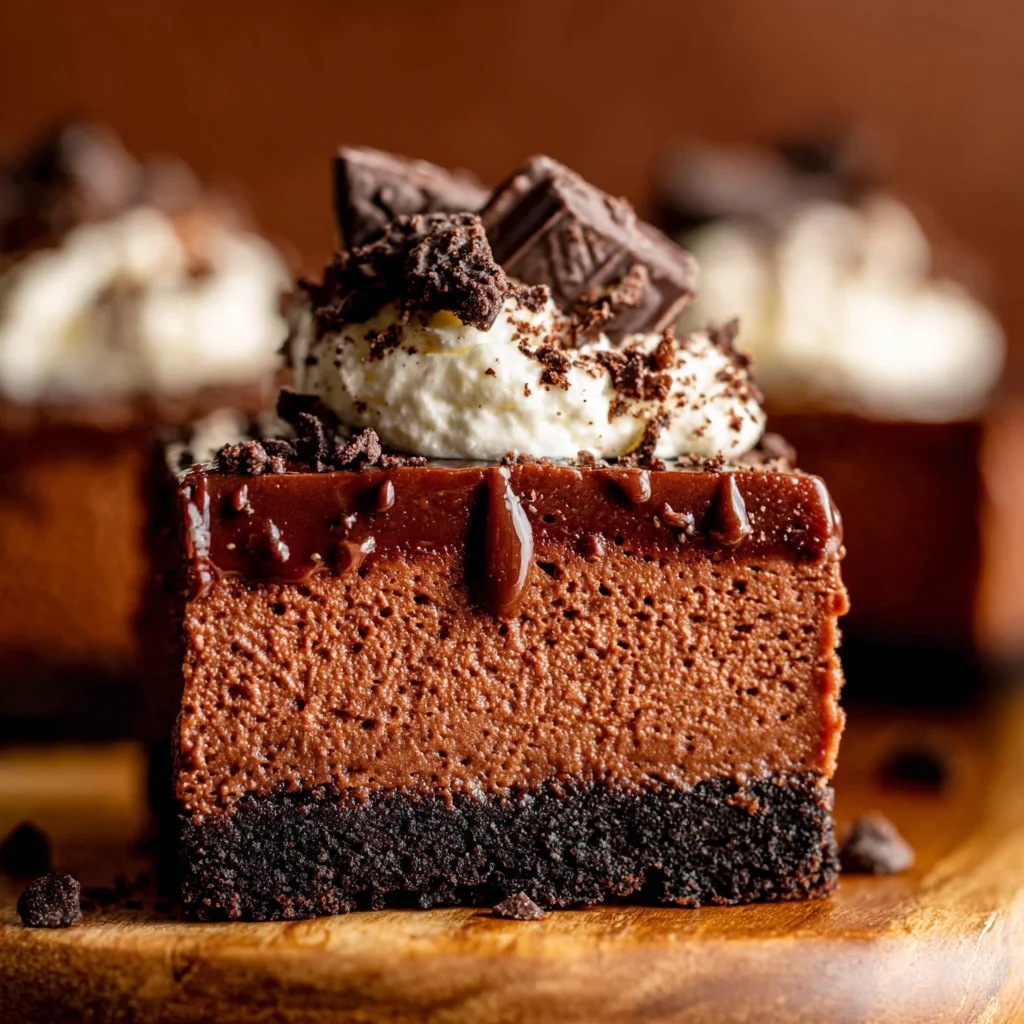
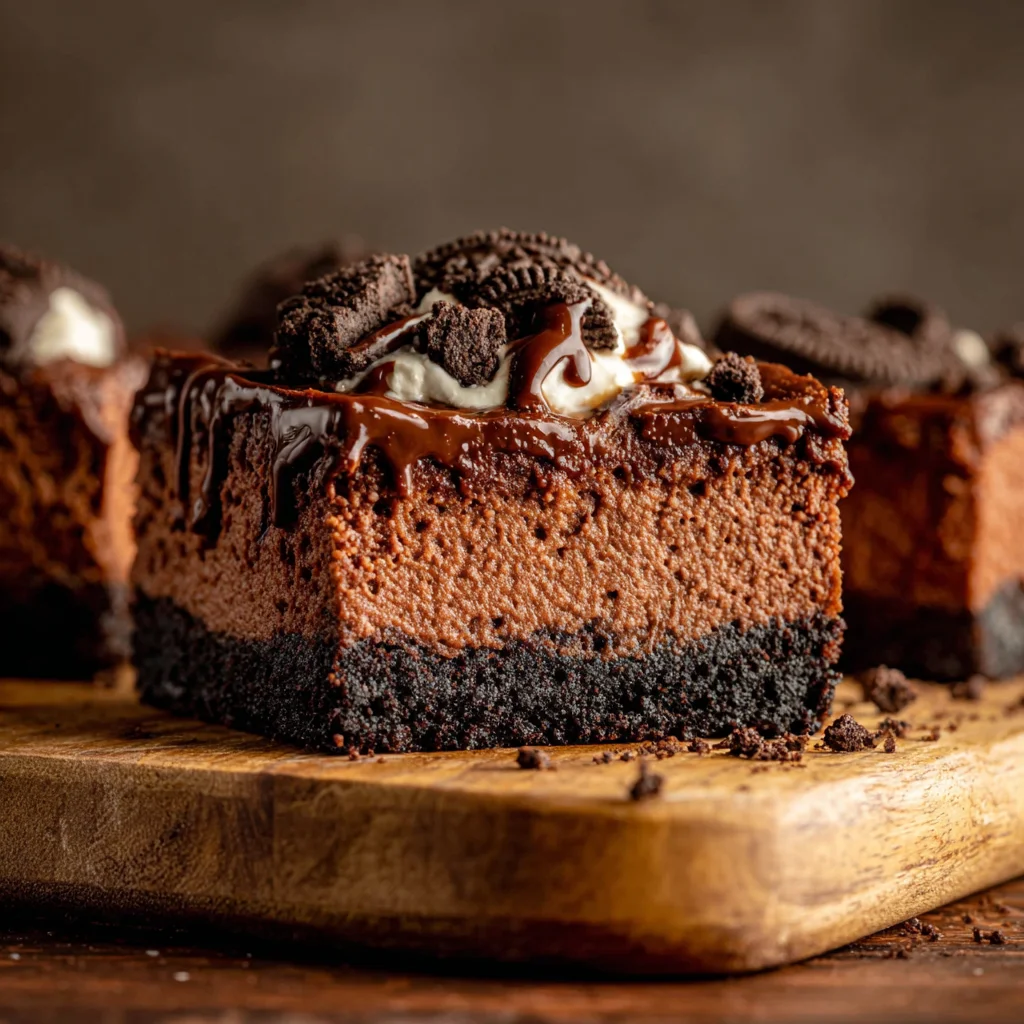
Chocolate Cheesecake Bars
Indulge in these luxurious Chocolate Cheesecake Bars, featuring a perfectly balanced blend of rich, creamy chocolate cheesecake nestled on a buttery, crisp Oreo cookie crust. Crowned with a glossy homemade chocolate ganache, each bar delivers an intense cocoa experience with a sophisticated texture. This impressive dessert is surprisingly straightforward to prepare and makes a show-stopping treat for any occasion or a delightful indulgence for yourself.
Prep Time
30 minutes
Cook Time
1 hour
Total Time
8 hours 30 minutes (includes chilling)
Servings
16 bars
Keywords
Why This Recipe Delivers
- Features a triple chocolate threat: Oreo crust, chocolate cheesecake, and chocolate ganache.
- Offers a perfect contrast of textures from crisp crust to creamy filling and smooth topping.
- Ideal for entertaining, as it can be prepared ahead of time.
- Easily portioned into individual bars, making serving effortless.
- A sophisticated dessert that’s surprisingly accessible for home bakers.
Ingredients
- 2 cups (220g) Oreo crumbs (approximately 2 rows of Oreos in a regular pack)
- 4 tablespoons (56g) unsalted butter, melted
- 680g (24 oz) cream cheese, at room temperature
- 1 cup (200g) white granulated sugar
- 1/2 cup (50g) unsweetened cocoa powder, preferably Dutch process
- 226g (8 oz) dark chocolate bar (e.g., Lindt 70%), melted
- 1/2 cup (120ml) heavy cream, at room temperature
- 1 teaspoon (5ml) pure vanilla extract
- 4 large eggs, at room temperature
- 1 cup (170g) semi-sweet chocolate chips
- 1/2 cup (120ml) heavy cream
Instructions
- Preheat your oven to 160°C (325°F). Prepare a 23×23 cm (9×9-inch) square baking pan by thoroughly spraying it with nonstick baking spray. Line the bottom and two opposing sides of the pan with parchment paper, ensuring an overhang to easily lift the bars later, and spray the parchment paper again.
- Using a food processor, blend the Oreo cookies into fine crumbs. Alternatively, place the cookies in a sturdy zip-top bag and crush them with a rolling pin until uniformly fine. Transfer the crumbs to a small mixing bowl.
- Pour the melted unsalted butter over the Oreo crumbs. Use a fork or a spatula to thoroughly combine the butter and crumbs, ensuring they are evenly moistened. This step is crucial for a cohesive and sturdy crust.
- Pour the prepared Oreo crumb mixture into the lined baking pan. Using the bottom of a measuring cup or your knuckles, firmly and evenly compact the crust into the bottom of the pan. Ensure the crust forms a solid, uniform base and does not extend up the sides.
- Bake the compacted Oreo crust in the preheated oven for 12 minutes. While the crust is baking, begin preparing the chocolate cheesecake batter.
- For the chocolate filling, carefully melt the dark chocolate bar. Break the chocolate into small pieces and place them in a microwave-safe bowl. Heat for 30 seconds, stir, then heat for 20 seconds, and stir again. Continue heating in 15-second intervals, stirring vigorously after each, until the chocolate is completely smooth and melted. Be cautious not to overheat the chocolate, as it can seize.
- In the bowl of a stand mixer fitted with the paddle attachment, or using a large bowl with a hand mixer, combine the room temperature cream cheese, granulated white sugar, and unsweetened Dutch-process cocoa powder. Beat on high speed for approximately 2 minutes, stopping once to scrape down the sides and bottom of the bowl. The mixture should become light and fluffy.
- Reduce the mixer speed to medium. Gradually add the melted and slightly cooled chocolate, room temperature heavy cream, and pure vanilla extract to the cream cheese mixture. Continue mixing until the batter is smooth and well combined, ensuring there are no lumps.
- Lower the mixer speed to low. Add the large eggs one at a time, mixing only until each egg is just incorporated before adding the next. Overmixing at this stage can introduce too much air, which can lead to cracks in the cheesecake during cooling. Scrape the bowl once more to ensure all ingredients are evenly mixed.
- Gently pour the cheesecake batter over the baked Oreo crust in the prepared pan. Carefully smooth the top with an offset spatula or the back of a spoon to ensure an even layer.
- Bake the cheesecake in the preheated oven for 40-50 minutes. The cheesecake is ready when the edges appear set and firm, but the center still has a slight, delicate jiggle when the pan is gently nudged. Avoid overbaking, as this can result in a dry texture and potential cracking.
- Once baked, turn off the oven but leave the cheesecake inside. Crack the oven door open slightly and allow the cheesecake to cool slowly in the oven for 20 minutes. This gradual cooling process helps prevent cracking. After 20 minutes, transfer the pan to a wire cooling rack to cool completely at room temperature.
- Thirteenth Step: Once the cheesecake is fully cooled to room temperature, cover the pan tightly with aluminum foil or plastic wrap. Transfer it to the refrigerator and chill for a minimum of 6 hours, or ideally overnight. Proper chilling is crucial for the cheesecake to set completely and achieve its dense, creamy texture.
- Fourteenth Step: To prepare the chocolate ganache, place the semi-sweet chocolate chips in a small, heatproof bowl. In a small saucepan, gently heat the heavy cream over medium-low heat until it just begins to steam and small bubbles form around the edges. Do not let it boil.
- Fifteenth Step: Pour the hot cream directly over the chocolate chips. Let the mixture sit undisturbed for 2 minutes. This allows the residual heat from the cream to melt the chocolate evenly, which is essential for a smooth ganache.
- Sixteenth Step: After 2 minutes, gently stir the chocolate and cream mixture with a whisk or spoon, starting from the center and working outwards, until it becomes completely smooth, glossy, and well combined. If there are still a few unmelted chips, you can return the bowl over a saucepan with simmering water (bain-marie) for a few seconds, stirring constantly, until smooth.
- Seventeenth Step: Once the cheesecake is thoroughly chilled, carefully remove the bars from the pan by lifting the parchment paper overhang. Peel away the parchment paper from the sides. Pour the prepared ganache evenly over the top of the chilled cheesecake and spread it to the edges using an offset icing spatula.
- Eighteenth Step: If serving immediately, place the ganache-topped bars in the freezer for about 10 minutes to help the ganache set quickly for clean cuts. If serving later, store the bars, covered, in the refrigerator until you are ready to cut and serve them. For the cleanest cuts, use a sharp knife wiped clean after each slice.
- Nineteenth Step: Cut the chilled cheesecake into 16 even bars. Serve and enjoy!
Tools You’ll Need
- 9×9 inch (23×23 cm) square baking pan
- Parchment paper
- Food processor (optional)
- Measuring cups and spoons
- Microwave-safe bowl
- Stand mixer with paddle attachment or hand mixer
- Rubber spatula
- Small saucepan
- Whisk
- Offset icing spatula
- Wire cooling rack
- Sharp knife
Essential Success Tips
- Ensure all cold ingredients, especially cream cheese and eggs, are at room temperature. This is crucial for achieving a smooth, lump-free batter and an even bake.
- Do not overmix the cheesecake batter, particularly after adding the eggs. Overmixing incorporates too much air, which can cause the cheesecake to puff up excessively and then crack as it cools.
- Allow the cheesecake to cool slowly in the oven with the door ajar, then completely at room temperature on a wire rack, before chilling. Rapid temperature changes are a common culprit for cracks.
- Chill the cheesecake for the full recommended time (6 hours or ideally overnight). Proper chilling is essential for the cheesecake to fully set, develop its rich texture, and ensure clean, neat cuts.
- When preparing the ganache, pour hot cream over the chocolate chips and allow it to sit for 2 minutes before stirring. This 'resting' period helps the chocolate melt evenly and results in a perfectly smooth, glossy ganache.
Professional Cooking Secrets
- To achieve the ultimate silky-smooth cheesecake texture and minimize air bubbles, gently tap the pan on the counter several times after pouring the batter, before placing it in the oven.
- For razor-sharp, professional-looking cuts when slicing, warm your knife under hot running water, wipe it completely clean and dry, then make each slice. Re-warm and clean the knife between every cut for the cleanest edges.
- Using a high-quality dark chocolate bar (like Lindt 70%) for the melted chocolate in the batter, combined with Dutch-process cocoa, elevates the depth and complexity of the chocolate flavor, providing a truly gourmet experience.
Notes
- Storage: Store leftover Chocolate Cheesecake Bars in an airtight container in the refrigerator for up to 4-5 days.
- Freezing: For longer storage, individual bars can be wrapped tightly in plastic wrap, then placed in an airtight freezer-safe container, and frozen for up to 1 month. Thaw in the refrigerator before serving.
- Flavor Variation: For a subtle hint of coffee that enhances the chocolate, add 1 teaspoon (5ml) of instant espresso powder to the cream cheese mixture along with the cocoa powder.
Frequently Asked Questions
Why did my cheesecake crack?
Cheesecake cracks are most often caused by overmixing the batter (introducing too much air), overbaking, or rapid temperature changes during cooling. To prevent this, ensure ingredients are at room temperature, mix only until just combined, and allow the cheesecake to cool slowly in the oven before chilling.
Can I use a different type of chocolate for the ganache?
Yes, you can adjust the sweetness and intensity of the ganache by using milk chocolate or a different percentage of dark chocolate chips. Be aware that milk chocolate may require slightly less cream to achieve the desired pouring consistency due to its higher fat content.
What if I don't have a food processor for the Oreo crust?
No problem! You can place the Oreo cookies in a sturdy zip-top bag and crush them into fine crumbs using a rolling pin or the bottom of a heavy pan. Ensure the crumbs are as fine as possible for a well-compacted crust.
Nutrition Facts (Per Serving)
Per serving (approximately 1 bar): Calories: 480, Protein: 7g, Fat: 38g, Carbs: 35g, Sugars: 27g. (Note: Nutritional values are estimates and can vary based on specific brands and exact quantities used.)
Allergy Information
This dish contains dairy (cream cheese, butter, heavy cream), gluten (Oreo cookies), and eggs. For a gluten-free version, use gluten-free chocolate sandwich cookies for the crust.


No comment