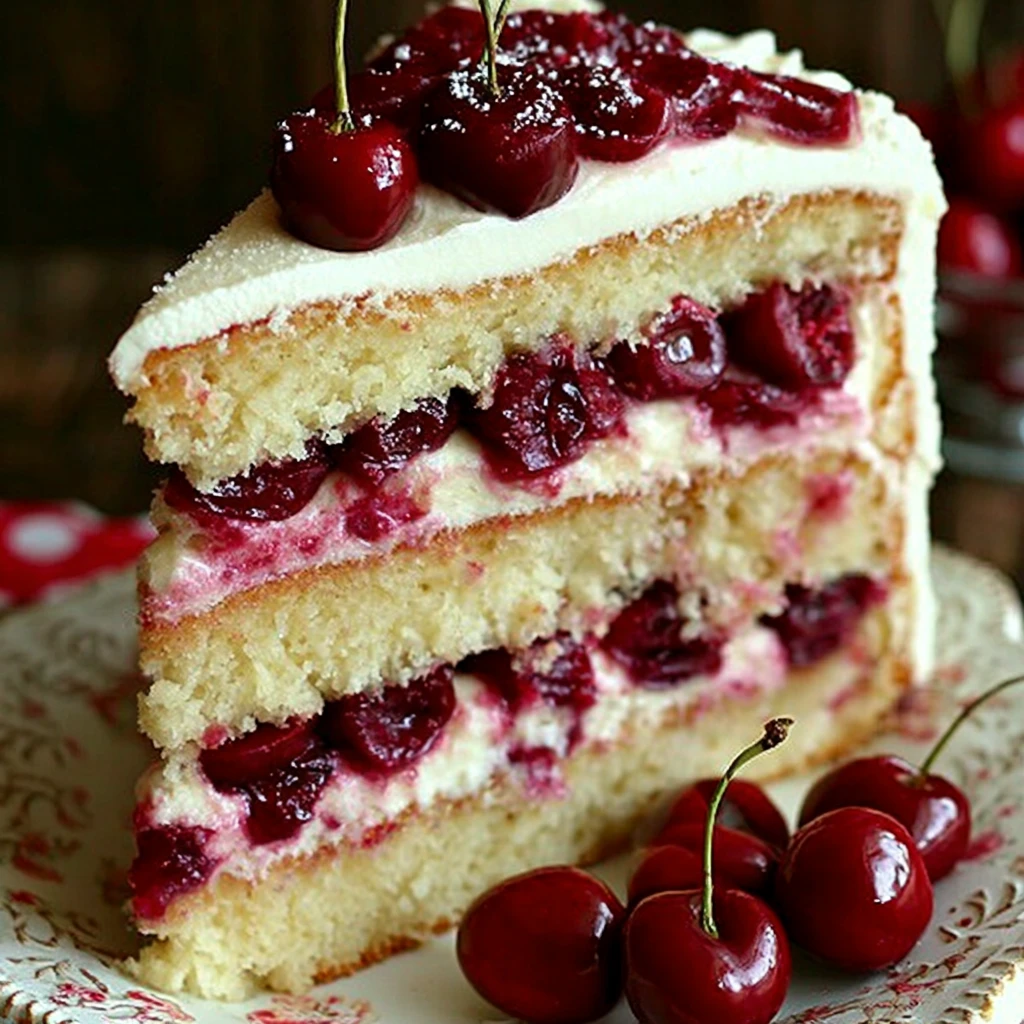
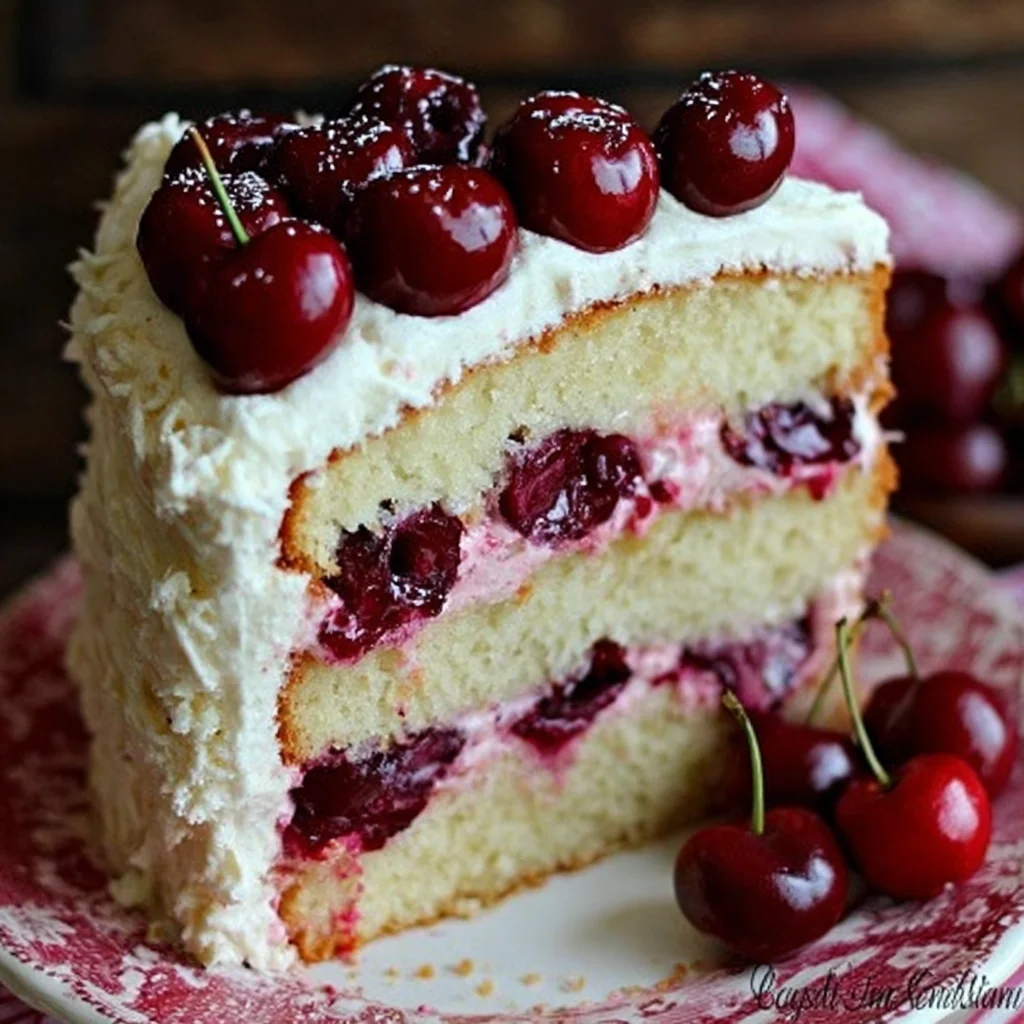
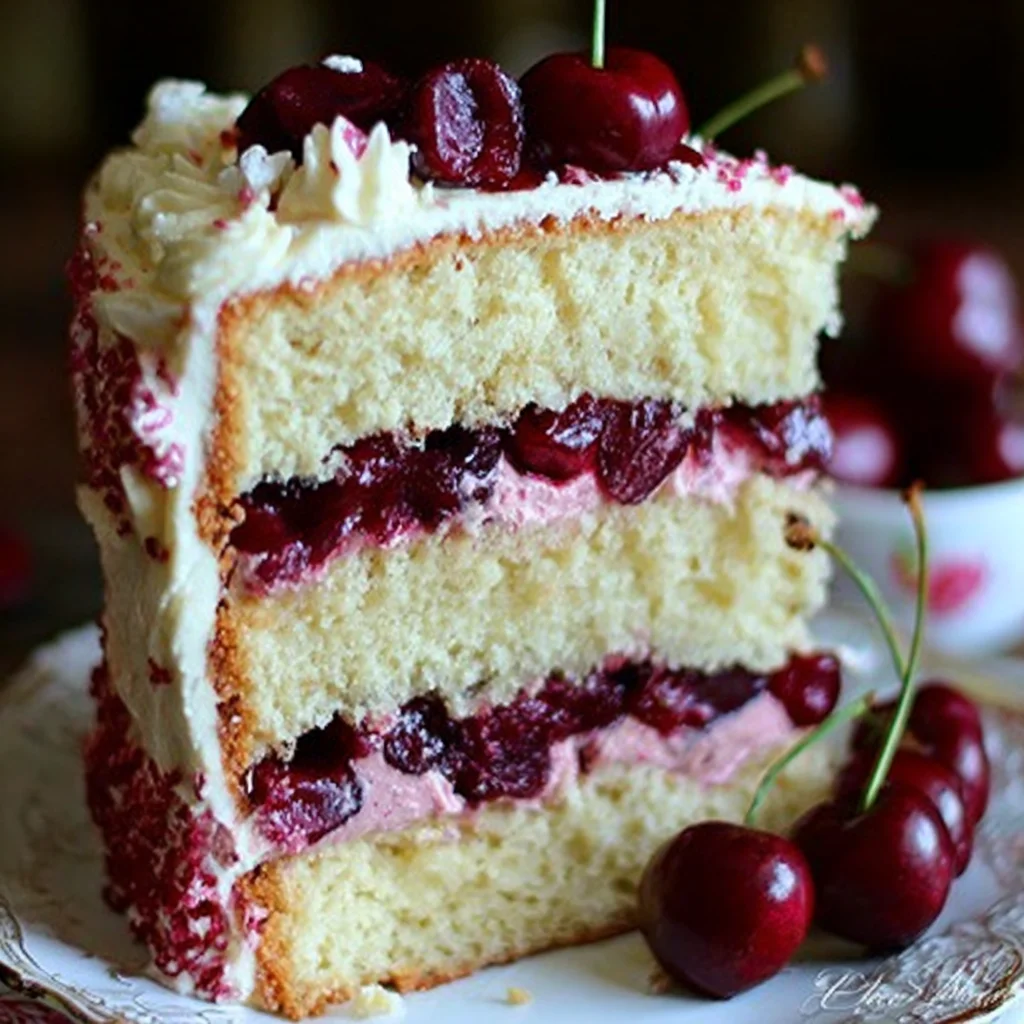
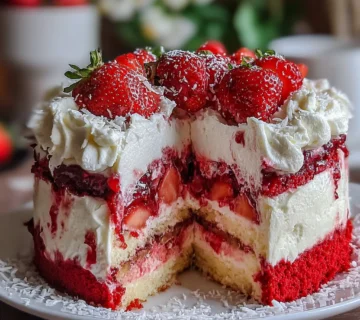
Cherry Layer Cake with Cherry Cream Cheese Frosting
Indulge in a magnificent three-layer cherry cake, featuring a tender, moist crumb studded with sweet cherry pieces. Each layer is generously filled and topped with a luscious, tangy cherry cream cheese frosting, making for an unforgettable dessert experience. This cake is a perfect balance of fruitiness and rich creaminess, ideal for any celebration or a delightful weekend treat.
Prep Time
45 minutes
Cook Time
22-27 minutes
Total Time
2 hours 30 minutes (including cooling)
Servings
12-16 servings
Keywords
Why This Recipe Delivers
- Offers a perfect balance of sweet and tangy flavors from fresh cherries and cream cheese.
- Features a tender, moist cake crumb that melts in your mouth with every bite.
- Presents a stunning visual centerpiece, ideal for any celebration or gathering.
- Handmade with love, delivering a comforting and truly special homemade taste.
- Versatile enough to be enjoyed year-round, using fresh, frozen, or canned cherries.
Ingredients
- 300 g (2½ cups) all-purpose flour
- 12.5 g (2½ tsp) baking powder
- 2.5 g (½ tsp) salt
- 226 g (1 cup) unsalted butter, softened, for cake batter
- 350 g (1¾ cups) granulated sugar
- 4 large eggs, at room temperature
- 10 ml (2 tsp) vanilla extract, for cake batter
- 240 ml (1 cup) whole milk (or buttermilk), at room temperature
- 350 g (2 cups) cherries (fresh, frozen, or canned), pitted and chopped
- For Cherry Filling:
- 15-30 g (1-2 tbsp) granulated sugar
- 5 ml (splash) lemon juice (optional)
- For Cherry Cream Cheese Frosting:
- 226 g (8 oz) cream cheese, softened
- 113 g (½ cup) unsalted butter, softened, for frosting
- 420 g (3½ cups) powdered sugar
- 5 ml (1 tsp) vanilla extract, for frosting
- 60 ml (¼ cup) cherry juice or puréed cherries (optional, for color and enhanced flavor)
Instructions
- Preheat your oven to 175°C (350°F). Prepare three 20 cm (8-inch) round cake pans by generously greasing them and lining the bottoms with parchment paper. This meticulous preparation ensures the cakes release easily without sticking, preserving their beautiful structure.
- In a medium-sized mixing bowl, meticulously whisk together the dry ingredients: the all-purpose flour, baking powder, and salt. This step is crucial for even distribution, preventing pockets of leavening agents in the final cake. Set this mixture aside.
- In a large mixing bowl, preferably using an electric mixer, cream together the softened unsalted butter and granulated sugar for 3 to 5 minutes. Beat until the mixture is notably lighter in color and fluffy in texture. This aeration process is fundamental for a tender and moist cake crumb.
- Add the large eggs to the creamed butter and sugar, one at a time, beating thoroughly after each addition until fully incorporated. Pause to scrape down the sides of the bowl as needed to ensure everything is evenly mixed. Finally, stir in the vanilla extract just until combined.
- Gradually incorporate the dry flour mixture and the whole milk into the wet ingredients, alternating between them. Begin and end with the flour mixture, typically adding about one-third of the flour, then half of the milk, another third of the flour, the remaining milk, and concluding with the last third of the flour. Mix on low speed only until just combined; overmixing can develop the gluten too much, resulting in a tough cake.
- Divide the prepared cake batter evenly among the three lined cake pans. For professional and consistent results, consider using a kitchen scale to ensure each pan receives precisely the same amount of batter. Gently spread the batter to the edges of the pans.
- Bake the cakes in the preheated oven for 22 to 27 minutes. The cakes are done when a wooden toothpick inserted into the center of a cake comes out clean, indicating no wet batter remains. Avoid opening the oven door too frequently during baking.
- Allow the baked cakes to cool in their pans for a critical 10 minutes. This allows them to firm up slightly before you can carefully invert them onto wire racks. Remove the parchment paper and let them cool completely to room temperature. Attempting to frost warm cakes will cause the frosting to melt and slide off.
- While the cake layers are cooling, prepare the cherry filling. In a small saucepan, combine the chopped, pitted cherries with 1 to 2 tablespoons (15-30 g) of granulated sugar and an optional splash of lemon juice. Simmer over medium-low heat, stirring occasionally, until the mixture thickens slightly, usually within 5-7 minutes. The natural pectin in the cherries, aided by the sugar, will help it gel. It is essential that this cherry filling cools completely before use to prevent it from warming the frosting.
- For the Cherry Cream Cheese Frosting, begin by beating the softened cream cheese in a large bowl with an electric mixer until it is perfectly smooth and free of any lumps. This ensures a silky-smooth frosting texture.
- Add the softened unsalted butter to the cream cheese and continue to beat together until the mixture is light, fluffy, and well combined, typically another 2-3 minutes. This creates the creamy base for the frosting.
- Gradually add the powdered sugar, approximately one cup at a time, beating on low speed until it is fully incorporated, then increasing the speed to medium. Stir in the vanilla extract. If desired, mix in the ¼ cup (60 ml) of cherry juice or puréed cherries for an intensified cherry flavor and a beautiful natural pink hue. Beat until the frosting is smooth, creamy, and wonderfully spreadable.
- Thirteenth Step: To assemble the cake, place the first cooled cake layer on your chosen serving plate or cake stand. Spread an even, generous layer of the cherry cream cheese frosting over the top. Then, carefully spoon a portion of the cooled cherry filling over the frosting, leaving a small border around the edge to prevent the filling from oozing out when subsequent layers are added.
- Fourteenth Step: Gently place the second cake layer on top, aligning it carefully. Repeat the process by spreading another layer of frosting, followed by another portion of the cooled cherry filling.
- Fifteenth Step: Finally, place the third cake layer on top. Use the remaining frosting to generously coat and frost the top and sides of the entire cake, smoothing it meticulously with an offset spatula for a polished finish. For an extra touch of elegance, garnish the cake with fresh cherries, a sprinkle of cherry pieces, or even delicate chocolate shavings if desired.
- Sixteenth Step: Chill the assembled cake in the refrigerator for at least 30 minutes before slicing and serving. This allows the frosting to firm up, making for cleaner, more precise slices and a more stable cake structure.

Tools You’ll Need
- Electric stand mixer or hand mixer
- Three 20 cm (8-inch) round cake pans
- Parchment paper
- Large mixing bowls
- Medium mixing bowl
- Whisk
- Rubber spatulas
- Offset spatula (for frosting)
- Wire cooling racks
- Small saucepan (for cherry filling)
- Measuring cups and spoons
- Kitchen scale (optional, for precise batter division)
Essential Success Tips
- Ensure all cold ingredients (butter, eggs, milk, cream cheese) are at room temperature. This allows them to emulsify properly, creating a smooth batter and creamy frosting.
- Avoid overmixing the cake batter once the flour is added. Mix only until just combined to prevent gluten development, which can lead to a tough cake.
- Always cool your cake layers completely on wire racks before attempting to frost them. Warm cakes will cause the cream cheese frosting to melt and slide off.
- When making the cherry filling, simmer until it slightly thickens, but don't reduce it too much. You want a luscious, spreadable consistency, not a jam.
- For the neatest slices, chill the assembled cake for at least 30 minutes (or longer) before serving. This firms up the frosting and layers.
Professional Cooking Secrets
- To intensify the cherry flavor in your frosting without adding too much liquid, gently reduce pure cherry juice on the stovetop until it's a thicker, more concentrated syrup, then cool it completely before adding. This minimizes water content while maximizing flavor.
- For perfectly even cake layers, weigh your batter after mixing and divide it equally among your prepared pans. This ensures consistent baking times and a beautifully level final cake.
- After baking and cooling, wrap each cake layer tightly in plastic wrap and refrigerate for at least an hour, or even freeze for 30 minutes, before leveling and frosting. Chilled cakes are firmer and easier to handle, making the assembly process much smoother and resulting in fewer crumbs in your frosting.
Notes
- Storage: Store the Cherry Layer Cake in an airtight container in the refrigerator for up to 3-4 days. Allow it to come to room temperature for about 30 minutes before serving for the best flavor and texture.
- Variations: For an almond-cherry twist, add ½ teaspoon of almond extract to both the cake batter and the frosting. You can also experiment with different berry fillings, such as raspberry or blackberry.
- Using Frozen Cherries: If using frozen cherries for the cake or filling, thaw them completely and drain any excess liquid before chopping and adding them to the recipe. This prevents adding too much moisture to the batter or thinning out the filling.
Frequently Asked Questions
Can I use frozen cherries instead of fresh?
Yes, absolutely! If using frozen cherries, thaw them completely and drain any excess liquid before chopping and incorporating them into the cake batter or simmering them for the filling. This helps maintain the correct moisture balance in the cake and prevents the filling from becoming too watery.
How far in advance can I make this cake?
You can bake the cake layers up to 2 days in advance. Once completely cooled, wrap them tightly in plastic wrap and store them at room temperature or in the refrigerator. The cherry filling can also be made 2 days ahead and stored in an airtight container in the refrigerator. Assemble and frost the cake no more than 1 day before serving for optimal freshness.
What if my cream cheese frosting is too soft?
If your cream cheese frosting is too soft, it likely needs to be chilled. Place the bowl of frosting in the refrigerator for 15-30 minutes, then re-whip it. The cooler temperature will help the butter and cream cheese firm up, making the frosting more stable and easier to spread. Ensure your butter and cream cheese are softened but not melted, as this can affect consistency.
Nutrition Facts (Per Serving)
Calories: 480, Protein: 6g, Fat: 28g, Saturated Fat: 17g, Cholesterol: 105mg, Sodium: 210mg, Carbohydrates: 55g, Fiber: 1g, Sugars: 40g (Estimates based on typical ingredients and serving sizes.)
Allergy Information
Contains dairy (butter, milk, cream cheese), eggs, and gluten (wheat flour). For a gluten-free version, use a high-quality gluten-free all-purpose flour blend with xanthan gum. Individuals with nut allergies should ensure their vanilla extract is nut-free if that is a concern.

No comment