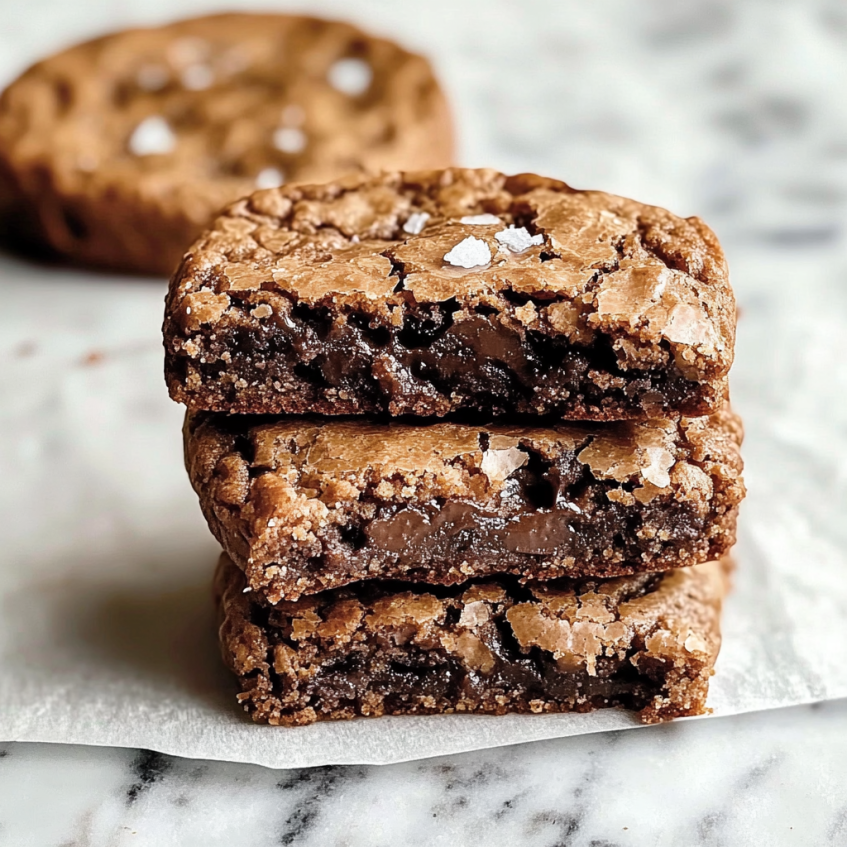
Ultimate Fudgy Chewy Brookies Recipe – Brownie-Cookie Hybrid Delight
Imagine biting into a dessert that combines the rich, fudgy decadence of brownies with the soft, chewy satisfaction of cookies—these brookies deliver exactly that! Perfect for chocolate lovers, this easy recipe creates irresistible treats with crackly tops, gooey centers, and deep cocoa flavor. Whether for parties, gifting, or a cozy night in, these brookies are a guaranteed crowd-pleaser.
Prep Time:
15 minutes
Cook Time:
45 minutes
Calories:
Approximately 210 kcal per brookie
ingredients
Dry Ingredients
¾ cup (95g) all-purpose flour, spooned and leveled
2 tbsp (10g) cocoa powder (Dutch-process recommended for richer flavor)
1 tsp baking powder
¼ tsp salt
½ cup (85g) dark or milk chocolate chips
Wet Ingredients
1¼ cups (225g) dark chocolate, finely chopped (70% cocoa or higher)
¼ cup (56g) unsalted butter (or salted butter, adjusting salt)
2 large eggs, room temperature
¾ cup (150g) granulated sugar
½ cup (90g) light brown sugar, packed
1 tsp vanilla extract
Directions
1. Prep & Melt Chocolate
Preheat oven to 320°F (160°C) for fan or 338°F (170°C) conventional. Line a baking tray with parchment paper.
In a heatproof bowl, combine chopped chocolate and butter. Melt over a simmering water bath (double boiler), stirring until smooth. Remove from heat and stir in vanilla.
2. Whip Eggs & Sugars
In a separate bowl, use an electric mixer to beat eggs, granulated sugar, and brown sugar on high speed for 3–5 minutes until pale, thick, and fluffy.
3. Combine Wet & Dry Mixtures
Gently fold the melted chocolate into the whipped eggs.
In another bowl, sift together flour, cocoa powder, baking powder, and salt. Fold into the wet mixture just until combined. Stir in chocolate chips.
4. Bake to Perfection
Drop tablespoon-sized portions of batter onto the tray, spacing 2 inches apart.
Bake for 12–14 minutes until tops are crackly but centers are still soft (they firm up while cooling).
5. Cool & Serve
Let cool on the tray for 10 minutes, then transfer to a wire rack. Sprinkle with sea salt if desired.
Frequently Asked Questions
1. Can I use milk chocolate instead of dark?
Yes, but the brookies will be sweeter and less intense. Dark chocolate (70% cocoa) is ideal for balance.
2. Why didn’t my brookies get a crackly top?
The whipped eggs and sugar create the crackly texture. Ensure you beat them until pale and thick (like ribbon stage).
3. Can I make these gluten-free?
Yes! Substitute 1:1 gluten-free flour and ensure cocoa powder is GF-certified.
4. How do I prevent over-spreading?
Chill the dough for 15 minutes before baking if too soft, and avoid overcrowding the tray.
5. Can I freeze brookies?
Absolutely! Freeze in an airtight container for up to 3 months. Thaw at room temperature or warm in the oven.

Tools You'll Need
Heatproof bowl (for melting chocolate)
Electric hand mixer or stand mixer
Baking tray + parchment paper
Spatula (for gentle folding)
Cookie scoop (for even portions)
Tips
Use room-temperature eggs for better volume when whipped.
Don’t overmix—fold dry ingredients just until combined to keep them tender.
Underbake slightly for fudgy centers (they set while cooling).
Sprinkle flaky sea salt post-baking for a sweet-salty contrast
Allergy Information
Contains: Gluten, dairy (butter, chocolate), eggs.
Gluten-free: Use GF flour blend.
Dairy-free: Substitute butter with coconut oil and use dairy-free chocolate.
Vegan: Replace eggs with flax eggs (1 tbsp flaxseed + 3 tbsp water per egg)

Conclusion
These brookies are a chocolate lover’s dream—simple to make yet impossibly indulgent. With their crackly tops, chewy edges, and molten centers, they’re perfect for sharing (or not!). Whether you’re baking for a special occasion or just because, this recipe promises bakery-quality results with minimal effort.
We’d love to see your creations! Tag your photos with #BrookieMagic and share how you made them your own. Happy baking!


No comment